# Getting Started
Getting Started with the Tensorleap platform: Installation and integrating an off-the-shelf model
From development to production, Tensorleap enables teams to debug models, optimize datasets, and monitor performance all in one integrated platform.
Cover image
Introduction to Tensorleap
Overview of the Tensorleap platform and it's capabilities
# Introduction to Tensorleap

#### **Deep Learning Debugging & Explainability Platform**
Tensorleap helps data scientists and ML engineers understand, diagnose, and improve deep learning systems at every stage of the lifecycle. By combining model observability, explainability, and dataset optimization, it provides clear visibility into model behavior and actionable insights to drive better performance.
#### **Model Behavior Analysis & Observability**
Gain deep visibility into how your models behave — in development and in production.
* **Failure & Edge Case Detection**\
Identify hidden weaknesses and unexplained performance drops to debug faster
* **Model Observability**\
Explain predictions and uncover the root causes behind model decisions
* **Scenario Testing**\
Validate robustness across edge cases before deploying to production
* **Real-Time Monitoring**\
Detect drift, regressions, and anomalies in live environments
#### **Dataset Curation & Optimization**
Build smarter datasets that directly improve model performance.
* **Labeling Prioritization**\
Focus labeling efforts on the most impactful samples
* **Dataset Pruning**\
Remove redundant, noisy, or low-value data to reduce cost and complexity
* **Domain Gap Analysis**\
Identify and close gaps between training data and real-world scenarios
* **Generalization Improvement**\
Detect over-reliance on specific features and improve model robustness
#### **Built to Fit Your Workflow**
Seamlessly integrate Tensorleap into your existing ML stack.
* Plug into training, evaluation, or production pipelines
* Supports PyTorch, TensorFlow, and custom models
* Deploy via cloud or on-premise infrastructure
# Core Concepts
This page describes the three core concepts that the Tensorleap Platform utilizes: the code, the model, and the mapping.
Tensorleap operates around two core building blocks:
* **Model** – the neural network you want to analyze
* **Code** – which contains two parts:
* **The integration code:** Custom Python functions that load your data and define how the data is processed (metrics, visualizations, etc.)
* **The Integration test**: Python inference script that defines how your integration code connects to your model. In addition, it is used to test your code before uploading it to the platform
Together, the model-code pair defines everything Tensorleap needs to run explainability, validation, and debugging pipelines.
This page introduces each concept, how it’s represented in your local environment, and how it appears inside the Tensorleap platform.
## Model
**What is a Model in Tensorleap?**
A model in Tensorleap is a trained neural network used for inference and analysis. It’s the computational backbone that transforms input data into predictions.
**How Is the Model Used in the Platform**
Once uploaded, the model is saved as a [version](/user-interface/project/versions). The platform uses the model during [evaluation](/user-interface/project/menu-bar/evaluate-a-model) processes, combining it with your [integration code](/tensorleap-integration/writing-integration-code) as defined in the [integration test](/user-interface/project/network/network-mapping/create-a-mapping-deprecated) to compute predictions, metrics, and insights.
Tensorleap supports models in `.onnx` or `.h5` format.
**How the Model Connects to the Other Components**
The model is powered by your [**integration script**](/tensorleap-integration/writing-integration-code), which defines how inputs and outputs are prepared. The [integration test](/user-interface/project/network/network-mapping/create-a-mapping-deprecated) then instructs the platform on how to connect these code interfaces to nodes in the platform's analysis graph, enabling rich visualization and debugging tools.
## Code
### The Integration Code
**What Is an Integration Code in Tensorleap?**
The [code integration](/tensorleap-integration/writing-integration-code) is a collection of Python scripts (or a complete repo) that defines how your dataset is processed and interpreted. It’s similar in purpose to a PyTorch `Dataset`: it loads and prepares data for your model, but also supports additional functionality like visualizations and custom metrics. Each component is defined using decorators such as [@tensorleap\_input\_encoder](/tensorleap-integration/python-api/code_loader/decorators/tensorleap_input_encoder) or [@tensorleap\_custom\_visualizer](/tensorleap-integration/python-api/code_loader/decorators/tensorleap_custom_visualizer).
**How the Code Integration Is Used in the Platform**
Your script is [uploaded](/tensorleap-integration/uploading-with-cli/cli-assets-upload#uploading-code-only) to the platform and executed during evaluation processes. Tensorleap calls the functions you've defined (e.g., [preprocess](/tensorleap-integration/writing-integration-code/preprocess-function), [encoders](/tensorleap-integration/writing-integration-code/input-encoder), [visualizers](/tensorleap-integration/writing-integration-code/visualizer-function)) to transform and interpret data throughout the analysis graph.
**How the Code Integration Connects to the Other Components**
The code integration acts as a bridge between your raw **dataset** and **model**. The **integration test** tells the platform how each function (e.g., your input encoder) connects to specific nodes in the platform’s graph, enabling explainability and evaluation.
### The Integration test
**What Is the integration test?**
The [integration test](/tensorleap-integration/integration-test) serves two purposes:\
(1) It enables a quick way to locally test whether your integration to Tensorleap works.
(2) It defines how the interfaces in your integration code connects to your model. For example, if you define an image visualizer using [@tensorleap\_custom\_visualizer](/tensorleap-integration/python-api/code_loader/decorators/tensorleap_custom_visualizer), the integration test tells the platform whether it should visualize the input, output, or ground truth.
**How the Integration test Is Used in the Platform**
When a process runs in the platform, the [integration test](/tensorleap-integration/integration-test) tells Tensorleap [how to connect](/user-interface/project/network/network-mapping/applying-a-mapping-deprecated) your code functions to the model’s input and output layers. This ensures that the platform executes your integration correctly and interprets its outputs.
**How the Integration test Connects to the Other Components**
The [Integration test](/tensorleap-integration/integration-test) links your [**integration script**](/tensorleap-integration/writing-integration-code) to your **model**, specifying how each [decorated](/tensorleap-integration/python-api/code_loader/decorators) function relates to the model’s computation. It makes your integration usable by the platform.
{% hint style="info" %}
For more info on the Integration test structure, syntax, and goals: see [this](/tensorleap-integration/integration-test) guide.
{% endhint %}
# Tensorleap Setup
How to setup the Tensorleap server, CLI, authentication and registering a user
This section includes instruction on how to get Tensorleap up & running on your local machine or server.
In order to have Tensorleap setup follow these steps:
* [Installation](/getting-started/tensorleap-setup/installation)
* [Register a User](/getting-started/tensorleap-setup/registering-a-user)
* [Manage License](/getting-started/tensorleap-setup/manage-license)
* [CLI Authentication](/getting-started/tensorleap-setup/cli-authentication)
# Installation
Here we will describe how to install the Tensorleap on-prem server
{% hint style="info" %}
This page covers an on-prem or local server installation. If instead you want to setup a new ec2 server that is dedicated to Tensorleap you can check [this guide](https://github.com/tensorleap/installation-guid/tree/bf8e440bdda3d55c832c52a5ac7c317f4a4118bb/environments/ec2-gpu).
{% endhint %}
The Tensorleap setup is usually composed from two parts:
* Server - where all of the workloads are computed
* Client - used by users to upload models and code to the server
### Where should you install the server and client
* The Tensorleap server should be installed on a machine that:
* is accessible to all Tensorleap users.
* [Sufficient resources](#tensorleap-requirements)
* have access the datasets you would like to use with Tensorleap
* Be able to expose port 4589 to any client station that would like to access Tensorleap. In cases where the server and client are the same station (i.e. a local installation) no port-forwarding is needed.
* Ubuntu or mac station (**Installing the Server on a windows machine is currently not supported**)
* Tensorleap clients should be installed on each Tensorleap local station used by the user to develop the models & write the code that trains and checks the models.
* Station could be ubuntu/Mac/Windows
## Installing the Tensorleap Server
### Tensorleap Requirements
For installing Tensorleap we recommend a server with the following requirements:
| Resource | Minimal | Recommended |
| -------- | ------- | ----------- |
| CPU | 4 | 16 |
| RAM | 64 | 128 |
| Storage | 200GB | 1TB |
| GPU | - | 1 |
{% hint style="info" %}
For an installation that should support multiple concurrent users workloads we recommend to increase resources further.
{% endhint %}
#### Drivers and packages requirements
We expect **NVIDIA drivers** and **nvidia-docker2** to be installed in the server prior to Tensorleap installation. It's usually recommended to keep your current setup if it's already working for model training and inferring.\
\
In case you're missing some basic GPU related dependencies - you can follow [this guide](https://github.com/tensorleap/installation-guid/blob/master/environments/local-gpu-ubuntu/INSTALL.md) for a complete setup of the requirements on an ubuntu based server.
### Tensorleap CLI installation
in the order to install the Tensorleap you should do the following:
{% tabs %}
{% tab title="Linux & Mac" %}
In order to install the Tensorleap CLI - you should run the following command in your shell:
```
curl -s https://raw.githubusercontent.com/tensorleap/leap-cli/master/install.sh | bash
```
To verify that this was correctly verify you get the CLI help menu when running `leap -h` from your terminal.
{% endtab %}
{% tab title="Microsoft" %}
In order to install the CLI on a windows server, go to our release page:\
And download our LeapCLIInstaller exe. Running this installer should install the CLI in your computer.\
\
To verify this was installed well - go to CMD or powershell and run `leap -h`
{% endtab %}
{% endtabs %}
### Tensorleap Server
{% hint style="info" %}
This installation requires internet connectivity. In case you station is air-gapped, please contact the Tensorleap Team for support.
{% endhint %}
Once you have the CLI, the tensorleap server could be installed by running:
`leap server install`
The installation process would interactively prompt you to select the following:
* Which GPUs should the system access
* What would be the datasets volumes (i.e. the places that hold all of the datasets Tensorleap should have access to)
It would then pull required assets and install the Tensorleap server on the machine.
Once the Installation is done you should see the following message:
> Tensorleap installed on local k3d cluster
## Tensorleap client
For each user, we recommend installing [the CLI](#tensorleap-cli-installation) (without installing the server) on the local machine on which he browses the web and writes code. This CLI would serve as a client that allow the user to upload models and codebases to the platform.
{% hint style="info" %}
In cases where the server is installed on a central location, port 4589 should be forwarded to the local station in order to communicate with the server.
{% endhint %}
### Accessing the Tensorleap Platform
To access the Tensorleap platform from your local machine, follow these steps:
1. **Local Installation:**
* If installed locally, access the platform directly via:\
`http://localhost:4589/`
2. **Server Access:**
* **Port-Forwarding:**
* Set up port-forwarding between your local machine and the server to expose port 4589. Access via:\
`http://localhost:4589/`
* **DNS Setup:**
* Configure a DNS to assign an IP address to the server, enabling direct access:\
`http://SERVER-IP:4589/`
* This method bypasses the need for port-forwarding.
# Registering a User
This page would walk you through the registration of a user to Tensorleap
{% hint style="info" %}
By default, The first user register is granted admin privileges.
{% endhint %}
In order to Register a new user you would need to have already [installed Tensorleap](/getting-started/tensorleap-setup/installation).
1. [Open the Tensorleap platform via the browser](/getting-started/tensorleap-setup/installation#accessing-tensorleap).
2. Click "Register"
The Tensorleap Login Page
3. Fill in all of the details in the application and click "Register"
Filling in your details
4. Click "Contirnue", accept the terms of use and Approve.
Finalizing the registration
5. Click "Get Started" to access the Tensorleap Platform
Finalizing the registration
# Manage License
This page describes how to extend the Tensorleap trial
### The Tensorleap Extension Code
The Tensorleap platform shows the number of remaining days of usage for each registered user. After registration, a user needs to enter an **extension token** that would unlock the platform for usage. To get this token, contact the Tensorleap team.
### Applying the Extension Code
In order to apply an extension token:
1. Login to the platform
2. Click the Top-right settings button
3. Click "Manage License"
4. Click "Insert Time Extension Code"
4. Enter Token and click "Apply Code"
Applying a token extension code
# CLI authentication
This page covers the steps needed to authenticate the CLI with your server
In order to allow the [CLI installed on your local station](/getting-started/tensorleap-setup/installation#tensorleap-client) to access your local server you need to supply the CLI with an authentication token.
We have several ways to obtain the authentication token:
{% tabs %}
{% tab title="CLI" %}
To authenticate via the CLI:
1. Run `leap auth login`
2. When asked for the API URL enter the url you use to access the Tensorleap Platform (hit Enter to chose default)
3. Press Enter for the rest of the interactive questions. This should open your browser
4. The browser should ask you to "Authorize" the CLI to access your server. Click it to complete the authentication.
{% hint style="info" %}
If you are not currently logged in to the system, you would be required to login after opening the browser and before the authentication screen shows
{% endhint %}
{% endtab %}
{% tab title="UI" %}
To authenticate via the UI:
1. Go into the Tensorleap app via the browser (default URL: )
2. Login with the credentials you've entered [after registering](/getting-started/tensorleap-setup/registering-a-user).
3. Open up the menu from the top left corner and choose "CLI Token"
{% hint style="info" %}
Creating a CLI token disable any previous ones. Therefore, you might be prompted to approve the creation of the a token.
{% endhint %}
4. Copy the CLI command that appears in the UI and paste into your terminal.
{% endtab %}
{% endtabs %}
# Post-Installation Sanity Check
Once you have installed Tensorleap on your local machine or server, you can perform a quick sanity check to ensure the system is fully operational. This guide will walk you through installing the Tensorleap CLI on your machine, authenticating your machine with a secure token, and deploying a sample MNIST project to verify your setup. Please note that the initial model evaluation process may take up to 20 minutes to complete.
### Performing the Sanity
1. Install the Leap CLI on your machine (you write code on) by running the following command:
```
curl -s https://raw.githubusercontent.com/tensorleap/leap-cli/master/install.sh | bash
```
2. Clone the sample mnist project by running the following command:
```
git clone https://github.com/Tensorleap-hub/mnist.git
cd mnist
```
3. Authenticate the CLI:
Copy your API token from the Tensorleap UI by navigating to Settings and selecting CLI Token.
Click on "YES, DISABLE MY OLD TOKEN AND GENERATE A NEW ONE"
Click on the copy icon
Run the following command and replace the \[Token] with the token ID you've copied
```
leap auth login http://localhost:4589 -k [Token]
```
4. Within the mnist directory run the following command:
```
leap push
```
While being prompt in the process of the leap push run in the cli:
* Create a new project
* Provide a name for the model - For Example modelmnist
* Select the .h5 model
* Reply with a Yes to the Evaluate Model
* Set the batch to 256
Th evaluate process may take up to 20 minutes
# QuickStart
This section details the Tensorleap quickstart options
### Prerequisites
The following section aims to guide towards a quick loading of a model and dataset into the platform.\
It assumes that the previous steps were done:
1. [Tensorleap installation](/getting-started/tensorleap-setup/installation)
2. [User registration](/getting-started/tensorleap-setup/registering-a-user)
3. [CLI authentication](/getting-started/tensorleap-setup/cli-authentication)
### Quickstart Alternatives
There are 2 main ways to quickly add a model & dataset into the platform:
* [Leap Hub integration](/getting-started/quickstart/quickstart-using-leap-hub)
* [Gallery integration](/getting-started/quickstart/quickstart-using-gallery)
#### How to choose a Quickstart option:
* (recommended) If you aim to start using Tensorleap on your own data & you want to have a ready-made example of an off-the-shelf integration for reference before you start with the [Leap Hub integration](/getting-started/quickstart/quickstart-using-leap-hub)
* If you're just exploring the platform, and want quick access to a data and a model start with the [Gallery integration](/getting-started/quickstart/quickstart-using-gallery)
# Quickstart using Leap Hub
How to Quickly load an off-the-shelf model & dataset using Leap Hub
{% hint style="success" %}
Please Ensure to fill all [prerequisites](/getting-started/quickstart) before going through the Leap Hub integration.
{% endhint %}
{% hint style="info" %}
Most of the off-the-shelf integration we have assume internet access or pre-existing dataset. We recommend going over the README of each repo to understand its requirements
{% endhint %}
In this section we will go over the steps needed to push an existing hub project into your local tensorleap installation. At the end of this section you would have a model and data integrated in the Tensorleap platform.
### Choosing a hub project
In order to chose a hub model, we recommend visiting our [github space](https://github.com/Tensorleap-hub) and reviewing the different repositories. Each repository is a Tensorleap integration for a given model and dataset.
* If it's your first time using Tensorleap, we recommend using the [MNIST](https://github.com/Tensorleap-hub/mnist) use-case. It does not require to download any datasets, and thus enables a straightforward integration.
* Otherwise, we recommend browsing the hub for a repo that captures a similar data and model to your organization's use-case.
{% hint style="info" %}
Nest sections will assume MNIST was chosen for the integration. If you chose any other project, some other steps like downloading a dataset or a model might be needed. Please Follow the relevant README to fill in the missing details
{% endhint %}
### Setting up the repo
1. Clone the repo into the computer on which the CLI was installed.
2. Create a virtual environment for the repo and install the Repo's requirements.
{% hint style="info" %}
Our repo usually have a pyproject.toml [Poetry](https://python-poetry.org/) requirements file. This file details the expected python version and the expected dependencies. We recommend a combination of [pyenv](https://www.google.com/search?q=pyenv\&oq=pyenv\&gs_lcrp=EgZjaHJvbWUyCQgAEEUYORiABDIHCAEQABiABDIHCAIQABiABDIHCAMQABiABDIHCAQQABiABDIHCAUQABiABDIHCAYQABiABDIHCAcQABiABDIHCAgQABiABDIHCAkQABiABNIBCDEyNDlqMGo3qAIAsAIA\&sourceid=chrome\&ie=UTF-8) to set the local python interpreter, and Poetry to manage the dependencies.
{% endhint %}
### Integration Test
From within the repo, run `leap_integration.py` and ensure a successful termination of the script.
{% hint style="warning" %}
This file serves as a local integration test the checks the validity of the Tensorleap integration, dataset structure, and dataloader. Any issues in running this script should be resolved before moving on to the next steps to ensure a smooth integration with the dataset and model.
{% endhint %}
### Integrating the codebase and model to the platform
> To upload your model and code, run the push command from the repository root:
```
leap push
```
You would then be prompted to provide:
* Project name (choose create new)
* Choose model path
* Choose model name
{% hint style="info" %}
The CLI would now upload the model and the codebase into the server. The first time running this after installing or upgrading Tensorleap might take up to 10 minutes to complete due to initial setup. Next uploads would finalize much quicker
{% endhint %}
A valid upload show the following logs in the terminal:
```
...
INFO Code parsed successfully
...
INFO Successfully imported model
```
Once these appear within the terminal, the model and dataset are integrated into the platform.
### Data validation and Evaluation in the platform
To review your project and run the data through the uploaded model:
1. Login into your [Tensorleap app](http://localhost:4589/)
2. Click on the project you've just uploaded
Selecting a Project
3. Click on the Evaluate button to open the Evaluation panel. Click Evaluate again to start the evaluation process and infer your data using the uploaded model.
Evaluating the data
3. Wait for the evaluation process to be completed. To follow on the progress of the evaluation you can open the "Runs and Processes" panel.
The Runs and Processes Tab
Once evaluation is completed the integration is finished. We can now go over the Dashboard tab and start an analysis of the model and the dataset:
Switching to the Dasboard Tab
# Quickstart Using Gallery
How to import one of our demo projects directly from the platform
Please Ensure to fill all [prerequisites](/getting-started/quickstart) before going through the Leap Gallery.
In order to reach the Tensorleap gallery, open the [Tensorleap app](/getting-started/tensorleap-setup/installation#accessing-the-tensorleap-platform) via the browser, and login using the credentials you've supplied when [registering](/getting-started/tensorleap-setup/registering-a-user).
1. The right hand side panel contains a list of projects, that could be imported into Tensorleap by clicking the "Import" button:
2. A pop-up should open - click "Import" to start the import process
3. A new "Import Project" run should be added to your Runs & Processes panel:
Import Project run started
4. The project might take some time to be imported, depending on the size of the project and network speed. Once project is imported, it is accessible via the Projects tab:
{% hint style="info" %}
Most of the Demo Projects have an in-depth analysis blog that highlights insights and important flows within the system. You can find these at .
{% endhint %}
# Quickstart using CLI
## Prerequisites
Prior steps are logging in, creating a project and a dataset instance.
More info about these steps is described at the [**Setup**](broken://pages/ERkSgwrMnaeqEZ15Wu04) page.
### Installing Leap CLI
Install `leapcli` using the following command:
```bash
pip install leapcli
```
Once installed successfully, the `leap` command shall be available.
### Leap Init
Once the `leap` CLI is installed, you can initialize your project to be synced with the Tensorleap platform.
In the target project path, run the following command to initialize Tensorleap within the project:
```bash
leap init PROJECT_NAME DATASET_NAME
```
Replace the arguments with the corresponding value:
All the parameters are stored at the `.tensorleap/config.toml` file and could be changed if needed.
### Leap Login
In order to access the platform, we must run the `leap login` command within the initialized project path, as such:
```
leap login [API_ID] [API_KEY] [ORIGIN]
```
The `API_ID` , `API_KEY` and the `ORIGIN`, along with the full command, can easily be found by clicking the button within the [**Resources Management**](/user-interface/resources-management) view.
### Dataset Integration
For Tensorleap to read the data and fetch it to the model for training or evaluation, we must provide a [**Dataset Script**](/tensorleap-integration/writing-integration-code#dataset-script). This script defines the **preprocessing** function**, input/ground\_truth** encoders and **metadata** functions.
The script should be set at the `.tensorleap/dataset.py` file.
{% hint style="info" %}
Important to note that this script should be contained and **not** use external project dependencies!
{% endhint %}
This script will later be synced with the [**Dataset Instance**](/tensorleap-integration/writing-integration-code#dataset-instance) set by the `DATASET_NAME` property above.
More info can be found at the Dataset Script page. A sample script can be found at the [MNIST Guide](/guides/full-guides/mnist-guide).
Additional examples can be found at the [**Tensorleap Examples**](https://github.com/tensorleap/tensorleap/) repository.
### Model Integration
The model integration script is located at `.tensorleap/model.py`, an example script below:
{% tabs %}
{% tab title="Tensorflow" %}
```python
from pathlib import Path
from myproject.model import build_model # import from the parent project
def leap_save_model(target_file_path: Path):
# Load your model
model = build_model()
# Save it to the path supplied as an arugment (has a .h5 suffix)
model.save(target_file_path)
```
{% endtab %}
{% tab title="PyTorch" %}
Coming Soon
{% endtab %}
{% endtabs %}
The `leap_save_model` is automatically called by the CLI when pushing a model into the Tensorleap platform. Its purpose is to prepare and store the model in the provided `target_file_path`.
More info can be found at the Dataset Script page. A sample script can be found at the [MNIST Guide](/guides/full-guides/mnist-guide).
Additional examples can be found at the [**Tensorleap Examples**](https://github.com/tensorleap/tensorleap/) repository.
### Validation
You can validate the **dataset** and **model** scripts locally by using the following command:
```
leap check --all
```
This command will validate the scripts together with its synchronization with the Tensorleap platform.
### Synchronization
Once everything is validated, you can push the **dataset script** and **model** to the Tensorleap platform for further evaluation/training/analysis.
To push the **dataset script**, use the following command from the project path:
```bash
leap push --dataset
```
To push the model to the project, use the following command:
```bash
leap push --model
```
You can also set the `branch-name`, `description` and `model-name` as such:
```
leap push --model [--branch-name= [--description=]
[--model-name=]
```
### What's Next?
You can now log in into the Tensorleap Platform within the UI, and find the imported model within the project, and the dataset within the [**Resources Management**](/user-interface/resources-management) view.
You can follow the next steps to prepare the model for analysis:
* Open up the current project (defined by the `PROJECT_NAME` above).\
More info at [**Open a Project**](/user-interface/project#open-a-project)**.**
* Find the imported model on the Versions view, hover your cursor over the view and **click** on the right to **Open Commit**.
* Back on the **Network** view, set the [**Dataset** **Block**](/user-interface/project/network/network-mapping/create-a-mapping-deprecated/input-node#setup) to point to the `DATASET_NAME` [**Dataset Instance**](broken://pages/CBUAxbBBCSLCooJBRheA), and connect it to the first layer.
* Add the **ground truth**, **loss** and **optimizer** blocks, and connect them to the end of the network.\
More info at [**Dataset Block Setup**](/user-interface/project/network/network-mapping/create-a-mapping-deprecated/input-node#setup) and [**Loss and Optimizer**](/user-interface/project/network/network-mapping/create-a-mapping-deprecated/loss-node)**.**
* Save the version model by clicking the button and set the `Revision Name` . This adds the new version to the [**Versions**](/user-interface/project/versions) view. More info at [**Save a Version**](/user-interface/project/versions#save-a-version).
* The model is ready for **training** or **evaluation**:
***Already trained model*** - click from the top bar to inference the data and collect metrics.\
***Re-train / train from scratch in the Tensorleap platform*** - click from the top bar to train the model.\
More info at [Evaluate a Model](/user-interface/project/menu-bar/evaluate-a-model).
* After the process is done, the model is ready for analysis. More info at [Sample Analysis](/user-interface/dashboards/dashlets/sample-analysis).
# Tensorleap Integration
Integrating your own model and dataset to the platform and reviewing the development proces
This page outlines the different elements of the tensorleap integration and reviews the integration flow and development cycle within the platform.
### Prerequisites
* [Access to Tensorleap](/getting-started/tensorleap-setup/installation#accessing-the-tensorleap-platform)
* Leap CLI is [installed](/getting-started/tensorleap-setup/installation#tensorleap-cli-installation) and [authenticated](/getting-started/tensorleap-setup/cli-authentication)
* .onnx or .h5 model
* [A valid code integration](/tensorleap-integration/writing-integration-code) that instructs Tensorleap on how to load the dataset and parse and visualize different elements.
* Tensoleap [configuration yamls](/tensorleap-integration/configurations-files):
* A [leap.yaml](/tensorleap-integration/leap.yaml) file that contains the setup of your integration.
* (optionally) requirements.txt file if non-default requirements are needed
* An [integration test](/tensorleap-integration/integration-test) script that instructs Tensorleap on what code needs to be run during model analysis (loss, metrics, visualizers & metadata)
### Expected Folder Structure
The expected file structure for a Tensorleap code integration is the following:
```
my_leap_project/
├── ...
├── leap_binder.py
├── leap.yaml
├── integration_test.py
```
Here, leap\_binder.py contains the [integration script](/tensorleap-integration/writing-integration-code).
### The Tensorleap integration flow
1. Start from an existing repo from our [Leap Hub](/getting-started/quickstart/quickstart-using-leap-hub) or use the CLI to add template Tensorleap integration files into your existing repository.
2. Make sure your data is accessible by the [Tensorleap Server](/getting-started/tensorleap-setup/installation#tensorleap-server).
3. Create a basic [Integration script](/tensorleap-integration/writing-integration-code). This can include an [input\_encoder](/tensorleap-integration/writing-integration-code/input-encoder), [GT encoder](/tensorleap-integration/writing-integration-code/ground-truth-encoder), [loss](/tensorleap-integration/writing-integration-code/custom-loss-function), and a basic [visualizer](/tensorleap-integration/writing-integration-code/visualizer-function) for the input, prediction and GT.
4. Verify your integration validity locally using an [Integration test](/tensorleap-integration/integration-test).
5. Use the [CLI](/tensorleap-integration/uploading-with-cli/cli-assets-upload) to push the code and models to the platform
6. Use the Platform to [Evaluate](/user-interface/project/menu-bar/evaluate-a-model) and process the data using your model.
{% hint style="info" %}
After the integration step the model and dataset can be analyzed using the platform. Usually, during the analysis phase the insights and analysis being done points to a missing metadata, better visualization method, or a new metric. These elements should then be added to the integration script and then steps 4-7 are repeated.
{% endhint %}
# Writing Integration Code
Integration Script - How to integrate your dataset and dataloaders with Tensorleap
The way to integrate a dataset into Tensorleap is by providing an [**Integration** **Script**](#integration-script) that instructs the platform on how to load, parse and visualize your data when **evaluating** and **analyzing** a model.
## Integration Script
The Integration Script has the following structure:
* [**Preprocess Function**](/tensorleap-integration/writing-integration-code/preprocess-function) - prepares the data state for fetching into the neural network. Similar to a Pytorch Dataset.
* [**Input Encoders**](/tensorleap-integration/writing-integration-code/input-encoder) - read and prepare each input for your neural networks. Similar to a \_\_getitem\_\_ that fetches the input.
* [**Ground Truth Encoders**](/tensorleap-integration/writing-integration-code/ground-truth-encoder) - read and prepare each Ground Truth. Similar to a \_\_getitem\_\_ that fetches the ground truth.
* [**Metadata Functions**](/tensorleap-integration/writing-integration-code/metadata-function) - add extra data to each sample for future analysis.
* [**Visualizer Functions**](/tensorleap-integration/writing-integration-code/visualizer-function) *(optional)* - An interface that instructs the Tensorleap platform on how to visualize your inputs and outputs.
* [**Decorators**](/tensorleap-integration/python-api/code_loader/decorators) - bind the functions above for Tensorleap to register the dataset structure.
### Architecture
The [**Preprocess Function**](/tensorleap-integration/writing-integration-code/preprocess-function) runs once, and returns a list of data objects of type **PreprocessResponse** that correspond to the *training*, *validation*, *test, and unlabelled* dataset slices.
The returned [**PreprocessResponse**](/tensorleap-integration/python-api/code_loader/datasetclasses/preprocessresponse) object is then passed to the [**Input Encoders**](/tensorleap-integration/writing-integration-code/input-encoder), [**Ground Truth Encoders**](/tensorleap-integration/writing-integration-code/ground-truth-encoder) and [**Metadata Functions**](/tensorleap-integration/writing-integration-code/metadata-function), whose function is to read and prepare the data for a **single** sample with index `idx` passed as an argument.
{% hint style="info" %}
When processing the unlabelled set, the Ground Truth encoders and every metric or loss they're connected to is not called - since Ground Truth by definition is absent.
{% endhint %}
Finally, the [**Input Encoders**](/tensorleap-integration/writing-integration-code/input-encoder), [**Ground Truth Encoders**](/tensorleap-integration/writing-integration-code/ground-truth-encoder)**,** must be declared using the [Tensorleap decorators](/tensorleap-integration/python-api/code_loader/decorators).
The [**Metadata Functions**](/tensorleap-integration/writing-integration-code/metadata-function)**,** [**Visualizer Functions**](/tensorleap-integration/writing-integration-code/visualizer-function)**,** [**Metric Functions**](/tensorleap-integration/writing-integration-code/custom-metrics) are not mandatory, but are recommended to ensure a complete analysis using the Platform
The script can be integrated into the Platform using the [CLI](/tensorleap-integration/uploading-with-cli/cli-assets-upload).
### Examples
#### Basic Usage
```python
from typing import List, Union
# Tensorleap imports
from code_loader.contract.datasetclasses import PreprocessResponse
from code_loader.contract.visualizer_classes import LeapHorizontalBar
from code_loader.inner_leap_binder.leapbinder_decorators import *
from code_loader.contract.enums import DataStateType
# Preprocess Function:
@tensorleap_preprocess()
def preprocess_func() -> List[PreprocessResponse]:
...
train = PreprocessResponse(sample_ids=list(train_X.index), data=train_df, state=DataStateType.training)
val = PreprocessResponse(sample_ids=list(val_X.index), data=val_df, state=DataStateType.validation)
test = PreprocessResponse(sample_ids=list(test_X.index), data=test_df, state=DataStateType.test)
return [train, val, test]
# Input Encoder(s):
@tensorleap_input_encoder('image')
def input_encoder(idx: int, preprocess: PreprocessResponse) -> np.ndarray:
return preprocess.data.iloc[idx]['samples'].astype('float32')
# Ground Truth Encoder(s):
@tensorleap_gt_encoder('classes')
def gt_encoder(idx: int, preprocess: PreprocessResponse) -> np.ndarray:
return preprocess.data.iloc[idx]['ground_truth'].astype('float32')
# Metadata Function(s):
@tensorleap_metadata(name='label')
def metadata_label(idx: int, preprocess: PreprocessResponse) -> Union[int, float, str, bool]:
return preprocess.data.iloc[idx]['class_name']
LABELS = ['cat', 'dog', 'tiger', 'cow', 'goat', 'zebra', 'horse']
@tensorleap_custom_visualizer(name="pet_visualizer", visualizer_type=LeapDataType.HorizontalBar)
def is_pet_visualizer(animal_prediction: np.ndarray) -> LeapHorizontalBar:
np_labels = np.array(LABELS)
pet_confidence = animal_prediction[np_labels == 'cat'][0] + animal_prediction[np_labels == 'dog'][0]
body = np.array([pet_confidence, 1-pet_confidence])
return LeapHorizontalBar(body=body, labels=['pet', 'not-pet'])
```
### Retrieve the Secret
Tensorleap allows you to store sensitive information as a **Secret** in a secure location called [**Secret Manager**](/user-interface/secrets-management).
The **Integration Script** has access to the **Secret** [set for this Codebase](/tensorleap-integration/uploading-with-cli/cli-assets-upload#uploading-code-only). The secret is stored at the `AUTH_SECRET` environment variable, and can be accessed simply by using:
```python
import os
auth_secret_string = os.environ['AUTH_SECRET']
```
### Persistent Storage
Persistent storage is data storage that persists across different instances and reboots of job processes. In some cases there is a need to cache data. For example, after preprocessing or for very large files.
#### Cloud Platform
Tensorleap's cloud persistent storage can be accessed via writing and reading to the `/nfs/` path:
```python
persistent_dir = '/nfs/'
```
{% hint style="warning" %}
NOTE: Mounted storage in the cloud is set up only to serve as a cache, and it is regularly cleaned.
{% endhint %}
#### On Premise
In case you are running an on-premise solution, you can access your chosen mounted storage.
### Code Integration Video Tutorial
{% embed url="" %}
# Preprocess Function
The `preprocessing_func` *(custom name)* is a **preprocess** function that is called just once before the training/evaluating process. It prepares the data for later use in **input encoders**, **output encoders**, and **metadata** functions.
```python
from code_loader.contract.datasetclasses import PreprocessResponse
from code_loader.inner_leap_binder.leapbinder_decorators import tensorleap_preprocess
@tensorleap_preprocess()
def preprocessing_func() -> List[PreprocessResponse]:
...
train = PreprocessResponse(sample_ids=list(train_df.index), data=train_df, state=DataStateType.training)
val = PreprocessResponse(sample_ids=list(val_df.index), data=val_df, state=DataStateType.validation)
test = PreprocessResponse(sample_ids=list(test_df.index), data=test_df, state=DataStateType.test)
unlabeled = PreprocessResponse(sample_ids=list(unlabeled_df.index), data=unlabeled_df, state=DataStateType.unlabeled)
return [train, val, test, unlabeled]
```
The [@tensorleap\_preprocess](/tensorleap-integration/python-api/code_loader/decorators/tensorleap_preprocess) decorator registers the preprocess function into the Tensorleap integration.
This function returns a `List` of [**`PreprocessResponse`**](/tensorleap-integration/python-api/code_loader/datasetclasses/preprocessresponse) objects. The elements on that list correspond to the `train` , `validation,` `test` and `unlabeled` data slices.
For a successful Tensorleap integration, supplying a train and validation set is mandatory, the rest is optional. Refer to the [**Code Integration**](/tensorleap-integration/writing-integration-code) section for complete usage instructions.
{% hint style="warning" %}
It is mandatory to return at least a training and a validation set.
{% endhint %}
# Input Encoder
The input encoder generates a sample with index `idx` from the [PreprocessResponse](/tensorleap-integration/python-api/code_loader/datasetclasses/preprocessresponse) object. This sample will later be fetched as input by the network. The function is called for every evaluated sample. There should be a separate encoder for each input.
The [@tensorleap\_input\_encoder](/tensorleap-integration/python-api/code_loader/decorators/tensorleap_input_encoder) decorator registers each input encoder into the Tensorleap integration.
```python
from code_loader.contract.datasetclasses import PreprocessResponse
from code_loader.inner_leap_binder.leapbinder_decorators import tensorleap_input_encoder
@tensorleap_input_encoder(name='image', channel_dim=-1)
def input_encoder(idx: int, preprocess: PreprocessResponse) -> np.ndarray:
return preprocess.data.iloc[idx]['samples'].astype('float32')
```
Usage within the full script can be found at the [**Dataset Script**](/tensorleap-integration/writing-integration-code#dataset-script).
# Ground Truth Encoder
The ground truth encoder generates a ground truth value correlated with a sample, with index `idx`, from the `preprocess`. It will later be used as the ground truth for the **loss** function. This function is called for each evaluated sample.
For example:
```python
from code_loader.contract.datasetclasses import PreprocessResponse
from code_loader.inner_leap_binder.leapbinder_decorators import tensorleap_gt_encoder
@tensorleap_gt_encoder(name='classes')
def gt_encoder(idx: int, preprocess: Union[PreprocessResponse, list]) -> np.ndarray:
return preprocess.data.iloc[idx]['ground_truth'].astype('float32')
```
The [@tensorleap\_gt\_encoder](/tensorleap-integration/python-api/code_loader/decorators/tensorleap_gt_encoder) decorator registers each gt encoder into the Tensorleap integration.
Usage within the full script can be found at the [**Dataset Script**](/tensorleap-integration/writing-integration-code#dataset-script).
# Metadata Function
For each sample, Tensorleap allows additional data to be added for future analysis. Each defined piece of data is wrapped in a **metadata function**.
```python
from code_loader.contract.datasetclasses import PreprocessResponse
from code_loader.inner_leap_binder.leapbinder_decorators import tensorleap_metadata
import numpy as np
...
@tensorleap_metadata(name='metadata_label_description', metadata_type={"label":DatasetMetadataType.int, "is_circle": DatasetMetadataType.boolean})
def metadata_label(idx: int, preprocess: PreprocessResponse) -> Dict[str, Union[int, bool]]:
return {
'label': int_metadata_creator(preprocess, idx),
'is_circle': bool_metadata_creator(preprocess, idx),
}
```
The [@tensorleap\_metadata](/tensorleap-integration/python-api/code_loader/decorators/tensorleap_metadata) decorator registers each metadata function into the Tensorleap integration.
You can add additional custom metadata that will later be available for each sample to help with analysis. This function is called for each evaluated sample.
These functions should return either:
* An int/bool/float/str property per sample
* A dictionary with multiple attributes that maps str keys to int/bool/float/str properties
{% hint style="warning" %}
When using the dictionary syntax, the supplied dictionary must be flat (i.e. a mapping of a str to bool/float/str/int). Non-flat dictionaries will result in integration errors.
{% endhint %}
Usage within the full script can be found at the [**Integration Script**](/tensorleap-integration/writing-integration-code#dataset-script).
# Visualizer Function
Tensorleap enables visualizations of data within the model graph by connecting a [**Visualizer**](/user-interface/project/network/network-mapping/create-a-mapping-deprecated/visualizer-node) block to a node's output tensor. This allows you to visualize the model's input, prediction, ground truth, or any internal tensor.
By default, the following naive Visualizers are provided (in the UI):
* Image
* Graph
* Numeric
* HorizontalBar
* Text
* ImageMask
* TextMask
These naive visualizers shows the data as-is, but in many cases, there is a need to write our own **Visualizer Function** to make sense of the data. For example:
* Converting *tokenized* data to text *words*
* Custom post-processing
* Draw landmarks on images
* Apply transforms
Example of a visualizer function:
```python
import numpy as np
from code_loader.contract.visualizer_classes import LeapText
from code_loader.contract.enums import LeapDataType
...
@tensorleap_custom_visualizer(name="input_visualizer", visualizer_type=LeapDataType.Text)
def input_visualizer(input_ids: np.ndarray) -> LeapText:
input_ids = np.squeeze(input_ids)
text = decode_token_ids(input_ids)
return LeapText(text)
```
The [@tensorleap\_custom\_visualizer](/tensorleap-integration/python-api/code_loader/decorators/tensorleap_custom_visualizer)decorator registers each visualizer into the Tensorleap integration.
These functions should return one of the following types defined in [**visualizer\_classes**](/tensorleap-integration/python-api/code_loader/visualizer_classes).
The [**visualizer\_classes**](/tensorleap-integration/python-api/code_loader/visualizer_classes) pages contain additional, visualizer specific, examples. Moreover, full script usage can be found at [**Integration Script**](/tensorleap-integration/writing-integration-code#dataset-script).
# Custom Metrics
You can write your own custom metrics to be calculated and stored for later use within the [**Metrics Dashboard**](/user-interface/dashboards/dashlets/metrics-dashboard).
Tensorleap stores metrics and metadata for every sample. This allows the user to investigate certain populations within the dataset. This also means that the **custom metric** is calculated per prediction on a **single** sample.
This function can get multiple `np.ndarray` arrays as inputs which will be exposed in the **Metric** UI connections. These are of shape *`(batch, dim-1,...,dim-n)`*. \
The function returns a `np.ndarray` that contains a batched metric result.
Example of usage:
```python
@tensorleap_custom_metric(name='metrics',
direction=MetricDirection.Downward,
compute_insights=None)
def custom_metric_distances(
y_true: npt.NDArray[np.float32],
y_pred: npt.NDArray[np.float32]
) -> dict[str, npt.NDArray[np.float32]]:
diff = y_true - y_pred
axis = tuple(range(1, diff.ndim))
return {
"mean_difference": np.mean(diff, axis=axis),
"mean_absolute_difference": np.mean(np.abs(diff), axis=axis)
}
```
The [@tensorleap\_custom\_metric](/tensorleap-integration/python-api/code_loader/decorators/tensorleap_custom_metric) decorator registers each metric collection into the Tensorleap integration, and can be added to the model analysis using the [integration test](/tensorleap-integration/integration-test).
# Custom Loss Function
Tensorleap enables you to write custom loss functions to be used within the platform. Once you define your custom loss function, and add it using [@tensorleap\_custom\_loss](/tensorleap-integration/python-api/code_loader/decorators/tensorleap_custom_loss)**,** you can use it within the platform by adding a **CustomLoss** node.
This function can get multiple np.ndarray arrays which will be exposed in the **CustomLoss** UI connections. These are of shape *(batch, dim-1,...,dim-n)*. \
The function returns a np.ndarray that contains a batch loss.
Example of a custom loss function:
from code_loader.contract.datasetclasses import PreprocessResponse
from code_loader.inner_leap_binder.leapbinder_decorators import tensorleap_custom_loss
import numpy as np
...

@tensorleap_custom_loss(name='weighted_ce')
def weighted_categorical_crossentropy(y_true :np.ndarray, y_pred: np.ndarray) -> np.ndarray:
    # Normalize predictions so each sample's probabilities sum to 1
    y_pred = y_pred / np.sum(y_pred, axis=-1, keepdims=True)

    # Clip predictions to avoid log(0) and ensure numerical stability
    epsilon = 1e-7  # Similar to K.epsilon()
    y_pred = np.clip(y_pred, epsilon, 1 - epsilon)

    # Define class weights
    weights = np.array([0.5, 2.1, 3, 4, 4, 4, 4, 4])

    # Compute weighted log loss
    loss = y_true * np.log(y_pred) * weights
    loss = -np.sum(loss, axis=-1)
    return loss
The [@tensorleap\_custom\_loss](/tensorleap-integration/python-api/code_loader/decorators/tensorleap_custom_loss) decorator registers each custom loss into the Tensorleap integration.
# Prediction
Each model graph has at least one **prediction** output. The **prediction type** is set to each **prediction**, and defines the associated **labels.**
Use the [**`leap_binder.add_prediction`**](/tensorleap-integration/python-api/code_loader/leap_binder/add_prediction) function to add a prediction type to the list or **prediction types**. From this list, a type can be assigned to each **prediction** output.
Example of usage:
```python
leap_binder.add_prediction(
name='toxicity',
labels=['non-toxic','toxic']
)
```
For more info, see [**`leap_binder.add_prediction`**](/tensorleap-integration/python-api/code_loader/leap_binder/add_prediction).
In the [**Network**](/user-interface/project/network) view, each prediction (output) node can be pointed to its corresponding **Prediction Type** in the **Layer Details** panel.
# Custom Layers
You can write your own custom layers, and integrate them into your Tensorleap model.
To set up your custom layer, open the [Integration Scripts](/user-interface/resources-management/integration-scripts) editor and add a class that describes your custom layer.\
\
Then, register your custom layer with the `@tensorleap_custom_layer` decorator to support your layer.\
\
For example, here we add a custom dense layer:
```python
from code_loader.inner_leap_binder.leapbinder_decorators import tensorleap_custom_layer
# This class must inherit from tf.keras.layers.Layer
@tensorleap_custom_layer(name='CustomDense')
class CustomDense(tf.keras.layers.Layer):
def __init__(self, n, **args):
super(CustomDense, self).__init__()
self.n = n
self.dense = tf.keras.layers.Dense(self.n)
def call(self, inputs):
return self.dense(inputs)
def get_config(self):
config = super().get_config()
config.update({
"n": self.n,
})
return config
```
Now, you can upload a model that includes these layers by following the [Import Model](/user-interface/project/versions/import-model) guide.
# Examples
Dataset examples are designed to get you started quickly with setting the [**Dataset Script**](/tensorleap-integration/writing-integration-code).
Examples:
* [**Wikipedia Toxicity (using Tensorflow Datasets**](/tensorleap-integration/writing-integration-code/examples/wikipedia-toxicity-using-tensorflow-datasets)**)**
* [**CelebA (using Google Cloud Storage)**](/tensorleap-integration/writing-integration-code/examples/celeba-classification-using-gcs)
{% hint style="info" %}
Additional dataset examples can be found within the [**Guides**](/guides).
{% endhint %}
# CelebA Object Detection (YoloV7)
This example will demonstrate how to integrate [YoloV7](https://github.com/WongKinYiu/yolov7) to the Tensorleap system. The architecture we use for this example is the [YoloV7-tiny](https://github.com/WongKinYiu/yolov7/blob/main/cfg/deploy/yolov7-tiny.yaml) model, trained on the CelebA full dataset on 1 class (faces).
The starting point for this example is having a trained model `PyTorch` weights (.pt) that was trained using the YoloV7 repository.
## Dataset Script
To use the CelebA dataset for object detection, we set up the CelebA dataset into an images and labels folders, and created the corresponding .txt files according to the YOLOv7 specs.
In the following entries we provide an in-depth description of the main components of our dataset, following by the complete dataset script
### Key components
Before going to each component in depth, two things are important to note:
{% hint style="info" %}
* The GT function converts a YOLO-format: \[class,X,Y,W,H] and outputs \[X,Y,W,H,class]
* The input function return a channels-last image \[H,W,3]
{% endhint %}
#### YoloV7 utils
YOLOv7 requires a decoder (so we can view the images), a custom loss (that is composed of an object & class & IOU losses), and a specific grid definition to be able to map the predictions to the priors. A complete description of these elements and their configuration could be found in the [helpers](/tensorleap-integration/python-api/helpers) section.
Here, we set up the YOLO utils with a YOLO-tiny config. This includes the loss config (overlap threshold, maximum matches, weights), the decoder config (NMS & confidence threshold, top\_k and max bb to plot) and the Grid config (heads size, strides, and image size).
```python
from code_loader.helpers.detection.yolo.decoder import Decoder
from code_loader.helpers.detection.yolo.utils import scale_loc_prediction, reshape_output_list
from code_loader.helpers.detection.yolo.grid import Grid
from code_loader.helpers.detection.yolo.loss import YoloLoss
from code_loader.helpers.detection.utils import xywh_to_xyxy_format, xyxy_to_xywh_format, jaccard
# -------------------------------------OD Functions ----------------------------------- #
CATEGORIES = ['face'] # class names
BACKGROUND_LABEL = 1
MAX_BB_PER_IMAGE = 30
CLASSES = 1
IMAGE_SIZE = (640, 640)
FEATURE_MAPS = ((80, 80), (40, 40), (20, 20))
BOX_SIZES = (((10, 13), (16, 30), (33, 23)),
((30, 61), (62, 45), (59, 119)),
((116, 90), (156, 198), (373, 326))) #tiny fd
NUM_FEATURES = len(FEATURE_MAPS)
NUM_PRIORS = len(BOX_SIZES[0]) * len(BOX_SIZES) #[3*3]
OFFSET = 0
STRIDES = (8, 16, 32)
CONF_THRESH = 0.35
NMS_THRESH = 0.65
OVERLAP_THRESH = 0.0625 #might need to be 1/16
BOXES_GENERATOR = Grid(image_size=IMAGE_SIZE, feature_maps=FEATURE_MAPS, box_sizes=BOX_SIZES,
strides=STRIDES, offset=OFFSET)
DEFAULT_BOXES = BOXES_GENERATOR.generate_anchors()
LOSS_FN = YoloLoss(num_classes=CLASSES, overlap_thresh=OVERLAP_THRESH,
default_boxes=DEFAULT_BOXES, background_label=BACKGROUND_LABEL,
from_logits=False , weights=[4.0, 1.0, 0.4], max_match_per_gt=10)
DECODER = Decoder(CLASSES,
background_label=BACKGROUND_LABEL,
top_k=20,
conf_thresh=CONF_THRESH,
nms_thresh=NMS_THRESH,
max_bb_per_layer=MAX_BB_PER_IMAGE,
max_bb=MAX_BB_PER_IMAGE)
```
#### Preprocess
The following method downloads our input text files from the public cloud, reads them, and parses the first NUM\_SAMPLES entries from each file.
```python
def subset_images_list() -> List[PreprocessResponse]:
lists_base_path = Path('celebA/celeba_full/input_lists')
lists_names = ["train.txt", "val.txt", "test.txt"]
NUM_SAMPELS = 100
lists_full_path = [lists_base_path / subset for subset in lists_names]
lists_files = [_download(str(f)) for f in lists_full_path]
subset_image_pths = [None]*3
subset_labels_pths = [None]*3
for i in range(len(lists_names)):
with open(lists_files[i], 'r') as f:
subset_image_pths[i] = f.read().strip().splitlines()
subset_labels_pths[i] = transform_image_list_to_labels(subset_image_pths[i])
subset_image_pths = [sub_pth[:NUM_SAMPELS] for sub_pth in subset_image_pths]
subset_labels_pths = [sub_pth[:NUM_SAMPELS] for sub_pth in subset_labels_pths]
responses = [PreprocessResponse(length=len(img_pth), data={'img_path': img_pth, 'label_path': lab_pth})
for img_pth, lab_pth in zip(subset_image_pths, subset_labels_pths)]
return responses
```
#### Input Images
this method downloads the images from our cloud, loads them, and then resizes them to a specific IMAGE\_SIZE
```python
def input_image(idx: int, data: PreprocessResponse) -> NDArray[float]:
"""
Returns a BGR image normalized and padded
"""
data = data.data
filepath = data['img_path'][idx]
fpath = _download(filepath)
image = np.array(Image.open(fpath).resize((IMAGE_SIZE[1], IMAGE_SIZE[0]), Image.BILINEAR))/255.
# rescale
return image
```
#### Ground Truth
This method reads the YOLO-format labels files and returns a \[X,Y,W,X,class\_idx] encoded ground truth, with a MAX\_BB\_PER\_IMAGE GT instances per image
```python
def get_bb(idx: int, data: PreprocessResponse) -> NDArray[np.double]:
"""
returns an array shaped (MAX_BB_PER_IMAGE, 5) where the channel idx is [X,Y,W,H] normalized to [0,1]
"""
data = data.data
filepath = data['label_path'][idx]
fpath = _download(filepath)
with open(fpath, 'r') as f:
gt_list = [x.split() for x in f.read().strip().splitlines()]
bboxes = np.zeros([MAX_BB_PER_IMAGE, 5])
max_anns = min(MAX_BB_PER_IMAGE, len(gt_list))
for i, gt_entry in enumerate(gt_list):
ann = gt_entry
bboxes[i, :4] = np.array(ann[1:]).astype(float)
bboxes[i, 4] = np.array(ann[0]).astype(float)
bboxes[max_anns:, 4] = BACKGROUND_LABEL
return bboxes
```
### Complete Dataset Script
The complete Face Detection dataset script could be found [here](https://storage.googleapis.com/example-datasets-47ml982d/celebA/celeba_full/YOLO%20example/yolov7_celeb.py).
## Exporting an ONNX Model
After the `PyTorch` training is finished, an `ONNX` model should be exported using the YOLOv7 export script. YOLOv7 has multiple export options, but the one that would allow the easiest integration with the TensorLeap system is exporting the model **without** NMS, but with the decoder.
To export the `PyTorch` model to `ONNX` you should execute the following command:
> python export.py --weights WEIGHTS\_PATH --grid --simplify --img-size 640 640 --max-wh 640
Where `WEIGHTS_PATH` is the .PT weights and 640 is the resolution of the input images.
The resulting .ONNX file should have a similar head structure to the above Netron Image
### Example ONNX model
Our YoloV7 exported model could be found [here](https://storage.googleapis.com/example-datasets-47ml982d/celebA/celeba_full/YOLO%20example/yolo_trained_fd.onnx).
## Model Integration
Following the [import model](/user-interface/project/versions/import-model) guide we can now upload the ONNX model to the platform.
### Removing last node
This model has a redundant `node` added to it at upload time - it should be removed.
Removing the last node
### Setting up the model
To set up the model, we need to first move the dataset node from the left-most part of the model to the right.
We should then select the YOLO parsed dataset on the dataset node. and connect several nodes:
* The GT visualizer (visualize GT BB)
* Prediction visualizer (visualize prediction BB)
* Image visualizer (visualize input)
* Custom Loss
{% hint style="info" %}
Don't forget to choose the loss within the dropdown menu after adding the loss node
{% endhint %}
* Optimizer
* Metrics
A valid object detection model's head
After connecting these nodes you should save the model (by overriding current version)
At this point both the dataset and the model is integrated into the platform. You can run evaluate and training
# Wikipedia Toxicity (using Tensorflow Datasets)
This dataset contains text comments from a Wikipedia talk page that have been labeled for toxicity. The comments are classified into various categories of toxicity - severe toxicity, obscenity, threatening language, insulting language, and identity attack. This dataset is a replica of the data released for the [**Jigsaw Toxic Comment Classification**](https://www.kaggle.com/c/jigsaw-toxic-comment-classification-challenge).
In this example, we will load data from [**Tensorflow Datasets**](https://www.tensorflow.org/datasets)**,** use [**Persistent Storage**](/tensorleap-integration/writing-integration-code#persistent-storage), and integrate the Wikipedia Toxicity dataset.
In the description below, we will explain each part of the script, while the full script can be found at the end of this page.
## Setup
In the first part of the script, we import all the relevant modules:
* Common modules
* `texthero` - text processing module
* `trainsformers.AutoTokenizer` - text tokenizer module
* `code_loader` - Tensorleap's integration module
In addition, the `MAX_LENGTH` is set and a pre-trained BERT tokenizer is loaded.
```python
import os
from typing import List, Union, Callable
import tensorflow as tf
import tensorflow_datasets as tfds
import numpy as np
import texthero as hero
from transformers import AutoTokenizer
# Tensorleap imports
from code_loader import leap_binder
from code_loader.contract.datasetclasses import PreprocessResponse
from code_loader.contract.enums import Metric, DatasetMetadataType, LeapDataType
from code_loader.contract.visualizer_classes import LeapText
MAX_LENGTH = 250
tokenizer = AutoTokenizer.from_pretrained("bert-base-uncased")
```
## Preprocess Function
The `preprocess_func` *(custom name)* is a **preprocess** function that is called just **once** before the training/evaluating process. It prepares the data for later use in **input encoders**, **output encoders**, and **metadata** functions. More info at [**Preprocess Function**](/tensorleap-integration/writing-integration-code/preprocess-function).
The implementation below loads the [**wikipedia\_toxicity\_subtypes**](https://www.tensorflow.org/datasets/catalog/wikipedia_toxicity_subtypes) dataset by using [**Tensorflow Datasets**](https://www.tensorflow.org/datasets), and converts it to a DataFrame for easier handling. The `tfdf.load` function is provided with the `PERSISTENT_DIR` path for caching.
Once the dataset is fetched and loaded, a preprocessing step is performed - converting to *UTF-8* format, lowercasing, and removing URLs, digits, punctuations, and HTML tags.
After tokenizing the data, the `word_to_index` mapping is set so that the Tensorleap platform can translate the tokens into words for visualization purposes.
Lastly, the [**PreprocessResponse**](/tensorleap-integration/python-api/code_loader/datasetclasses/preprocessresponse) objects are set for the *train* and *validation* data slices. These objects are passed to the encoder and metadata functions later on.
```python
def preprocess_func() -> List[PreprocessResponse]:
PERSISTENT_DIR = '/nfs/'
train_ds = tfds.load('wikipedia_toxicity_subtypes', split='train', data_dir=PERSISTENT_DIR)
val_ds = tfds.load('wikipedia_toxicity_subtypes', split='test', data_dir=PERSISTENT_DIR)
train_df = tfds.as_dataframe(train_ds)
val_df = tfds.as_dataframe(val_ds)
# Text Preproccessing
feature_col = "text"
train_df[feature_col] = train_df[feature_col].str.decode('utf-8').pipe(hero.lowercase).pipe(hero.remove_urls).pipe(hero.remove_digits).pipe(hero.remove_punctuation).pipe(hero.remove_html_tags)
val_df[feature_col] = val_df[feature_col].str.decode('utf-8').pipe(hero.lowercase).pipe(hero.remove_urls).pipe(hero.remove_digits).pipe(hero.remove_punctuation).pipe(hero.remove_html_tags)
# Bind `word to index` mapping
word_index = tokenizer.vocab
word_index[""] = word_index.pop("[PAD]")
leap_binder.custom_tokenizer = tokenizer # to be used within the visualizer
# Generate a PreprocessResponse for each data slice, to later be read by the encoders.
# The length of each data slice is provided, along with the data frame.
train = PreprocessResponse(length=len(train_df), data=train_df)
val = PreprocessResponse(length=len(val_df), data=val_df)
return [train, val]
```
## Input Encoder
The input encoder generates an input component of a sample with index `idx` from the `preprocessing` [**PreprocessResponse**](/tensorleap-integration/python-api/code_loader/datasetclasses/preprocessresponse) object. This sample will later be fetched as input by the network. The function is called for every evaluated sample. More info at [**Input Encoder**](/tensorleap-integration/writing-integration-code/input-encoder).
In the example below, the *text* with index `idx` is retrieved from the preprocessing's data. This *text* is tokenized by our `tokenizer` and turned into a list of word IDs, which is fetched as our model's input.
```python
def input_encoder(idx: int, preprocess: PreprocessResponse) -> np.ndarray:
text = preprocess.data["text"].iloc[idx]
tokens = tokenizer(text, return_tensors='tf', truncation=True, padding='max_length', max_length=MAX_LENGTH, add_special_tokens=True)
input_ids = tokens["input_ids"][0]
return input_ids
```
## Ground Truth Encoder
The ground truth encoder generates a ground truth component of a sample with index `idx`, from the `preprocessing`. This function is called for each evaluated sample. It will later be used as the ground truth for the **loss** function. More info at [**Ground Truth Encoder**](/tensorleap-integration/writing-integration-code/ground-truth-encoder).
In the code below, the `to_predict` list contains the keys for multi-label prediction. With the multi label values set to either 0 or 1, we will use a **binary cross-entropy** loss function and **sigmoid** activation on the last layer.
```python
def gt_encoder(idx: int, preprocess: Union[PreprocessResponse, list]) -> np.ndarray:
to_predict = ['identity_attack', 'insult','obscene', 'severe_toxicity', 'threat', 'toxicity']
return np.array(preprocess.data.iloc[idx][to_predict])
```
## Metadata Functions
For each sample, Tensorleap allows extra data to be added for future analysis. Each defined metadata is wrapped in a **metadata function**.
In the code below, we created a function that adds the label `toxic` or `non-toxic` for each sample. Additionally, we added the word count metadata.
```python
def metadata_toxicity(idx: int, preprocess: Union[PreprocessResponse, list]) -> Union[int, float, str, bool]:
return 'toxic' if preprocess.data['toxicity'].iloc[idx] > 0 else 'non-toxic'
def metadata_word_count(idx: int, preprocess: Union[PreprocessResponse, list]) -> int:
return len(preprocess.data.iloc[idx]['text'].split())
```
## Visualizers
Visualizer functions translate encoded `data` , which is derived from a tensor, an input or ground\_truth, to a chosen format that can be visualized. See [**Visualizers**](/user-interface/project/network/network-mapping/create-a-mapping-deprecated/visualizer-node) for more info.
In this example, the visualizer function received `data` in a form of a tokenized text, and returns the decoded text sequence. The `LeapText` data-class can later be read and visualized within the platform.
```python
def text_visualizer_func(data: np.ndarray) -> LeapText:
tokenizer = leap_binder.custom_tokenizer
texts = tokenizer.sequences_to_texts(data)
return LeapText(texts[0].split(' '))
```
## Binding Functions
For the Tensorleap platform to register the encoders and functions, we use the [**leap\_binder**](/tensorleap-integration/python-api/code_loader/leap_binder) object:
```python
leap_binder.set_preprocess(function=preprocess_func)
leap_binder.set_input(function=input_encoder, name='text')
leap_binder.set_ground_truth(function=gt_encoder, name='classes')
leap_binder.set_metadata(function=metadata_toxicity, metadata_type=DatasetMetadataType.string, name='toxicity')
leap_binder.set_metadata(function=metadata_word_count, metadata_type=DatasetMetadataType.int, name='word_count')
leap_binder.add_prediction(name='classes', labels=['non-toxic','toxic'], metrics=[Metric.Accuracy])
leap_binder.set_visualizer(function=text_visualizer_func, visualizer_type=LeapDataType.Text, name='text_from_token')
```
The `add_prediction` function provides information about the prediction type of the current use-case and its metrics. This information will later be used for calculating selected metrics and visualizations.
## Extra Metadata
Our dataset includes extra metadata such as `identity_attack` , `insult`, `threat`, and more. These fields are implemented using the wrapper function `metadata_encoder` that generates a metadata function for each extra field.
At the end of this code snippet, we set the generated metadata functions to the [**leap\_binder**](/tensorleap-integration/python-api/code_loader/leap_binder) object for each of the extra fields.
```python
# Extra metadata
EXTRA_METADATA = ['identity_attack', 'insult', 'obscene', 'severe_toxicity', 'threat', 'toxicity']
def metadata_encoder(extra_metadata_key: str) -> Callable[[int, PreprocessingResponse], int]:
def func(idx: int, preprocess: PreprocessResponse) -> int:
return preprocessing.data[EXTRA_METADATA[extra_metadata_key]].iloc[idx]
func.__name__ = EXTRA_METADATA[extra_metadata_key]
return func
for i in range(len(EXTRA_METADATA)):
leap_binder.set_metadata(function=metadata_encoder(i), metadata_type=DatasetMetadataType.int, name=EXTRA_METADATA[i])
```
## Full Script
For your convenience, the full script is given below:
```python
import os
from typing import List, Union, Callable
import tensorflow as tf
import tensorflow_datasets as tfds
import numpy as np
import texthero as hero
from transformers import AutoTokenizer
# Tensorleap imports
from code_loader import leap_binder
from code_loader.contract.datasetclasses import PreprocessResponse
from code_loader.contract.enums import Metric, DatasetMetadataType
from code_loader.contract.visualizer_classes import LeapText
MAX_LENGTH = 250
tokenizer = AutoTokenizer.from_pretrained("bert-base-uncased")
# Preprocessing Function:
def preprocess_func() -> List[PreprocessResponse]:
PERSISTENT_DIR = '/nfs/'
train_ds = tfds.load('wikipedia_toxicity_subtypes', split='train', data_dir=PERSISTENT_DIR)
val_ds = tfds.load('wikipedia_toxicity_subtypes', split='test', data_dir=PERSISTENT_DIR)
train_df = tfds.as_dataframe(train_ds)
val_df = tfds.as_dataframe(val_ds)
# Text Preproccessing
feature_col = "text"
train_df[feature_col] = train_df[feature_col].str.decode('utf-8').pipe(hero.lowercase).pipe(hero.remove_urls).pipe(hero.remove_digits).pipe(hero.remove_punctuation).pipe(hero.remove_html_tags)
val_df[feature_col] = val_df[feature_col].str.decode('utf-8').pipe(hero.lowercase).pipe(hero.remove_urls).pipe(hero.remove_digits).pipe(hero.remove_punctuation).pipe(hero.remove_html_tags)
# Bind `word to index` mapping
word_index = tokenizer.vocab
word_index[""] = word_index.pop("[PAD]")
leap_binder.custom_tokenizer = tokenizer # to be used within the visualizer
# Generate a PreprocessResponse for each data slice, to later be read by the encoders.
# The length of each data slice is provided, along with the data frame.
train = PreprocessResponse(length=len(train_df), data=train_df)
val = PreprocessResponse(length=len(val_df), data=val_df)
return [train, val]
# Input encoder fetches the image with the index `idx` from the data from set in
# the PreprocessResponse's data. Returns an ndarray containing the sample's tokens.
def input_encoder(idx: int, preprocess: PreprocessResponse) -> np.ndarray:
text = preprocess.data["text"].iloc[idx]
tokens = tokenizer(text, return_tensors='tf', truncation=True, padding='max_length', max_length=MAX_LENGTH, add_special_tokens=True)
input_ids = tokens["input_ids"][0]
return input_ids
# Ground truth encoder fetches the label with the index `idx` from the `toxicity` column set in
# the PreprocessResponse's data. Returns a numpy array containing a numeric multi-label
def gt_encoder(idx: int, preprocess: Union[PreprocessResponse, list]) -> np.ndarray:
to_predict = ['identity_attack', 'insult','obscene', 'severe_toxicity', 'threat', 'toxicity']
return np.array(preprocess.data.iloc[idx][to_predict])
# Metadata functions allow to add extra data for a later use in analysis.
# This metadata adds label as a string.
def metadata_toxicity(idx: int, preprocess: Union[PreprocessResponse, list]) -> Union[int, float, str, bool]:
return 'toxic' if preprocess.data['toxicity'].iloc[idx] > 0 else 'non-toxic'
def metadata_word_count(idx: int, preprocess: Union[PreprocessResponse, list]) -> int:
return len(preprocess.data.iloc[idx]['text'].split())
# Visualizers
def text_visualizer_func(data: np.ndarray) -> LeapText:
tokenizer = leap_binder.custom_tokenizer
texts = tokenizer.sequences_to_texts(data)
return LeapText(texts[0].split(' '))
# Binding functions to bind the functions above to Tensorleap.
leap_binder.set_preprocess(function=preprocess_func)
leap_binder.set_input(function=input_encoder, name='text')
leap_binder.set_ground_truth(function=gt_encoder, name='classes')
leap_binder.set_metadata(function=metadata_toxicity, metadata_type=DatasetMetadataType.string, name='toxicity')
leap_binder.set_metadata(function=metadata_word_count, metadata_type=DatasetMetadataType.int, name='word_count')
leap_binder.add_prediction(name='classes', labels=['non-toxic','toxic'], metrics=[Metric.Accuracy])
leap_binder.set_visualizer(function=text_visualizer_func, visualizer_type=LeapText.type, name='text_from_token')
# Extra metadata
EXTRA_METADATA = ['identity_attack', 'insult', 'obscene', 'severe_toxicity', 'threat', 'toxicity']
def metadata_encoder(extra_metadata_key: str) -> Callable[[int, PreprocessResponse], int]:
def func(idx: int, preprocess: PreprocessResponse) -> int:
return preprocess.data[EXTRA_METADATA[extra_metadata_key]].iloc[idx]
func.__name__ = EXTRA_METADATA[extra_metadata_key]
return func
for i in range(len(EXTRA_METADATA)):
leap_binder.set_metadata(function=metadata_encoder(i), metadata_type=DatasetMetadataType.int, name=EXTRA_METADATA[i])
```
# Confusion Matrix
{% hint style="warning" %}
Previous method for adding confusion matrix metric using `leap_binder.add_prediction(...)` is depricated
{% endhint %}
To add aconfusion matrix metric you can now just add a metric via the UI and choose the ConfusionMatrixClassification option from the `SELECTED METRIC` box
# CelebA Classification (using GCS)
The [**CelebFaces Attributes (CelebA)**](https://www.kaggle.com/datasets/jessicali9530/celeba-dataset) dataset contains images of faces and 40 attribute notations per image.
In this example, the CelebA dataset is integrated into the Tensorleap platform and prepared for use with a classification model. The predicted field is whether or not the person in the image wears glasses.
In addition, we will show how to download and cache data from a [**Google Cloud Storage**](https://cloud.google.com/storage) bucket.
## Data Preparation
In this section, the CelebA data will be placed in a Google Cloud Storage bucket for later use by the [**Dataset Script**.](/tensorleap-integration/writing-integration-code)
Download the **CelebFaces Attributes** dataset from [**here**](https://www.kaggle.com/datasets/jessicali9530/celeba-dataset). Extract the file and upload its folder to your Google Cloud Storage bucket. This can be done using the [**gsutil**](https://cloud.google.com/storage/docs/gsutil) as follows:
```bash
gsutil -m rsync -r celebA/ gs://<>/celebA/
```
The example below will show how the files are read, cached, and preprocessed.
For your convenience, we set up a public bucket with the data, which is then accessed using the dataset script below.
## Setup
In the first part of the script, we import all the relevant modules:
* Common modules
* `PIL.Image` - image processing module
* `google.cloud` - google cloud access module
* `code_loader` - Tensorleap's integration module
In addition, set the following constants:
* `PROJECT_ID` `BUCKET_NAME` - points to the Google cloud project and bucket where we store the data
* `IMAGE_SIZE` - the input image size
* `MAIN_ATTRIBUTE` - the attribute we would like to predict, currently set for `Eyeglasses`.
```python
import os
from typing import Optional, List, Union, Tuple, Callable
from pathlib import Path
from functools import lru_cache
from google.cloud import storage
from google.cloud.storage import Bucket
from google.auth.credentials import AnonymousCredentials
import numpy as np
import pandas as pd
import PIL.Image as Image
# Tensorleap imports
from code_loader.contract.enums import DatasetMetadataType, Metric
from code_loader.contract.datasetclasses import PreprocessResponse
from code_loader import leap_binder
PROJECT_ID = 'example-dev-project-nmrksf0o'
BUCKET_NAME = 'example-datasets-47ml982d'
IMAGE_SIZE = 64
MAIN_ATTRIBUTE = 'Eyeglasses'
```
## Helper Functions
This code section contains helper functions that are used for **fetching** and **caching** data from the Google Cloud Storage bucket.
In this example, the files are stored under the `HOME` path. Similarly, you can point it to the [**persistent**](/tensorleap-integration/writing-integration-code#persistent-storage) folder for persistent caching.
```python
#Helper Functions:
@lru_cache()
def _connect_to_gcs_and_return_bucket(bucket_name: str) -> Bucket:
gcs_client = storage.Client(project=PROJECT_ID, credentials=AnonymousCredentials())
return gcs_client.bucket(bucket_name)
def _download(cloud_file_path: str, local_file_path: Optional[str] = None) -> str:
print("download data from GC")
# if local_file_path is not specified saving in home dir
if local_file_path is None:
home_dir = os.getenv("HOME")
local_file_path = os.path.join(home_dir, "Tensorleap_data", BUCKET_NAME, cloud_file_path)
# check if file is already exists
if os.path.exists(local_file_path):
return local_file_path
bucket = _connect_to_gcs_and_return_bucket(BUCKET_NAME)
dir_path = os.path.dirname(local_file_path)
os.makedirs(dir_path, exist_ok=True)
blob = bucket.blob(cloud_file_path)
blob.download_to_filename(local_file_path)
return local_file_path
```
## Preprocess Function
The `preprocess_func` *(custom name)* is a **preprocessing** function that is called just **once** before the training/evaluating process. It prepares the data for later use in **input encoders**, **output encoders**, and **metadata** functions. More info at [**Preprocess Function**](/tensorleap-integration/writing-integration-code/preprocess-function).
The implementation below downloads the `list_attr_celeba.csv` (contains attributes) and `list_eval_partition.csv` (contains train/validation/test data slices), loads them into a DataFrame, and joins them into `df_attr`. Then it splits the data into train, validation, and test according to the `list_eval_partition`.
Lastly, the [**PreprocessResponse**](/tensorleap-integration/python-api/code_loader/datasetclasses/preprocessresponse) objects are set for the *train* and *validation* data slices. These objects are later passed on to the encoder and metadata functions.
```python
# Preprocess Function:
def preprocess_func() -> List[PreprocessResponse]:
annotations_path = _download("celebA/list_attr_celeba.csv")
partition_path = _download("celebA/list_eval_partition.csv")
df_attr = pd.read_csv(annotations_path, index_col=0)
df_partition = pd.read_csv(partition_path, index_col=0)
df_attr = df_attr.join(df_partition)
df_train = df_attr[df_attr.partition == 0]
df_valid = df_attr[df_attr.partition == 1]
df_test = df_attr[df_attr.partition == 2]
train = PreprocessResponse(length=len(df_train), data=df_train)
val = PreprocessResponse(length=len(df_valid), data=df_valid)
test = PreprocessResponse(length=len(df_test), data=df_test)
return train, val, test
```
## Input Encoder
The input encoder generates an input component of a sample with index `idx` from the [**PreprocessResponse**](/tensorleap-integration/python-api/code_loader/datasetclasses/preprocessresponse) object. This sample will later be fetched as input by the network. The function is called for every evaluated sample. More info at [**Input Encoder**](/tensorleap-integration/writing-integration-code/input-encoder).
The input encoder function is called for every evaluated sample and generates for each an input component with an index from the [**PreprocessResponse**](/tensorleap-integration/python-api/code_loader/datasetclasses/preprocessresponse) object - `idx`. This input component will later be fetched by the network. More info at [**Input Encoder**](/tensorleap-integration/writing-integration-code/input-encoder).
In the example below, the image file name with index `idx` is retrieved from the preprocessing's data. The image is then downloaded and opened. Additionally, the image is center cropped and resized before it is fetched as the model's input.
```python
# Input encoder fetches the image with the index `idx` from the data from set in
# the PreprocessResponse's data. Returns an ndarray containing the sample's image.
def input_encoder(idx: int, preprocess: PreprocessResponse) -> np.ndarray:
sample = preprocess.data.iloc[idx]
fpath = f'celebA/img_align_celeba/img_align_celeba/{sample.name}'
fpath = _download(fpath)
image = Image.open(fpath)
# center crop
celeba_face_size = 178
width, height = image.size
left = (width - celeba_face_size)/2
top = (height - celeba_face_size)/2
right = (width + celeba_face_size)/2
bottom = (height + celeba_face_size)/2
image = image.crop((left, top, right, bottom))
image = image.resize((IMAGE_SIZE, IMAGE_SIZE))
return image
```
## Ground Truth Encoder
The ground truth encoder generates a ground truth component of a sample with index `idx` from the `preprocessing`. It will later be used as the ground truth for the **loss** function. This function is called for each evaluated sample. More info at [**Ground Truth Encoder**](/tensorleap-integration/writing-integration-code/ground-truth-encoder).
The ground truth encoder generates a ground truth component of a sample with index `idx` from the `preprocess`. This function is called for each evaluated sample and will later be used as the ground truth for the **loss** function. More info at [**Ground Truth Encoder**](/tensorleap-integration/writing-integration-code/ground-truth-encoder).
The implementation below extracts the `MAIN_ATTRIBUTE` of a sample with index `idx` and returns a one-hot-vector.
{% hint style="info" %}
Note: The CelebA dataset's attributes are stored in a **-1** for negative and **1** for positive.
{% endhint %}
```python
# Ground truth encoder fetches the label with the index `idx` from the MAIN_ATTRIBUTE column set in
# the PreprocessResponse's data and returns its hot vector representation.
def gt_encoder(idx: int, preprocess: Union[PreprocessResponse, list]) -> np.ndarray:
return [0.0, 1.0] if preprocess.data.iloc[idx][MAIN_ATTRIBUTE] == 1 else [1.0, 0.0]
```
## Metadata Function
For each sample, Tensorleap allows extra data to be added for future analysis. Each defined metadata is wrapped in a **metadata function**.
The metadata function below adds the label `glasses` or `no-glasses` as metadata to each sample.
```python
# Metadata functions allow to add extra data for a later use in analysis.
# This metadata adds label as a string.
def metadata_label(idx: int, preprocess: Union[PreprocessResponse, list]) -> Union[int, float, str, bool]:
return 'glasses' if preprocess.data.iloc[idx][MAIN_ATTRIBUTE] == 1 else 'no-glasses'
```
## Binding Functions
For the Tensorleap platform to register the encoders and functions, we use the [**leap\_binder**](/tensorleap-integration/python-api/code_loader/leap_binder) object:
```python
# Leap binding functions to bind the functions above to the `Dataset`.
leap_binder.set_preprocess(function=preprocess_func)
leap_binder.set_input(function=input_encoder, name='image')
leap_binder.set_ground_truth(function=gt_encoder, name='glasses')
leap_binder.set_metadata(function=metadata_label, metadata_type=DatasetMetadataType.string, name='label')
leap_binder.add_prediction(name='prediction', labels=['glasses','no-glasses'], metrics=[Metric.Accuracy])
```
The `add_prediction` function provides information about the prediction tensor of the current use-case, and its metrics. This information will later be used for calculating selected metrics and visualizations.
## Extra Metadata
Our dataset includes extra metadata such as `Bald` , `Young`, `Smiling`, and more. These fields are implemented using the wrapper function `metadata_encoder` that generates a metadata function for each extra field.
At the end of this code snippet, we set the generated metadata functions to the [**leap\_binder**](/tensorleap-integration/python-api/code_loader/leap_binder) object for each of the extra fields.
```python
# Extra metadata
EXTRA_METADATA = ['5_o_Clock_Shadow', 'Arched_Eyebrows', 'Attractive', 'Bags_Under_Eyes', 'Bald', 'Bangs', 'Big_Lips',
'Big_Nose', 'Black_Hair', 'Blond_Hair', 'Blurry', 'Brown_Hair', 'Bushy_Eyebrows', 'Chubby', 'Double_Chin', 'Eyeglasses',
'Goatee', 'Gray_Hair', 'Heavy_Makeup', 'High_Cheekbones', 'Male', 'Mouth_Slightly_Open', 'Mustache', 'Narrow_Eyes', 'No_Beard',
'Oval_Face', 'Pale_Skin', 'Pointy_Nose', 'Receding_Hairline', 'Rosy_Cheeks', 'Sideburns', 'Smiling', 'Straight_Hair',
'Wavy_Hair', 'Wearing_Earrings', 'Wearing_Hat', 'Wearing_Lipstick', 'Wearing_Necklace', 'Wearing_Necktie', 'Young']
def metadata_encoder(extra_metadata_key: str) -> Callable[[int, PreprocessResponse], int]:
def func(idx: int, preprocess: PreprocessResponse) -> int:
return preprocess.data[EXTRA_METADATA[extra_metadata_key]].iloc[idx]
func.__name__ = EXTRA_METADATA[extra_metadata_key]
return func
for i in range(len(EXTRA_METADATA)):
leap_binder.set_metadata(
function=metadata_encoder(i),
metadata_type=DatasetMetadataType.int,name=EXTRA_METADATA[i]
)
```
## Full Script
For your convenience, the full script is given below:
```python
import os
from typing import Optional, List, Union, Tuple, Callable
from pathlib import Path
from functools import lru_cache
from google.cloud import storage
from google.cloud.storage import Bucket
from google.auth.credentials import AnonymousCredentials
import numpy as np
import pandas as pd
import PIL.Image as Image
# Tensorleap imports
from code_loader.contract.enums import DatasetMetadataType, Metric
from code_loader.contract.datasetclasses import PreprocessResponse
from code_loader import leap_binder
PROJECT_ID = 'example-dev-project-nmrksf0o'
BUCKET_NAME = 'example-datasets-47ml982d'
IMAGE_SIZE = 64
MAIN_ATTRIBUTE = 'Eyeglasses'
#Helper Functions:
@lru_cache()
def _connect_to_gcs_and_return_bucket(bucket_name: str) -> Bucket:
gcs_client = storage.Client(project=PROJECT_ID, credentials=AnonymousCredentials())
return gcs_client.bucket(bucket_name)
def _download(cloud_file_path: str, local_file_path: Optional[str] = None) -> str:
print("download data from GC")
# if local_file_path is not specified saving in home dir
if local_file_path is None:
home_dir = os.getenv("HOME")
local_file_path = os.path.join(home_dir, "Tensorleap_data", BUCKET_NAME, cloud_file_path)
# check if file is already exists
if os.path.exists(local_file_path):
return local_file_path
bucket = _connect_to_gcs_and_return_bucket(BUCKET_NAME)
dir_path = os.path.dirname(local_file_path)
os.makedirs(dir_path, exist_ok=True)
blob = bucket.blob(cloud_file_path)
blob.download_to_filename(local_file_path)
return local_file_path
# Preprocess Function:
def preprocess_func() -> List[PreprocessResponse]:
annotations_path = _download("celebA/list_attr_celeba.csv")
partition_path = _download("celebA/list_eval_partition.csv")
df_attr = pd.read_csv(annotations_path, index_col=0)
df_partition = pd.read_csv(partition_path, index_col=0)
df_attr = df_attr.join(df_partition)
df_train = df_attr[df_attr.partition == 0]
df_valid = df_attr[df_attr.partition == 1]
df_test = df_attr[df_attr.partition == 2]
train = PreprocessResponse(length=len(df_train), data=df_train)
val = PreprocessResponse(length=len(df_valid), data=df_valid)
test = PreprocessResponse(length=len(df_test), data=df_test)
return train, val, test
# Input encoder fetches the image with the index `idx` from the data from set in
# the PreprocessResponse's data. Returns an ndarray containing the sample's image.
def input_encoder(idx: int, preprocess: PreprocessResponse) -> np.ndarray:
sample = preprocess.data.iloc[idx]
fpath = f'celebA/img_align_celeba/img_align_celeba/{sample.name}'
fpath = _download(fpath)
image = Image.open(fpath)
# center crop
celeba_face_size = 178
width, height = image.size
left = (width - celeba_face_size)/2
top = (height - celeba_face_size)/2
right = (width + celeba_face_size)/2
bottom = (height + celeba_face_size)/2
image = image.crop((left, top, right, bottom))
image = image.resize((IMAGE_SIZE, IMAGE_SIZE))
return image
# Ground truth encoder fetches the label with the index `idx` from the MAIN_ATTRIBUTE column set in
# the PreprocessResponse's data and returns its hot vector representation.
def gt_encoder(idx: int, preprocess: Union[PreprocessResponse, list]) -> np.ndarray:
return [0.0, 1.0] if preprocess.data.iloc[idx][MAIN_ATTRIBUTE] == 1 else [1.0, 0.0]
# Metadata functions allow to add extra data for a later use in analysis.
# This metadata adds label as a string.
def metadata_label(idx: int, preprocess: Union[PreprocessResponse, list]) -> Union[int, float, str, bool]:
return 'glasses' if preprocess.data.iloc[idx][MAIN_ATTRIBUTE] == 1 else 'no-glasses'
# Dataset binding functions to bind the functions above to the `Dataset`.
leap_binder.set_preprocess(function=preprocess_func)
leap_binder.set_input(function=input_encoder, name='image')
leap_binder.set_ground_truth(function=gt_encoder, name='glasses')
leap_binder.set_metadata(function=metadata_label, metadata_type=DatasetMetadataType.string, name='label')
leap_binder.add_prediction(name='prediction', labels=['glasses','no-glasses'], metrics=[Metric.Accuracy])
# Extra metadata
EXTRA_METADATA = ['5_o_Clock_Shadow', 'Arched_Eyebrows', 'Attractive', 'Bags_Under_Eyes', 'Bald', 'Bangs', 'Big_Lips',
'Big_Nose', 'Black_Hair', 'Blond_Hair', 'Blurry', 'Brown_Hair', 'Bushy_Eyebrows', 'Chubby', 'Double_Chin', 'Eyeglasses',
'Goatee', 'Gray_Hair', 'Heavy_Makeup', 'High_Cheekbones', 'Male', 'Mouth_Slightly_Open', 'Mustache', 'Narrow_Eyes', 'No_Beard',
'Oval_Face', 'Pale_Skin', 'Pointy_Nose', 'Receding_Hairline', 'Rosy_Cheeks', 'Sideburns', 'Smiling', 'Straight_Hair',
'Wavy_Hair', 'Wearing_Earrings', 'Wearing_Hat', 'Wearing_Lipstick', 'Wearing_Necklace', 'Wearing_Necktie', 'Young']
def metadata_encoder(extra_metadata_key: str) -> Callable[[int, PreprocessResponse], int]:
def func(idx: int, preprocess: PreprocessResponse) -> int:
return preprocess.data[EXTRA_METADATA[extra_metadata_key]].iloc[idx]
func.__name__ = EXTRA_METADATA[extra_metadata_key]
return func
for i in range(len(EXTRA_METADATA)):
leap_binder.set_metadata(
function=metadata_encoder(i),
metadata_type=DatasetMetadataType.int,name=EXTRA_METADATA[i]
)
```
# Unlabeled Data
As a data scientist, one of the most important things you can do is label your data samples. This allows you to build models that are more accurate and can be applied to real-world data. However, with the vast amount of data out there, it can be tough to **prioritize which samples to label**.
Tensorleap constructs the model's most informative latent-space, which enables you to prioritize which samples to label in an efficient way, by utilizing the learnt features of the model.
#### Integration Script
The `unlabeled_data_preprocessing_func` *(custom name)* is a **preprocess** function that is called just once before the reading the data, similar to the [**Preprocess Function**](/tensorleap-integration/writing-integration-code/preprocess-function). It prepares the data for later use in **input encoders**.
```python
from code_loader import leap_binder
from code_loader.contract.datasetclasses import PreprocessResponse
# Preprocessing Function
def unlabeled_preprocessing_func() -> PreprocessResponse:
...
return PreprocessResponse(length=len(unlabeled_df), data=unlabeled_df)
leap_binder.set_unlabeled_data_preprocess(function=unlabeled_preprocessing_func)
```
This function returns a single [**`PreprocessResponse`**](/tensorleap-integration/python-api/code_loader/datasetclasses/preprocessresponse) object.
#### Fetch Similar
In order to prioritize unlabeled data, choose a sample within the [**Population Exploration**](/user-interface/dashboards/dashlets/sample-analysis#population-exploration) analysis that correlates to a desired cluster, and request to fetch similar samples from the unlabeled data.

Once the `Fetch Similar` process finished, a similarity map of the found samples will be presented. You can choose to set the color and size of the dots to to `similarity` in order to indicate which were found to be the most similar to the target sample.
 
# Model Integration
Model Integration to the platform requires a `.onnx` or `.h5` model.
To integrate the model via the CLI, ensure it's accessible from the Tensorleap [integration script](/tensorleap-integration/writing-integration-code)'s root. The model doesn't have to be located under the project root.
A more detailed explanation on how to integrate a model can be found in the [CLI assets upload ](/tensorleap-integration/uploading-with-cli/cli-assets-upload#uploading-a-model)section.
{% hint style="warning" %}
Tensorleap compatible models are:
* `.onnx` or `.h5` formats.
* Models that has a batch dimension, i.e. inputs has a shape of \[Batch,\*] and outputs have the same batch dimension \[Batch,\*]. Both a dynamic or a hard-coded batches within the model are supported in the platform.
{% endhint %}
# leap.yaml
Descirbes the leap.yaml configuration - it's fields and usage
The `leap.yaml` configuration file is located at the project root. It is a mandatory configuration file that contains several pieces of information required by the Tensorleap server:
* `projectID`: (optional) an ID that represents a [project](/user-interface/project) in the Tensorleap platform.
* `secretID`: (optional) an ID that represents a [secret](/user-interface/secrets-management) in the Tensorleap platform.
* `entryFile`: The path to a python file that includes the [tensorleap integration test](/tensorleap-integration/integration-test)
* An indicator of which files should be sent to the server relative to the current path.
* `include`: a list of relative file path to upload to the server.
* `exclude`: a list of relative file path to ignore from server upload.
{% hint style="info" %}
Both the `include` and `exclude` fields support wildcards (e.g. `*.py`)
{% endhint %}
* `pythonVersion`: The expected python version to build your dependencies file with when supplying a requirements.txt file.
This stateful configuration allows the [CLI](/tensorleap-integration/uploading-with-cli/cli-assets-upload) to know which object it should upload the assets to when communicating with the server.
### `leap.yaml` Example
#### Include Example
The leap.yaml can use the `include` syntax to state which files should be uploaded to the platform
```yaml
projectId: 685474990d49a6e4c09ec115
secretId: ""
entryFile: leap_binder.py
include:
- leap_binder.py
- mnist/config.py
- mnist/project_config.yaml
- mnist/utils.py
- mnist/data/preprocess.py
- requirements.txt
pythonVersion: py310
```
#### Exclude Example:
The leap.yaml can use the `exclude` syntax to state which files should be uploaded to the platform
```
projectId: 685474990d49a6e4c09ec115
secretId: ""
entryFile: leap_binder.py
exclude:
- "**/*.h5"
- "**/*.onnx"
- "**/*.jpg"
- "**/*.png"
pythonVersion: py310
```
{% hint style="info" %}
For initial integration or when uploading the code-base and model to a new location, the `leap.yaml` should not include `codeIntegrationId`, `projectId`, `secretId`, and `pythonVersion` rows. During the CLI upload process, you can select these objects interactively, and they will be automatically added to `leap.yaml`.
{% endhint %}
# Configurations files
Describes the tensorleap project-level configuration
Tensorleap holds up a configuration file per project that help ease the integration in recurrent asset uploads. This file is [leap.yaml](/tensorleap-integration/leap.yaml) - that contain Ids of different objects in the platform.
# Integration test
How to locally test your Tensorleap integration
{% hint style="warning" %}
The integration test is a mandatory part of Tensorleap's Integration and must be implemented for the platform to work properly.
{% endhint %}
### The purpose and structure of a local integration test
before uploading code and models to the platform, an integration test should be created and run locally. The purpose of this test is to:\
(1) Instruct Tensorleap on which code needs to be executed during model analysis (loss, metrics, visualizers & metadata)\
(2) S**imulate the data flow** that would occur in the Tensorleap platform locally, ensuring that:
* All of the inputs, outputs, metrics, loss & ground truths are:
* Parsed successfully
* Have valid values
* Visualizations are as expected
The way to create the inegration test is by creating a simply python script (leap\_custom\_test.py), that would:
This integration test can be run or debugged locally on your machine in an appropriate python environment ([see example](#an-integration-test-example)). Since all of Tensorleap's decorators include a strong runtime validation for a mismatch in expected types and shapes, running the test locally will quickly highlight any existing integration issues.
{% hint style="info" %}
Debugging this file using an IDE will easily point you to integration issues.
{% endhint %}
### The integration test decorators
To run the integration test, two interfaces should be implemented: [tensorleap\_load\_model](#tensorleap_load_model) and [tensorleap\_integration\_test](#tensorleap_integration_test).
#### @tensorleap\_load\_model
{% hint style="warning" %}
Supported model formats are .h5 or .onnx
{% endhint %}
This decorator wraps a function that performs .onnx or .h5 model loading. It should return the model to be later used in @tensorleap\_integration\_test for inference. The decorator receives a list of [PredictionTypeHandler](/tensorleap-integration/python-api/code_loader/datasetclasses/predictiontypehandler), which should match the number of model outputs in length (a full description is provided in the [load\_model](/tensorleap-integration/python-api/code_loader/decorators/tensorleap_load_model) decorator page)
{% tabs %}
{% tab title=".onnx" %}
```python
import tensorflow as tf
from code_loader.inner_leap_binder.leapbinder_decorators import tensorleap_load_model, tensorleap_integration_test
#Define model outputs
prediction_type1 = PredictionTypeHandler(name='depth', labels=['high', 'low'], channel_dim=1)
#Load model
@tensorleap_load_model([prediction_type1])
def load_model():
dir_path = os.path.dirname(os.path.abspath(__file__))
model_path = 'models/GLPN_Kitti.onnx'
sess = onnxruntime.InferenceSession(os.path.join(dir_path, model_path))
return sess
#Instruct Tensorleap on how to infer model
@tensorleap_integration_test()
def integration_test(idx, subset):
sess = load_model()
# inputs
x = input_image(idx, subset)
# model
input_name_1 = sess.get_inputs()[0].name
pred = sess.run(None, {input_name_1: x})[0]
...
```
{% endtab %}
{% tab title=".h5" %}
For an .h5 model, models could be loaded and infer in the following way:
```python
import tensorflow as tf
from code_loader.inner_leap_binder.leapbinder_decorators import tensorleap_load_model, tensorleap_integration_test
prediction_type1 = PredictionTypeHandler(name='classes', labels=CONFIG['LABELS'])
@tensorleap_load_model([prediction_type1])
def load_model():
dir_path = os.path.dirname(os.path.abspath(__file__))
model_path = 'model/model.h5' # Relative path to .h5 model
cnn = tf.keras.models.load_model(os.path.join(dir_path, model_path))
return cnn
@tensorleap_integration_test()
def integration_test(idx, subset):
# Get input and GT
image = input_encoder(idx, subset)
...
# Load Model and infer
cnn = load_model()
y_pred = cnn([image])
```
{% endtab %}
{% endtabs %}
{% hint style="info" %}
For more information on the attributes of the load\_model decorator and interface specifics refer [here](/tensorleap-integration/python-api/code_loader/decorators/tensorleap_load_model).
{% endhint %}
#### @tensorleap\_integration\_test
This decorator wraps a function that serves as a way to instruct Tensorleap on what code needs to be run during model analysis. This function:
1. Receives a [PreprocessResponse](/tensorleap-integration/python-api/code_loader/datasetclasses/preprocessresponse) and an idx as inputs
2. Calls the @tensorleap\_load\_model wrapped function to load the .onnx or .h5 model
3. Does the following:
1. Call [Input Encoder ](/tensorleap-integration/writing-integration-code/input-encoder)- to get the input of sample `idx`
2. Call the ([decorated](#tensorleap_load_model)) model on the input to get predictions
3. Call [Ground Truth Encoder](/tensorleap-integration/writing-integration-code/ground-truth-encoder) - to get the ground truth of sample `idx`
4. Use the above to call the [loss](/tensorleap-integration/writing-integration-code/custom-loss-function), [metrics](/tensorleap-integration/writing-integration-code/custom-metrics), and [metadata](/tensorleap-integration/writing-integration-code/metadata-function).
5. Use the above to call the [visualizers](/user-interface/project/network/network-mapping/create-a-mapping-deprecated/visualizer-node).
6. (optional) Use Tensorleap built-in methods to visualize the visualizers result locally and review the expected result in the platform
7. (optional) Prints whatever values needed for debugging and integrity purposes (metadata, metrics, loss, etc.)
{% hint style="warning" %}
Only decorators that are called within the tensorleap\_integration\_test would be utilized in Tensorleap analysis. Any decorator that is defined in code, but not called within the integration test would not be executed in the platform.
{% endhint %}
To capture the connectivity of the different interfaces used in the integration test, Tensorleap passes pointers that maps the connection between the model and the decorators. For example, this instructs the platform on what should an[ image visualizer](/tensorleap-integration/python-api/code_loader/decorators/tensorleap_custom_visualizer) defined in the script visualize - the input or the output of the model.
To support a correct registration and tracking of the pointers used, the integration test function should adhere to a specific format:
{% hint style="success" %}
* Only functions decorated with [Tensorleap decorators](/tensorleap-integration/python-api/code_loader/decorators) should be called within the code. Any python logic (post & pre-processing, input and output manipulation) is placed within these functions.
* The model is loaded using the [tensorleap\_load\_model](/tensorleap-integration/python-api/code_loader/decorators/tensorleap_load_model) decorator.
* Visualizing and viewing outputs can only be done using the build in `visualize` function and the python build-in `print` method.
{% endhint %}
The integration test should not contain the following placed outside of other decorated functions:
{% hint style="danger" %}
* Arithmetics done on model inputs and outputs
* Usage of external libraries: NumPy, Pandas, etc.
* Indexing of anything other than the model prediction. This includes metadata\_result\['specific\_key'], input\_result\[3], etc.
* Adding or removing a batch dimension from an input, output or the return array of any of the decorators.
{% endhint %}
{% hint style="info" %}
The integration test automatically adds a batch to every call to a ground truth or input encoder to support an inference script without the need of appending or removing a batch dimension
{% endhint %}
### Verification Table
After running the integration test script locally, Tensorleap prints a verification table summarizing which decorators were called:
```
Decorator Name | Added to integration
-------------------------------------------------
tensorleap_integration_test | ✅
tensorleap_preprocess | ✅
tensorleap_input_encoder | ✅
tensorleap_gt_encoder | ✅
tensorleap_load_model | ✅
tensorleap_custom_loss | ✅
tensorleap_custom_metric (optional) | ✅
tensorleap_metadata (optional) | ✅
tensorleap_custom_visualizer (optional)| ✅
```
| Symbol | Meaning |
| ------ | ------------------------------------------------------------------ |
| ✅ | Decorator was called successfully during the integration test |
| ❌ | Decorator was not called, or the script crashed before reaching it |
| ❔ | Status unknown — decorator was not encountered during this run |
The table is followed by a message indicating whether the integration is complete:
* **All parts have been successfully set** — every decorator was called; you can push the project to Tensorleap.
* **All mandatory parts have been successfully set** — mandatory decorators passed; the next optional decorator to add is listed.
* **Some mandatory components have not yet been added** — the next recommended mandatory decorator to implement is listed.
{% hint style="info" %}
Only decorators **called within** `@tensorleap_integration_test` appear as ✅. Decorators defined in code but not called inside the integration test will show ❌ and will **not** be executed on the platform.
{% endhint %}
### An integration test example
Many integration tests could be found in the [leap hub github space](broken://spaces/FsTVi1xDYmDOJLXTCOii/pages/E38WjqIdr0a6hpVDJfmO).\
Here, we share a basic integration test of the MNIST dataset. For a reference of the corresponding MNIST Tensorleap integration please check this [repo](https://github.com/Tensorleap-hub/mnist).
```python
import os
from code_loader.contract.datasetclasses import PredictionTypeHandler
from code_loader.plot_functions.visualize import visualize
from mnist.config import CONFIG
from leap_integration import (input_encoder, preprocess_func_leap, gt_encoder,
combined_bar, metrics, image_visualizer, categorical_crossentropy_loss,
metadata_sample_index, metadata_one_hot_digit, metadata_euclidean_distance_from_class_centroid)
import tensorflow as tf
from code_loader.inner_leap_binder.leapbinder_decorators import tensorleap_load_model, tensorleap_integration_test
prediction_type1 = PredictionTypeHandler(name='classes', labels=CONFIG['LABELS'])
@tensorleap_load_model([prediction_type1])
def load_model():
dir_path = os.path.dirname(os.path.abspath(__file__))
model_path = 'model/model.h5'
cnn = tf.keras.models.load_model(os.path.join(dir_path, model_path))
return cnn
@tensorleap_integration_test()
def integration_test(idx, subset):
# Get input and GT
image = input_encoder(idx, subset)
gt = gt_encoder(idx, subset)
# Load Model and infer
cnn = load_model()
y_pred = cnn([image])
# Visualize the inputs and outputs of the model
horizontal_bar_vis = combined_bar(y_pred, gt)
img_vis = image_visualizer(image)
visualize(img_vis)
visualize(horizontal_bar_vis)
# Compute metrics and loss
metric_res = metrics(y_pred)
loss_res = categorical_crossentropy_loss(gt, y_pred)
print(metric_res)
print(loss_res)
# Compute metadata
m1 = metadata_sample_index(idx, subset)
m2 = metadata_one_hot_digit(idx, subset)
m3 = metadata_euclidean_distance_from_class_centroid(idx, subset)
print(m1)
print(m2)
print(m3)
# here the user can return whatever he wants
if __name__ == '__main__':
num_samples_to_test = 3
train, val = preprocess_func_leap()
for i in range(num_samples_to_test):
integration_test(i, train)
integration_test(i, val)
```
# Uploading with CLI
This describes best practices of how to upload your code and models into Tensorleap
This section details two important aspects of uploading a new codebase and/or model to Tensorleap:
* How to [instruct the platform](/tensorleap-integration/integration-test) to utilize the code integration for the model and locally test your code before uploading it.
* How to [upload](/tensorleap-integration/uploading-with-cli/cli-assets-upload) your models and codebase using the CLI
# CLI Assets upload
Describes the usage of the Tensorleap CLI to upload models and datasets to the platform
{% hint style="success" %}
prerequisites to upload assets to the Tensorleap platform are:
* Having a Tensorleap server [installed](/getting-started/tensorleap-setup/installation#tensorleap-server), with access to the dataset.
* Having a CLI [installed](/getting-started/tensorleap-setup/installation#tensorleap-cli-installation) & [authenticated](/getting-started/tensorleap-setup/cli-authentication), that is able to [access the Tensorleap server](/getting-started/tensorleap-setup/installation#where-should-you-install-the-server-and-client) via port 4589.
* Access to a valid [integration script](/tensorleap-integration/writing-integration-code) that passed the [integration test](/tensorleap-integration/integration-test) OR/AND access to a .onnx or .h5 model that should be uploaded to the platform
{% endhint %}
The Tensorleap CLI is used to upload codebases and models to the Tensorleap platform.
Uploading assets to the platform could be done in two ways:
* [Uploading code that access local assets or publicly available assets](#uploading-code-only)
* [Uploading a code that requires to authenticate to a cloud or service](#uploading-a-codebase-that-requires-a-secret)
* [Uploading a code and model](#uploading-both-a-code-and-model)
### Uploading Model-Code pair
In order to upload a model and a codebase, from within the root of the repo (where leap.yaml is located), run:\
`leap push`
This would first try to [upload your code](#uploading-code-only) and would then try to [upload the model](#uploading-a-model).
This expects the [leap\_integration\_test](/tensorleap-integration/integration-test) interface to be implemented so that the platform knows what how to connect your code and model.
### Overriding existing Code
In order to override the code in a model-code pair within the platform, from within the root of the repo (where [leap.yaml ](/tensorleap-integration/leap.yaml)is located), run: `leap push` and instead of creating a new version, choose the one you already created.
{% hint style="danger" %}
If you override existing code the only supported change without running evaluation again is changes in the visualizations code. If you change any metric/metadata/data loading code you will need to re-evaluate.
{% endhint %}
The first action that happens on code push and requirement.txt upload is a creation of a virtual environment. This might take some time at first creation, but subsequent upload with the same requirements will utilize this existing virtual environment.
Next, the code is uploaded to the platform. The server would try to run the [preprocess function](/tensorleap-integration/writing-integration-code/preprocess-function), get an [input](/tensorleap-integration/writing-integration-code/input-encoder), get a [GT](/tensorleap-integration/writing-integration-code/ground-truth-encoder), and run all of the [metadata](/tensorleap-integration/writing-integration-code/metadata-function) for the first index of the dataset.
If this is able to run successfully, the CLI should show:
```
INFO Code parsed successfully
```
Otherwise, the CLI should print the stack trace with the error it got. For a more complete log, login to the platform and review the runs & processes menu.
{% hint style="danger" %}
Common code integration errors may occur when:
* [Integration](/tensorleap-integration/writing-integration-code) interface contract (i.e. shapes, types) was not kept. Please ensure you have been able to run a [local integration test](/tensorleap-integration/integration-test) successfully.
* Some of the files were not included in the leap.yaml.
* An error in accessing a specific path. please ensure that all of the data you want to read from storage in the code integration (including configs, labels, or any other assets) is located within a folder that was mounted to the Tensorleap server [on installation ](/getting-started/tensorleap-setup/installation#tensorleap-server). The **leap server info** command lists the mounted folders under the datasetvolumes property.
{% endhint %}
#### Uploading A codebase that requires a secret
In order to access a cloud storage, or some other service that requires a secret within your code, you can Utilize the [Secret Manager](/user-interface/secrets-management). After uploading a secret to the platform, you can associate this secret with your current integration by running:
```
leap secrets set
```
This would interactively let you choose which secret would you like to use within this code. Once set, the secret could be used within the code by referencing
```python
import os
auth_secret_string = os.environ['AUTH_SECRET']
```
{% hint style="info" %}
This environment variable would be set automatically once the codebase is uploaded & utilized within the Tensorleap server. For the[ local integration test](/tensorleap-integration/integration-test) we recommend setting an environment variable with the same name in your local environment for consistency purposes.
{% endhint %}
If [leap.yaml](/tensorleap-integration/leap.yaml) fields are invalid or if this is the first integration of the code and some fields are missing, the CLI would interactively ask the user to choose an existing project or create a new one. It would also inteartively ask for a model name.
# Python API
This section contains reference documentation for the Tensorleap library interfaces.
* [**code\_loader**](/tensorleap-integration/python-api/code_loader)
# code\_loader
The `code_loader` is a library provided by Tensorleap that includes:
* [**PreprocessResponse**](/tensorleap-integration/python-api/code_loader/datasetclasses/preprocessresponse)
* [**leap\_binder**](/tensorleap-integration/python-api/code_loader/leap_binder)
* [**enums**](/tensorleap-integration/python-api/code_loader/enums)
# Decorators
{% hint style="info" %}
This page contains the decoders that register functions with Tensorleap, upgraded from the previous [leap\_binder bindings](/tensorleap-integration/python-api/code_loader/leap_binder).
{% endhint %}
The Tensorleap decorators register the different functions that are required for Tensorleap to process and load your dataset: [**Preprocessing Function**](/tensorleap-integration/writing-integration-code/preprocess-function), [**Input Encoders**](/tensorleap-integration/writing-integration-code/input-encoder), [**Ground Truth Encoders**](/tensorleap-integration/writing-integration-code/ground-truth-encoder) and [**Metadata Functions**](/tensorleap-integration/writing-integration-code/metadata-function).
The **decorators** include:
* [@tensorleap\_preprocess](/tensorleap-integration/python-api/code_loader/decorators/tensorleap_preprocess)
* [@tensorleap\_input\_encoder](/tensorleap-integration/python-api/code_loader/decorators/tensorleap_input_encoder)
* [@tensorleap\_gt\_encoder](/tensorleap-integration/python-api/code_loader/decorators/tensorleap_gt_encoder)
* [@tensorleap\_custom\_loss](/tensorleap-integration/python-api/code_loader/decorators/tensorleap_custom_loss)
* [@tensorleap\_metadata](/tensorleap-integration/python-api/code_loader/decorators/tensorleap_metadata)
* [@tensorleap\_custom\_visualizer](/tensorleap-integration/python-api/code_loader/decorators/tensorleap_custom_visualizer)
# @tensorleap\_preprocess
code\_loader.inner\_leap\_binder.leapbinder\_decorators.tensorleap\_preprocess
The `tensorleap_preprocess` decorates a [**Preprocessing Function**](/tensorleap-integration/writing-integration-code/preprocess-function)
```python
@tensorleap_preprocess()
def preprocess_func_leap() -> List[PreprocessResponse]:
pass
```
### Examples
#### Basic Usage
```python
from code_loader.contract.datasetclasses import PreprocessResponse
from code_loader.contract.enums import DataStateType
from code_loader.inner_leap_binder.leapbinder_decorators import tensorleap_preprocess
# Preprocessing Function
@tensorleap_preprocess()
def preprocessing_func() -> List[PreprocessResponse]:
...
train = PreprocessResponse(length=len(train_df), data=train_df, state=DataStateType.training)
val = PreprocessResponse(length=len(val_df), data=val_df, state=DataStateType.validation)
test = PreprocessResponse(length=len(test_df), data=test_df, state=DataStateType.test)
unlabeled = PreprocessResponse(length=len(test_df), data=unlabeled_df, state=DataStateType.unlabeled)
return [train, val, test, unlabeled]
```
Usage within the full script can be found at the [**Dataset Script**](/tensorleap-integration/writing-integration-code#dataset-script).
#### Guides
Full examples can be found at the **Dataset Integration** section of the following guides:
* [**MNIST Guide**](/guides/full-guides/mnist-guide)
* [**IMDB Guide**](/guides/full-guides/imdb-guide)
# @tensorleap\_input\_encoder
code\_loader.inner\_leap\_binder.leapbinder\_decorators.tensorleap\_preprocess.tensorleap\_input\_encoder
The `tensorleap_input_encoder` decorates an [**Input Encoder**](/tensorleap-integration/writing-integration-code/input-encoder)
```python
@tensorleap_input_encoder(name='image', channel_dim=-1)
def input_encoder(idx: int, preprocess: PreprocessResponse) -> np.ndarray:
pass
```
Args
name
(str) with the given name of the input, e.g. image.
channel_dim
(int, optional) The dimension of the channels in the result. Default is -1 (channel last).
Example: If return shape of the function is [H,W,3] -> channel_dim=-1 If return shape of the function is [3,H,W] -> channel_dim=1
Returns:
a np.ndarray typed input (without a batch dimension)
### Examples
#### Basic Usage
```python
import numpy as np
from code_loader.contract.datasetclasses import PreprocessResponse
from code_loader.inner_leap_binder.leapbinder_decorators import tensorleap_input_encoder
...
@tensorleap_input_encoder('image')
def input_encoder(idx: int, preprocess: PreprocessResponse) -> np.ndarray:
return preprocess.data['images'][idx].astype('float32')
```
Usage within the full script can be found at [**Dataset Script**](/tensorleap-integration/writing-integration-code#dataset-script).
#### Guides
Full examples can be found at the **Dataset Integration** section of the following guides:
* [**MNIST Guide**](/guides/full-guides/mnist-guide)
* [**IMDB Guide**](/guides/full-guides/imdb-guide)
# @tensorleap\_gt\_encoder
code\_loader.inner\_leap\_binder.leapbinder\_decorators.tensorleap\_preprocess.tensorleap\_gt\_encoder
The `tensorleap_gt_encoder` decorates a [**Ground Truth Encoder**](/tensorleap-integration/writing-integration-code/ground-truth-encoder)**.**
```python
@tensorleap_gt_encoder(name='classes')
def gt_encoder(idx: int, preprocessing: PreprocessResponse) -> np.ndarray:
pass
```
Args
name
(str) The name of the ground truth, e.g. classes
Returns:
a np.ndarray gt (without a batch dimension)
### Examples
#### Basic Usage
```python
import numpy as np
from code_loader.contract.datasetclasses import PreprocessResponse
from code_loader.inner_leap_binder.leapbinder_decorators import tensorleap_gt_encoder
...
@tensorleap_gt_encoder('classes')
def gt_encoder(idx: int, preprocessing: PreprocessResponse) -> np.ndarray:
return preprocessing.data['labels'][idx].astype('float32')
```
Usage within the full script can be found at [**Integration Script**](/tensorleap-integration/writing-integration-code#dataset-script).
#### Guides
Full examples can be found at the **Dataset Integration** section of the following guides:
* [**MNIST Guide**](/guides/full-guides/mnist-guide)
* [**IMDB Guide**](/guides/full-guides/imdb-guide)
# @tensorleap\_custom\_loss
code\_loader.inner\_leap\_binder.leapbinder\_decorators.tensorleap\_preprocess.tensorleap\_custom\_loss
The purpose of the `tensorleap_custom_loss` decorator is to register the [**Custom Loss Function(s)**](/tensorleap-integration/writing-integration-code/custom-loss-function) to be used within the platform. This function adds the custom loss function to the selection list within the **CustomLoss** node.
```python
@tensorleap_custom_loss(name='weighted_ce')
def loss(tensor_1: np.ndarray, tensor_2: np.ndarray, ...) -> np.ndarray:
pass
```
Args
name
(str) with the given name of the custom loss.
#### Loss Function inputs:
np.ndarray tensors with a batch dimension
#### Loss Function outputs:
np.ndarray batched loss values
### Examples
#### Basic Usage
```python
from code_loader.contract.datasetclasses import PreprocessResponse
from code_loader.inner_leap_binder.leapbinder_decorators import tensorleap_custom_loss
import numpy as np
...
@tensorleap_custom_loss(name='weighted_ce')
def weighted_categorical_crossentropy(y_true :np.ndarray, y_pred: np.ndarray) -> np.ndarray:
# Normalize predictions so each sample's probabilities sum to 1
y_pred = y_pred / np.sum(y_pred, axis=-1, keepdims=True)
# Clip predictions to avoid log(0) and ensure numerical stability
epsilon = 1e-7 # Similar to K.epsilon()
y_pred = np.clip(y_pred, epsilon, 1 - epsilon)
# Define class weights
weights = np.array([0.5, 2.1, 3, 4, 4, 4, 4, 4])
# Compute weighted log loss
loss = y_true * np.log(y_pred) * weights
loss = -np.sum(loss, axis=-1)
return loss
```
# @tensorleap\_custom\_metric
code\_loader.inner\_leap\_binder.leapbinder\_decorators.tensorleap\_preprocess.tensorleap\_custom\_metric
The purpose of the `tensorleap_custom_metric` decorator is to add a [custom metric ](/tensorleap-integration/writing-integration-code/custom-metrics)suited to your needs to the tensorleap platform.
```python
@tensorleap_custom_metric(name='metrics',
direction=MetricDirection.Downward,
compute_insights=None)
def metrics(
tensor_1: npt.NDArray[np.float32],
tensor_2: npt.NDArray[np.float32],
...
) -> Union[npt.NDArray[np.float32], Dict[str, npt.NDArray[np.float32]]]:
pass
```
Args
name
The name of the the metric
direction
(optional, defaults toMetricDirection.Downward)
For a metric where lower values are better use MetricDirection.Downward
For a metric where higher values are better use MetricDirection.Upward
compute_insights
(optional, defaults to None). Specify metrics that should not have insights computed on them:
in case the metric function returns a dictionary, compute_insights should return a dictionary as well, mapping metric names to booleans.
otherwise, compute_insights=False if this metric should be ommited when computing insights
#### Metric Function inputs:
np.ndarray tensors with a batch dimension
#### Metric Function outputs:
np.ndarray batched metric values
### Examples
#### Basic Usage
```python
import numpy as np
import numpy.typing as npt
from code_loader.inner_leap_binder.leapbinder_decorators import tensorleap_custom_metric
@tensorleap_custom_metric(name='metrics',
direction=MetricDirection.Downward,
compute_insights=None)
def custom_metric_distances(
y_true: npt.NDArray[np.float32],
y_pred: npt.NDArray[np.float32]
) -> dict[str, npt.NDArray[np.float32]]:
diff = y_true - y_pred
axis = tuple(range(1, diff.ndim))
return {
"mean_difference": np.mean(diff, axis=axis),
"mean_absolute_difference": np.mean(np.abs(diff), axis=axis)
}
```
Full script usage can be found at [**Integration Script**](/tensorleap-integration/writing-integration-code#dataset-script).
# @tensorleap\_custom\_visualizer
code\_loader.inner\_leap\_binder.leapbinder\_decorators.tensorleap\_preprocess.tensorleap\_custom\_visualizer
The `tensorleap_custom_visualizer` decorates a [**Visualizer Function**](/tensorleap-integration/writing-integration-code/visualizer-function).
```python
@tensorleap_custom_visualizer(name='image_visualizer',
visualizer_type=LeapDataType.Image,
heatmap_function=None)
def image_visualizer(image: np.ndarray) -> LeapImage:
pass
```
Args
name
(str) with the given name of the visualization, e.g. image_visualzier.
visualizer_type
(LeapDataType) This property sets the type of the data to be visualized by the visualizer.
heatmap_function
(optional)
Callable[[npt.NDArray[np.float32]], npt.NDArray[np.float32]] This parameter points to a function that modifies the heatmap data before visualization.
#### Visualizer inputs:
np.ndarray tensors with a batch dimension. This batch would always be 1.
#### Visualizers outputs:
One of the [visualizer objects](/tensorleap-integration/python-api/code_loader/visualizer_classes) contraining a squeezed (no-batch) object.
### Examples
#### Basic Usage
```python
import numpy as np
from code_loader.contract.visualizer_classes import LeapImage
from code_loader.contract.enums import LeapDataType
...
@tensorleap_custom_visualizer(name='image_visualizer', visualizer_type=LeapDataType.Image)
def image_visualizer(image: np.ndarray) -> LeapImage:
image = image / image.max()
image = image.squeeze(0)
return LeapImage(image)
```
The [**decoder\_classes**](/tensorleap-integration/python-api/code_loader/visualizer_classes) pages contain additional, decoder specific, examples. Moreover, full script usage can be found in [**Integration Script**](/tensorleap-integration/writing-integration-code#dataset-script).
#### Resize Image and Heatmap
When changing the original data shape in the *visualizer function,* we need to reshape the heatmap data that is projected. `heatmap_visualizer` points to a function that modifies the heatmap data respectively. Consider the following example:
```python
from code_loader.contract.visualizer_classes import LeapImage
import numpy.typing as npt
def resized_image_visualizer_heatmap(data: npt.NDArray[np.float32]) -> npt.NDArray[np.float32]:
# data is the heatmap with original size (origin_W, origin_H)
return np.resize(data, (256, 512)) # we reshape to the resized shape
@tensorleap_custom_visualizer(name='image_visualizer',
visualizer_type=LeapDataType.Image,
heatmap_function=resized_image_visualizer_heatmap)
def resized_image_visualizer(data: npt.NDArray[np.float32]) -> LeapImage:
return LeapImage(np.resize(data, (256, 512, 3)))
```
#### Guides
Full examples can be found in the **Dataset Integration** section of the following guides:
* [**MNIST Guide**](/guides/full-guides/mnist-guide)
* [**IMDB Guide**](/guides/full-guides/imdb-guide)
# @tensorleap\_metadata
code\_loader.inner\_leap\_binder.leapbinder\_decorators.tensorleap\_preprocess.tensorleap\_metadata
The `tensorleap_metadata` decorates a [**Metadata Function**](/tensorleap-integration/writing-integration-code/metadata-function).
```python
@tensorleap_metadata(name='metadata_sample_index', metadata_type={"label": DatasetMetadataType.int, "is_circle": DatasetMetadataType.boolean})
def metadata_sample_index(idx: int, preprocess: PreprocessResponse) -> Union[int, str, bool, float, Dict[str, Union[int, str, bool, float]]]:
pass
```
Args
metadata_type
(DatasetMetadataType, optional) This property helps visualize the metadata data.
For a float metadata value, use DatasetMetadataType.float
For a string metadata value, use DatasetMetadataType.string
For a int metadata value, use DatasetMetadataType.int
For a boolean metadata value, use DatasetMetadataType.boolean
For a dictionary return a dictionary that maps key name to key type
Providing MetadataType becomes mendatory if some of the samples has a "None" value for the metadata
name
(str) The given name of the metadata, e.g. label.
### Examples
#### Basic Usage
```python
from code_loader.contract.datasetclasses import PreprocessResponse
from code_loader.inner_leap_binder.leapbinder_decorators import tensorleap_metadata
import numpy as np
...
@tensorleap_metadata(name='metadata_label_description', metadata_type={"label": DatasetMetadataType.int, "is_circle": DatasetMetadataType.boolean})
def metadata_label(idx: int, preprocess: PreprocessResponse) -> Dict[str, Union[int, bool]]:
return {
'label': int_metadata_creator(preprocess, idx),
'is_circle': bool_metadata_creator(preprocess, idx),
}
```
Usage within the full script can be found at [**Dataset Script**](/tensorleap-integration/writing-integration-code#dataset-script).
#### Guides
Full examples can be found at the **Dataset Integration** section of the following guides:
* [**MNIST Guide**](/guides/full-guides/mnist-guide)
* [**IMDB Guide**](/guides/full-guides/imdb-guide)
# @tensorleap\_load\_model
code\_loader.inner\_leap\_binder.leapbinder\_decorators.tensorleap\_load\_model
import os
from code_loader.contract.datasetclasses import PredictionTypeHandler
from code_loader.inner_leap_binder.leapbinder_decorators import tensorleap_load_model
import tensorflow as tf


prediction_type1 = PredictionTypeHandler('classes',[str(i) for i in range(10)])

@tensorleap_load_model(prediction_types=[prediction_type1])
def load_model():
    dir_path = os.path.dirname(os.path.abspath(__file__))
    model_path = 'model/model.h5'
    cnn = tf.keras.models.load_model(os.path.join(dir_path, model_path))
    return cnn
Args
prediction_types
(Optional, List[PredictionTypeHandler]) This property defines the outputs of the model uploaded to Tensorleap: their names, labels, and channels_dim (=1 for channels first and =-1 for channels last).
### PredictionTypes Examples
#### MNIST example
One output, which we name `classes` that has 10 channels, each a logit for the classification of a digit
```python
from code_loader.contract.datasetclasses import PredictionTypeHandler
from code_loader.inner_leap_binder.leapbinder_decorators import tensorleap_load_model
prediction_type1 = PredictionTypeHandler('classes', [str(i) for i in range(10)])
@tensorleap_load_model(prediction_types=[prediction_type1])
def load_model():
#Retrun an .onnx or .h5 model
...
```
#### YOLO example
Four outputs:
* a conctatenated prediction with #channels = 4 + #classes
* Three scales, with #channels of 20,40,80
```python
from code_loader.contract.datasetclasses import PredictionTypeHandler
from code_loader.inner_leap_binder.leapbinder_decorators import tensorleap_load_model
prediction_type1 = PredictionTypeHandler(name='object detection', labels=["x", "y", "w", "h"] + [cl for cl in all_clss.values()], channel_dim=1)
prediction_type2 = PredictionTypeHandler(name='concatenate_20', labels=[str(i) for i in range(20)], channel_dim=-1)
prediction_type3 = PredictionTypeHandler(name='concatenate_40', labels=[str(i) for i in range(40)], channel_dim=-1)
prediction_type4 = PredictionTypeHandler(name='concatenate_80', labels=[str(i) for i in range(80)], channel_dim=-1)
@tensorleap_load_model(prediction_types=[prediction_type1, prediction_type2, prediction_type3, prediction_type4])
def load_model():
#Retrun an .onnx or .h5 model
...
```
# @tensorleap\_integration\_test
code\_loader.inner\_leap\_binder.leapbinder\_decorators.tensorleap\_integration\_test
The tensorleap\_integration\_test decorates Tensorleap's [integration test](/tensorleap-integration/integration-test), and is used to instruct the platform on what code interfaces should be used when analyzing your model and to locally test the validity of a Tensorleap integration script.
```python
@tensorleap_integration_test()
def integration_test(idx: int, subset: PreprocessResponse) -> None:
pass
```
### Examples
#### Basic Usage
```python
from code_loader.plot_functions.visualize import visualize
from code_loader.inner_leap_binder.leapbinder_decorators import tensorleap_integration_test
# Import your integration functions (defined in your integration script)
from leap_integration import (
preprocess_func, input_encoder, gt_encoder,
image_visualizer, my_metric, my_loss, load_model
)
@tensorleap_integration_test()
def integration_test(idx, subset):
image = input_encoder(idx, subset)
gt = gt_encoder(idx, subset)
model = load_model()
y_pred = model([image])
img_vis = image_visualizer(image)
visualize(img_vis)
metric_res = my_metric(gt, y_pred)
loss_res = my_loss(gt, y_pred)
print(metric_res, loss_res)
if __name__ == '__main__':
train, val, *_ = preprocess_func()
for i in range(3):
integration_test(i, train)
integration_test(i, val)
```
# leap\_binder
code\_loader.leap\_binder
{% hint style="warning" %}
Previous Tensorleap versions had multiple binding functions in the leap\_binder that were used to register your model and dataset. Please refer to [Tensorleap decorators](/tensorleap-integration/python-api/code_loader/decorators) to see how to register your functions for the Tensorleap Platform using the up-to-date syntax.
{% endhint %}
{% content-ref url="/spaces/9UXeOlFqlw8pl79U2HGU/pages/TwUZ5gkpmUgyDtU36VQ8" %}
[enums](/tensorleap-integration/python-api/code_loader/enums)
{% endcontent-ref %}
The `leap_binder` object defines project level information needed to visualize your predictions.
The **leap\_binder** functions:
* [**add\_prediction**](/tensorleap-integration/python-api/code_loader/leap_binder/add_prediction)
# add\_prediction
code\_loader.leap\_binder.add\_prediction
The purpose of the `leap_binder.add_prediction` function is to describe the prediction(s) tensors for visualization and analysis purposes. This function adds a prediction type, which later can be assigned to the model graph prediction node(s).
```python
code_loader.leap_binder.add_prediction(
name=str,
labels=List[str]
channel_dim: int = -1
)
```
Args
name
(str) with the given name of the input, e.g. image
labels
(List[str]) an array containing the labels associated with this prediction
channel_dim
(defaults to -1). The dimension in which the channels exists in the prediction. channel_dim should be set to 1 for channel first predictions (i.e. - C,H,W).
### Examples
#### Basic Usage
```python
...
LABELS = ['0','1','2','3','4','5','6','7','8','9']
leap_binder.add_prediction(
name='predicted_digit',
labels=LABELS
)
```
Full script usage can be found at [**Integration Script**](/tensorleap-integration/writing-integration-code#dataset-script).
#### Guides
Full examples can be found at the **Dataset Integration** section of the following guides:
* [**MNIST Guide**](/guides/full-guides/mnist-guide)
* [**IMDB Guide**](/guides/full-guides/imdb-guide)
# add\_custom\_metric
The purpose of the `leap_binder.`add\_custom\_metric function is to add a [custom metric ](/tensorleap-integration/writing-integration-code/custom-metrics)suited to your needs to the tensorleap platform.
```python
code_loader.leap_binder.add_custom_metric(
function=Callable[..., tf.Tensor],
name=str
)
```
Args
function
A function that returns the required metrics
name
The name of the the metric
### Examples
#### Basic Usage
```python
import tensorflow as tf
def custom_metric_mean_distance(y_true, y_pred):
rank = len(y_true.shape)
axis = range(1, rank)
diff = y_true - y_pred
return tf.reduce_mean(diff, axis=axis)
leap_binder.add_custom_metric(custom_metric_mean_distance, "mean distance")
```
Full script usage can be found at [**Integration Script**](/tensorleap-integration/writing-integration-code#dataset-script).
# set\_preprocess
code\_loader.leap\_binder.set\_preprocessing
The `leap_binder.set_preprocessing` binding function points to the [**Preprocessing Function**](/tensorleap-integration/writing-integration-code/preprocess-function), and sets the `name` for future reference.
```python
code_loader.leap_binder.set_preprocess(
function=Callable[[], List[PreprocessResponse]]
)
```
Args
function
(Callable) This parameter points to the Preprocess Function mentioned above.
### Examples
#### Basic Usage
```python
from code_loader import leap_binder
from code_loader.contract.datasetclasses import PreprocessingResponse
# Preprocessing Function
def preprocessing_func() -> List[PreprocessingResponse]:
...
train = PreprocessingResponse(length=len(train_df), data=train_df)
val = PreprocessingResponse(length=len(val_df), data=val_df)
test = PreprocessingResponse(length=len(test_df), data=test_df)
return [train, val, test]
leap_binder.set_preprocessing(function=preprocessing_func)
```
Usage within the full script can be found at the [**Dataset Script**](/tensorleap-integration/writing-integration-code#dataset-script).
#### Guides
Full examples can be found at the **Dataset Integration** section of the following guides:
* [**MNIST Guide**](/guides/full-guides/mnist-guide)
* [**IMDB Guide**](/guides/full-guides/imdb-guide)
# set\_unlabeled\_data\_preprocess
code\_loader.leap\_binder.set\_unlabeled\_data\_preprocess
The `leap_binder.set_unlabeled_data_preprocess` binding function points to a preprocessing, similar to the [**Preprocessing Function**](/tensorleap-integration/writing-integration-code/preprocess-function), but points to unlabeled data lacking the ground-truth values.
This is often used to prioritize samples for labeling, which can be done by using the [**Fetch Similar**](/user-interface/dashboards/dashlets/sample-analysis#fetch-similar) analysis.
```python
code_loader.leap_binder.set_unlabeled_data_preprocess(
function=Callable[[], PreprocessResponse]
)
```
Args
function
(Callable) This parameter points to the Preprocess Function mentioned above.
### Examples
#### Basic Usage
```python
from code_loader import leap_binder
from code_loader.contract.datasetclasses import PreprocessingResponse
# Preprocessing Function
def unlabeled_preprocessing_func() -> PreprocessingResponse:
...
return PreprocessingResponse(length=len(unlabeled_df), data=unlabeled_df)
leap_binder.set_unlabeled_data_preprocess(function=unlabeled_preprocessing_func)
```
Usage within the full script can be found at the [**Dataset Script**](/tensorleap-integration/writing-integration-code#dataset-script).
#### Guides
Full examples can be found at the **Dataset Integration** section of the following guides:
* [**MNIST Guide**](/guides/full-guides/mnist-guide)
* [**IMDB Guide**](/guides/full-guides/imdb-guide)
# set\_input
code\_loader.leap\_binder.set\_input
The `leap_binder.set_input` binding function points to [**Input Encoder**](/tensorleap-integration/writing-integration-code/input-encoder) and `name` for reference.
```python
code_loader.leap_binder.set_input(
function=Callable[[int, PreprocessResponse], np.ndarray]
name=str
)
```
Args
function
(Callable) This parameter points to the Input Encoder function mentioned above.
name
(str) with the given name of the input, e.g. image.
### Examples
#### Basic Usage
```python
from code_loader import leap_binder
from code_loader.contract.datasetclasses import PreprocessResponse
from code_loader.contract.enums import DatasetInputType
...
def image_input_encoder(idx: int, subset: PreprocessResponse) -> np.ndarray:
return subset.data.iloc[idx]['image'].astype('float32')
leap_binder.set_input(
function=image_input_encoder,
input_name='image'
)
```
Usage within the full script can be found at [**Dataset Script**](/tensorleap-integration/writing-integration-code#dataset-script).
#### Guides
Full examples can be found at the **Dataset Integration** section of the following guides:
* [**MNIST Guide**](/guides/full-guides/mnist-guide)
* [**IMDB Guide**](/guides/full-guides/imdb-guide)
# set\_ground\_truth
code\_loader.leap\_binder.set\_ground\_truth
The `leap_binder.set_ground_truth` binding function points to the [**Ground Truth Encoder**](/tensorleap-integration/writing-integration-code/ground-truth-encoder) and `name` for reference.
```python
code_loader.leap_binder.set_ground_truth(
function=Callable[[int, PreprocessingResponse], np.ndarray]
name=str
)
```
Args
function
(Callable) This parameter points to the Ground Truth Encoder function mentioned above.
name
(str) with the given name of the input, e.g. image
### Examples
#### Basic Usage
```python
from code_loader import leap_binder
from code_loader.contract.datasetclasses import PreprocessResponse
...
def gt_encoder(idx: int, preprocessing: Union[PreprocessResponse, list]) -> np.ndarray:
return preprocessing.data.iloc[idx]['ground_truth'].astype('float32')
leap_binder.set_ground_truth(
function=gt_encoder,
gt_name='classes'
)
```
Usage within the full script can be found at [**Integration Script**](/tensorleap-integration/writing-integration-code#dataset-script).
#### Guides
Full examples can be found at the **Dataset Integration** section of the following guides:
* [**MNIST Guide**](/guides/full-guides/mnist-guide)
* [**IMDB Guide**](/guides/full-guides/imdb-guide)
# set\_metadata
code\_loader.leap\_binder.set\_ground\_truth
The `leap_binder.set_metadata` binding function points to [**Metadata Function**](/tensorleap-integration/writing-integration-code/metadata-function). In addition, it defines the `metadata_type` and `name` for reference.
```python
code_loader.leap_binder.set_metadata(
function=MetadataSectionCallableInterface,
metadata_type=DatasetMetadataType,
name=str
)
```
Args
function
(MetadataSectionCallableInterface) This parameter points to the Metadata Function mentioned above.
For a float ground truth, use DatasetMetadataType.float
For a string ground truth, use DatasetMetadataType.string
For a int ground truth, use DatasetMetadataType.int
For a boolean ground truth, use DatasetMetadataType.boolean
name
(str) with the given name of the input, e.g. image.
### Examples
#### Basic Usage
```python
from code_loader import leap_binder
from code_loader.contract.datasetclasses import PreprocessResponse
...
def metadata_label(idx: int, subset: Union[PreprocessResponse, list]) -> str:
return subset.data.iloc[idx]['label']
leap_binder.set_metadata(
function=metadata_label,
metadata_type=DatasetMetadataType.str,
name='label'
)
```
Usage within the full script can be found at [**Dataset Script**](/tensorleap-integration/writing-integration-code#dataset-script).
#### Guides
Full examples can be found at the **Dataset Integration** section of the following guides:
* [**MNIST Guide**](/guides/full-guides/mnist-guide)
* [**IMDB Guide**](/guides/full-guides/imdb-guide)
# add\_custom\_loss
code\_loader.leap\_binder.add\_custom\_loss
The purpose of the `leap_binder.add_custom_loss` function is to register the [**Custom Loss Function(s)**](/tensorleap-integration/writing-integration-code/custom-loss-function) to be used within the platform. This function adds the custom loss function to the selection list within the **CustomLoss** node.
```python
code_loader.leap_binder.add_custom_loss(
function=CustomCallableInterface,
name=str
)
```
Args
function
(CustomCallableInterface) This parameter points to the custom Loss Function.
name
(str) with the given name of the custom loss.
### Examples
#### Basic Usage
```python
import numpy as np
from code_loader import leap_binder
...
def weighted_categorical_crossentropy(y_true, y_pred):
# scale predictions so that the class probas of each sample sum to 1
y_pred /= K.sum(y_pred, axis=-1, keepdims=True)
# clip to prevent NaN's and Inf's
y_pred = K.clip(y_pred, K.epsilon(), 1 - K.epsilon())
# calc
weights = np.array([0.5, 2.1, 3, 4, 4, 4, 4, 4])
loss = y_true * K.log(y_pred) * weights
loss = -K.sum(loss, -1)
return loss
...
leap_binder.add_custom_loss(
function=weighted_categorical_crossentropy,
name='weighted_categorical_crossentropy'
)
```
# set\_visualizer
code\_loader.leap\_binder.set\_visualizer
The `leap_binder.set_visualizer` binding function points to [**Visualizer Function**](/tensorleap-integration/writing-integration-code/visualizer-function). In addition, it defines the `visualizer_type` and `name` for reference.
```python
code_loader.leap_binder.set_visualizer(
name=str,
function=VisualizerCallableInterface,
visualizer_type=LeapDataType,
heatmap_visualizer=Optional[Callable[[npt.NDArray[np.float32]], npt.NDArray[np.float32]]]
)
```
Args
function
(VisualizerCallableInterface) This parameter points to the Visualizer Function mentioned above.
name
(str) with the given name of the input, e.g. image.
visualizer_type
(LeapDataType) This property sets the type of the data to be visualized by the visualizer.
heatmap_visualizer
(optional)
Callable[[npt.NDArray[np.float32]], npt.NDArray[np.float32]] This parameter points to a function that modifies the heatmap data before visualization.
### Examples
#### Basic Usage
```python
import numpy as np
from code_loader.contract.visualizer_classes import LeapText
from code_loader import leap_binder
...
def text_visualizer_func(data: np.ndarray) -> LeapText:
tokenizer = leap_binder.custom_tokenizer
text = tokenizer.sequences_to_texts(data)
return LeapText(text)
leap_binder.set_visualizer(
function=text_visualizer_func,
visualizer_type=LeapText.type,
name='text_from_token'
)
```
The [**decoder\_classes**](/tensorleap-integration/python-api/code_loader/visualizer_classes) pages contain additional, decoder specific, examples. Moreover, full script usage can be found in [**Integration Script**](/tensorleap-integration/writing-integration-code#dataset-script).
#### Resize Image and Heatmap
When changing the original data shape in the *visualizer function,* we need to reshape the heatmap data that is projected. `heatmap_visualizer` points to a function that modifies the heatmap data respectively. Consider the following example:
```python
from code_loader.contract.visualizer_classes import LeapImage
from code_loader import le
def resized_image_visualizer(data: npt.NDArray[np.float32]) -> LeapImage:
return LeapImage(np.resize(data, (256, 512, 3)))
def resized_image_visualizer_heatmap(data: npt.NDArray[np.float32]) -> npt.NDArray[np.float32]:
# data is the heatmap with original size (origin_W, origin_H)
return np.resize(data, (256, 512)) # we reshape to the resized shape
leap_binder.set_visualizer(
function=resized_image_visualizer,
name='resized_image_visualizer',
visualizer_type=LeapImage.type,
heatmap_visualizer=resized_image_visualizer_heatmap
)
```
#### Guides
Full examples can be found in the **Dataset Integration** section of the following guides:
* [**MNIST Guide**](/guides/full-guides/mnist-guide)
* [**IMDB Guide**](/guides/full-guides/imdb-guide)
# enums
code\_loader.contract.enums
An enumeration is a set of members with unique and constant values. The [**code\_loader**](/tensorleap-integration/python-api/code_loader) enums include:
* [**DatasetInputType**](broken://pages/rc5DsqsmPiezOdD4H6ri)
* [**DatasetOutputType**](broken://pages/Dpx4k6G0N6hcloLK8msY)
* [**DatasetMetadataType**](/tensorleap-integration/python-api/code_loader/enums/datasetmetadatatype)
### Examples
Full examples can be found at the **Dataset Integration** section of the following guides:
* [**MNIST Guide**](/guides/full-guides/mnist-guide)
* [**IMDB Guide**](/guides/full-guides/imdb-guide)
# DatasetMetadataType
code\_loader.contract.enums.DatasetMetadataType
```python
class DatasetMetadataType(Enum):
float = "float"
string = "string"
int = "int"
boolean = "boolean"
```
#### Basic Usage
```python
from code_loader.contract.enums import DatasetMetadataType
```
# LeapDataType
code\_loader.contract.enums.LeapDataType
```python
class LeapDataType(Enum):
Image = 'Image'
Text = 'Text'
Graph = 'Graph'
HorizontalBar = 'HorizontalBar'
ImageMask = 'ImageMask'
TextMask = 'TextMask'
ImageWithBBox = 'ImageWithBBox'
ImageWithHeatmap = 'ImageWithHeatmap'
Video = 'Video'
```
#### Basic Usage
```python
from code_loader.contract.enums import LeapDataType
```
# DataStateType
```python
class DataStateType(Enum):
training = "training"
validation = "validation"
test = "test"
unlabeled = "unlabeled"
```
#### Basic Usage
```python
from code_loader.contract.enums import DataStateType
```
# datasetclasses
code\_loader.contract.datasetclasses
The **datasetclasses** represent a set of data classes that are used with the [**code\_loader**](/tensorleap-integration/python-api/code_loader).\
The [**code\_loader**](/tensorleap-integration/python-api/code_loader) dataset classes include:
* [**PreprocessResponse**](/tensorleap-integration/python-api/code_loader/datasetclasses/preprocessresponse)
* [**PredictionTypeHandler**](/tensorleap-integration/python-api/code_loader/datasetclasses/predictiontypehandler)
* [**LeapAnalysisConfiguration**](/tensorleap-integration/python-api/code_loader/datasetclasses/leapanalysisconfiguration)
### Examples
Full examples can be found at the **Dataset Integration** section of the following guides:
* [**MNIST Guide**](/guides/full-guides/mnist-guide)
* [**IMDB Guide**](/guides/full-guides/imdb-guide)
# PreprocessResponse
code\_loader.contract.datasetclasses.PreprocessResponse
An object that holds the samples data and length. This object is generated in the Preprocessing Function for each dataset slice. Then passed to the **input encoders**, **ground\_truth encoders** and **metadata** functions as an argument.
```python
from code_loader.contract.enums import DataStateType
@dataclass
class PreprocessResponse:
length: Optional[int] = None
data: Any = None
sample_ids: Optional[Union[List[str], List[int]]] = None
state: Optional[DataStateType] = None
sample_id_type: Optional[Union[Type[str], Type[int]]] = None
```
For more on `PreprocessResponse`:
Args
length
(int, deprecated) Number of samples in the slice. Deprecated — use sample_ids instead.
data
(Any) Dictionary / pandas.DataFrame / List or any object that describes the dataset features. The data parameter is later passed to the input encoders, ground_truth encoders, and metadata functions.
sample_ids
A list of unique identifiers for each sample in the slice. IDs should be either a list of ints or strings. Preferred over length.
state
(DataStateType, optional) The dataset split this response belongs to. Recommended to always set explicitly.
sample_id_type
(str/int, optional) The type of the sample IDs. Inferred automatically when using sample_ids.
## Examples
#### Basic Usage
```python
from code_loader.contract.datasetclasses import PreprocessResponse
preprocess_response = PreprocessResponse(sample_ids=list(x_df.index), data=x_df)
```
#### Within the Preprocess Function
Full examples can be found at the **Dataset Integration** section of the following guides:
* [**MNIST Guide**](/guides/full-guides/mnist-guide)
* [**IMDB Guide**](/guides/full-guides/imdb-guide)
# PredictionTypeHandler
code\_loader.contract.datasetclasses.PredictionTypeHandler
The purpose of `PredictionTypeHandler` is to describe the prediction(s) tensors for visualization and analysis purposes.
```python
@dataclass
class PredictionTypeHandler:
name: str
labels: List[str]
channel_dim: int = -1
```
For more on `PredictionTypeHandler`:
Args
name
(str) The given name of the output, e.g. image/logits/entity
labels
(List[str]) an array containing the labels associated with this prediction
channel_dim
(defaults to -1). The dimension in which the channels exists in the prediction. channel_dim should be set to 1 for channel first predictions (i.e. - C,H,W).
## Examples
#### Basic Usage
#### MNIST example
One output, which we name `classes` that has 10 channels, each a logit for the classification of a digit
```python
from code_loader.contract.datasetclasses import PredictionTypeHandler
prediction_type1 = PredictionTypeHandler(name='classes', labels=[str(i) for i in range(10)])
```
#### YOLO example
Four outputs:
* a conctatenated prediction with #channels = 4 + #classes
* Three scales, with #channels of 20,40,80
```python
prediction_type1 = PredictionTypeHandler(name='object detection', labels=["x", "y", "w", "h"] + [cl for cl in all_clss.values()], channel_dim=1)
prediction_type2 = PredictionTypeHandler(name='concatenate_20', labels=[str(i) for i in range(20)], channel_dim=-1)
prediction_type3 = PredictionTypeHandler(name='concatenate_40', labels=[str(i) for i in range(40)], channel_dim=-1)
prediction_type4 = PredictionTypeHandler(name='concatenate_80', labels=[str(i) for i in range(80)], channel_dim=-1)
```
# LeapAnalysisConfiguration
code\_loader.contract.responsedataclasses.LeapAnalysisConfiguration
`LeapAnalysisConfiguration` controls optional engine behaviors for a Tensorleap analysis run. It is set on the `leap_binder` object in your integration script, outside of any decorated function.
```python
@dataclass
class LeapAnalysisConfiguration:
domain_gap_metadata: Optional[List[str]] = None
feature_flags: Optional[List[str]] = None
deterministic_results: Optional[bool] = None
```
Field
domain_gap_metadata
(Optional[List[str]]) Names of metadata fields to use for domain gap analysis. Each name must match a registered @tensorleap_metadata field.
feature_flags
(Optional[List[str]]) List of engine feature flags to enable. See Feature Flags below.
deterministic_results
(Optional[bool]) When True, analysis results are fully deterministic across runs. This increases memory usage and runtime.
## Basic Usage
```python
from code_loader import leap_binder
from code_loader.contract.responsedataclasses import LeapAnalysisConfiguration
leap_binder.leap_analysis_configuration = LeapAnalysisConfiguration(
deterministic_results=True,
feature_flags=['FEATURE_FLAG_MISLABELED_ON_ALL_CATEGORICAL_METADATA'],
)
```
## Feature Flags
Feature flags are passed as strings in the `feature_flags` list. The following flags are supported:
Run mislabeled sample detection across all categorical metadata fields, not just the primary label.
FEATURE_FLAG_USE_PCA_IN_PRUNNING
Use a PCA-unified latent space when computing dataset pruning (similarity-based deduplication).
FEATURE_FLAG_TRAINING_RELEVANCE_SCORES
Compute relevance scores using the training set.
FEATURE_FLAG_TRAINING_DENSITY_WEIGHTS
Compute density weights using the training set.
FEATURE_FLAG_COMPUTE_PREDICTED_LOSS
Compute predicted loss scores per sample.
{% hint style="info" %}
All feature flags are disabled by default unless listed here.
{% endhint %}
# visualizer\_classes
code\_loader.contract.datasetclasses
The **visualizer\_classes** represent a set of visualizer classes that are used with the [**code\_loader**](/tensorleap-integration/python-api/code_loader) visualizers. \
The [**code\_loader**](/tensorleap-integration/python-api/code_loader) visualizer classes should be used to visualize the following items:
| Object to visualize | Leap object to use | How it is shown in the platfom |
| ------------------------------------------------ | ----------------------------------------------------------------------------------------------------------------- | --------------------------------------------------------------------------------------------------------------------------------------- |
| Grayscale/RGB image | [**LeapImage**](/tensorleap-integration/python-api/code_loader/visualizer_classes/leapimage) | [**Image**](/user-interface/dashboards/dashlets/population-exploration/sample-visualization#image-visualizer) |
| Image overlayed with bounding boxes | [**LeapImageWithBBox**](/tensorleap-integration/python-api/code_loader/visualizer_classes/leapimagewithbbox) | [**Image with bounding boxes**](/user-interface/dashboards/dashlets/population-exploration/sample-visualization#object-detection) |
| Image overlayed with heatmap | [**LeapImageWithHeamap**](/tensorleap-integration/python-api/code_loader/visualizer_classes/leapimagewithheatmap) | - |
| 1D signal | [**LeapGraph**](/tensorleap-integration/python-api/code_loader/visualizer_classes/leapgraph) | [**Graph**](/user-interface/dashboards/dashlets/population-exploration/sample-visualization#graph-visualizer) |
| Text | [**LeapText**](/tensorleap-integration/python-api/code_loader/visualizer_classes/leaptext) | [**Text**](/user-interface/dashboards/dashlets/population-exploration/sample-visualization#text-visualizer) |
| Historgram and logits | [**LeapHorizontalBar**](/tensorleap-integration/python-api/code_loader/visualizer_classes/leaphorizontalbar) | [**Horizontal bar**](/user-interface/dashboards/dashlets/population-exploration/sample-visualization#horizontal-bar-visualizer) |
| Semantic segmentation mask or other integer mask | [**LeapImageMask**](/tensorleap-integration/python-api/code_loader/visualizer_classes/leapimagemask) | [**Image with mask**](/user-interface/dashboards/dashlets/population-exploration/sample-visualization#semantic-segmentation-visualizer) |
| Token Classification | [**LeapTextMask**](/tensorleap-integration/python-api/code_loader/visualizer_classes/leaptextmask) | [**Text Mask**](/user-interface/dashboards/dashlets/population-exploration/sample-visualization#text-mask) |
| Video | [**LeapVideo**](/tensorleap-integration/python-api/code_loader/visualizer_classes/leapvideo) | - |
### Examples
Full examples can be found at the **Dataset Integration** section of the following guides:
* [**MNIST Guide**](/guides/full-guides/mnist-guide)
* [**IMDB Guide**](/guides/full-guides/imdb-guide)
# LeapImage
code\_loader.contract.visualizer\_classes.LeapImage
Used to visualize a grayscale/RGB image
```python
import numpy.typing as npt
from code_loader.contract.enums import LeapDataType
@dataclass
class LeapImage:
data: Union[npt.NDArray[np.float32], npt.NDArray[np.uint8]]
type: LeapDataType = LeapDataType.Image
compress: Optional[bool] = True
```
Args
data
np.ndarray uint8/float32 representation of the image. The expected image format is [H,W,1] OR [H,W,3]. For uint8, values should be in [0,255]. For float32, values should be in [0,1].
compress
(boolean, optional). Images are automatically compressed to jpg in the platform. For visualization that require no compression, set compress=False to get a png.
## Examples
#### Basic Usage
```python
from code_loader.contract.visualizer_classes import LeapImage
import cv2
...
@tensorleap_custom_visualizer(name='bgr2rgb_vis',
visualizer_type=LeapDataType.Image)
def bgr2rgb_visualizer(data: np.ndarray) -> LeapImage:
im_rgb = cv2.cvtColor(data, cv2.COLOR_BGR2RGB)
return LeapImage(im_rgb)
```
#### Resize Image and Heat-map
```python
from code_loader.contract.visualizer_classes import LeapImage
import numpy.typing as npt
from code_loader.contract.enums import LeapDataType
def resized_image_visualizer_heatmap(data: npt.NDArray[np.float32]) -> npt.NDArray[np.float32]:
# data is the heatmap with original size (origin_W, origin_H)
return np.resize(data, (256, 512)) # we reshape to the resized shape
@tensorleap_custom_visualizer(name='image_visualizer',
visualizer_type=LeapDataType.Image,
heatmap_function=resized_image_visualizer_heatmap)
def resized_image_visualizer(data: npt.NDArray[np.float32]) -> LeapImage:
return LeapImage(np.resize(data, (256, 512, 3)))
```
# LeapImageMask
code\_loader.contract.visualizer\_classes.LeapImageMask
Used to visualize a semantic segmentation mask
```python
import numpy.typing as npt
from code_loader.contract.enums import LeapDataType
@dataclass
class LeapImageMask:
mask: npt.NDArray[np.uint8]
image: npt.NDArray[np.float32]
labels: List[str]
type: LeapDataType = LeapDataType.ImageMask
```
Args
image
np.ndarray uint8/float32 representation of the image. The expected image format is [H,W,1] OR [H,W,3] and is expected to be in [0,255].
mask
np.ndarray uint8 representation of the mask. The expected format is [H,W] where each pixel value signifies its label
labels
A list of strings mapping pixel values to their labels
## Examples
#### Basic Usage
```python
import numpy as np
from code_loader.contract.visualizer_classes import LeapImageMask
from code_loader import leap_binder
from code_loader.contract.enums import LeapDataType
...
@tensorleap_custom_visualizer(name='seg_visualizer',
visualizer_type=LeapDataType.ImageMask,
heatmap_function=None)
def segmentation_visualizer(image: np.ndarray, segmentation_prediction: np.ndarray) -> LeapImageMask:
labels = ['background', 'vehicle', 'tree', 'road', 'pavement']
return LeapImageMask(mask=segmentation_prediction.squeeze(0), image=image.squeeze(0), labels=labels)
```
# LeapImageWithBBox
code\_loader.contract.visualizer\_classes.LeapImageWithBBox
Used to visualize an image overlayed with bounding boxes
```python
import numpy.typing as npt
from code_loader.contract.enums import LeapDataType
@dataclass
class BoundingBox:
x: float
y: float
width: float
height: float
confidence: float
label: str
rotation: float = 0.0
metadata: Optional[Dict[str, Union[str, int, float]]] = None
@dataclass
class LeapImageWithBBox:
data: Union[npt.NDArray[np.float32], npt.NDArray[np.uint8]]
bounding_boxes: List[BoundingBox]
type: LeapDataType = LeapDataType.ImageWithBBox
```
Args
data
an np.ndarray uint8/float32 representation of the image. The expected image format is [H,W,1] OR [H,W,3] and is expected to be in [0,255].
bounding_boxes
A list of bounding box. Each bounding_box has the following attributes:
x - x center of the bounding box. Expected to be between [0,1]
y - y center of the bounding box. Expected to be between [0,1]
width - width of the bounding box. Expected to be between [0,1]
height - height of the bounding box. Expected to be between [0,1]
confidence - the confidence of the prediction. Expected to be between [0,1]. Ground Truth should be set to 1.
label - a str label of the prediction
rotation - a float between [0,360] that represents the degree of roation. Defaults to 0.
metadata (optional) - a metadata on the bounding box. A dictionary of property names (str) to their values (str/int/float)
## Examples
#### Basic Usage
```python
from code_loader.contract.visualizer_classes import LeapImageWithBBox
import numpy as np
from code_loader.contract.enums import LeapDataType
...
@tensorleap_custom_visualizer("bb_gt_decoder", LeapDataType.ImageWithBBox)
def gt_bb_decoder(image: np.ndarray, bb_gt: np.ndarray) -> LeapImageWithBBox:
bbox = [BoundingBox(x=bbx[0], y=bbx[1], width=bbx[2], height=bbx[3], confidence=1, label=all_clss.get(int(bbx[4]) if not np.isnan(bbx[4]) else -1, 'Unknown Class')) for bbx in bb_gt.squeeze(0)]
image = image.squeeze(0)
return LeapImageWithBBox(data=image, bounding_boxes=bbox)
```
# LeapImageWithHeatmap
code\_loader.contract.visualizer\_classes.LeapImageWithHeatmap
Used to visualize attention maps or a similar float-based mask over an image.
```python
import numpy.typing as npt
from code_loader.contract.enums import LeapDataType
@dataclass
class LeapImageWithHeatmap:
image: npt.NDArray[np.float32]
heatmaps: npt.NDArray[np.float32]
labels: List[str]
type: LeapDataType = LeapDataType.ImageWithHeatmap
```
Args
image
np.ndarray float32 representation of the image. The expected image format is [H,W,1] OR [H,W,3] and is expected to be in [0,255].
heatmaps
np.ndarray float32 representation of the heatmaps. The expected shape is [C,H,W], where C is the amount of heatmaps that are provided for the image.
labels
A list of labels of C length for the heatmap labels
## Examples
#### Basic Usage
```python
import numpy as np
from code_loader.contract.visualizer_classes import LeapImageWithHeatmap
from code_loader import leap_binder
from code_loader.contract.enums import LeapDataType
...
@tensorleap_custom_visualizer("heatmap", LeapDataType.ImageWithHeatmap)
def heatmap(image_data: np.ndarray, heatmap_data: np.ndarray):
labels = ["heatmap1"]
return LeapImageWithHeatmap(image=image_data.squeeze(0), heatmaps=heatmap_data, labels=labels)
```
# LeapHorizontalBar
code\_loader.contract.visualizer\_classes.LeapHorizontalBar
This object is used to visualize logits and histograms
```python
import numpy.typing as npt
from code_loader.contract.enums import LeapDataType
@dataclass
class LeapHorizontalBar:
body: npt.NDArray[np.float32]
labels: List[str]
gt: Optional[npt.NDArray[np.float32]] = None
type: LeapDataType = LeapDataType.HorizontalBar
```
Args
body
np.ndarray float32 representation of the prediction confidences (length N) .
labels
a list of N strings representing the classes
gt
(optional) np.ndarray float32 representation of GT (length N).
## Examples
#### Basic Usage
```python
import numpy as np
from code_loader.contract.visualizer_classes import LeapHorizontalBar
from code_loader.contract.enums import LeapDataType
...
@tensorleap_custom_visualizer('label', visualizer_type=LeapDataType.HorizontalBar)
def animal_count_visualizer(num_of_cats: np.ndarray, num_of_dogs: np.ndarray) -> LeapHorizontalBar:
body = [num_of_cats, num_of_dogs]
labels = ['cats', 'dogs']
return LeapHorizontalBar(body=body, labels=labels)
```
# LeapGraph
code\_loader.contract.visualizer\_classes.LeapGraph
Used to visualize a 1D signal.
```python
import numpy.typing as npt
from code_loader.contract.enums import LeapDataType
@dataclass
class LeapGraph:
data: npt.NDArray[np.float32]
type: LeapDataType = LeapDataType.Graph
x_label: Optional[str] = None
y_label: Optional[str] = None
x_range: Optional[Tuple[float,float]] = None
legend: Optional[List[str]] = None
```
Args
data
an np.ndarray float32 [N,1] array where N is the number of points in the graph.
x_label
(optional) - the x label for the graph
y_label
(optional) - the y label for the graph
x_range
(optional) - controlling the ticks on the x axis by supplying a minimum and maximum value
legend
(optional) - a legend for distinguishing between different lines plotted in the same graph
## Examples
#### Basic Usage
```python
from code_loader.contract.visualizer_classes import LeapGraph
from code_loader.contract.enums import LeapDataType
import numpy as np
...
@tensorleap_custom_visualizer("diff", LeapDataType.Graph)
def diff_per_channel_visualizer(prediction: np.ndarray, ground_truth: np.array) -> LeapGraph:
diff = pred - ground_truth
return LeapGraph(diff)
```
# LeapText
code\_loader.contract.visualizer\_classes.LeapText
Used to visualize Text. Optionally, together with a heatmap that signifies words importance
```python
import numpy.typing as npt
from code_loader.contract.enums import LeapDataType
@dataclass
class LeapText:
data: List[str]
type: LeapDataType = LeapDataType.Text
heatmap: Optional[List[float]] = None
```
Args
data
a list of strings that compose the text (length N)
heatmap
(optional) - a lists of floats that provides word importance (length N)
## Examples
#### Basic Usage
```python
import numpy as np
from code_loader.contract.visualizer_classes import LeapText
from code_loader.contract.enums import LeapDataType
...
@tensorleap_custom_visualizer(name="input_visualizer", visualizer_type=LeapDataType.Text)
def input_visualizer(input_ids: np.ndarray) -> LeapText:
input_ids = np.squeeze(input_ids)
text = decode_token_ids(input_ids)
return LeapText(text)
```
# LeapTextMask
code\_loader.contract.visualizer\_classes.LeapTextMask
Used to visualize text together with an integer mask. Usually used for token-classification tasks (i.e. NER) visualization
```python
import numpy.typing as npt
from code_loader.contract.enums import LeapDataType
@dataclass
class LeapTextMask:
mask: npt.NDArray[np.uint8]
text: List[str]
labels: List[str]
type: LeapDataType = LeapDataType.TextMask
```
Args
mask
an np.ndarray of length N. Provides each token with its class. This mask has C unique values.
text
a list of strings that compose the text (length N)
labels
a list of C str labels for the classes.
## Examples
#### Basic Usage
```python
import numpy as np
from code_loader.contract.visualizer_classes import LeapTextMask
from code_loader import leap_binder
...
@tensorleap_custom_visualizer(name="mask_visualizer_comb", visualizer_type=LeapDataType.TextMask)
def text_segmentation_visualizer(data: np.ndarray, segmentation_prediction: np.ndarray) -> LeapTextMask:
labels = ['neutral', 'positive', 'negative']
tokenizer = leap_binder.custom_tokenizer
text = tokenizer.sequences_to_texts(data)
return LeapTextMask(mask=segmentation_prediction.squeeze(0), text=text, labels=labels)
```
# LeapVideo
code\_loader.contract.visualizer\_classes.LeapImage
Used to visualize a grayscale/RGB image
```python
import numpy.typing as npt
from code_loader.contract.enums import LeapDataType
@dataclass
class LeapVideo:
data: Union[npt.NDArray[np.float32], npt.NDArray[np.uint8]]
type: LeapDataType = LeapDataType.Video
```
Args
data
np.ndarray uint8/float32 representation of the video frames. The expected image format is [T, H,W,1] OR [T, H,W,3] and is expected to be in [0,255].
## Examples
#### Basic Usage
```python
from code_loader.contract.visualizer_classes import LeapVideo
import cv2
from code_loader.contract.visualizer_classes import LeapTextMask
from code_loader.contract.enums import LeapDataType
...
@tensorleap_custom_visualizer(name='video',
visualizer_type=LeapDataType.Video)
def video_visualizer(frames: np.ndarray) -> LeapVideo:
#data shape is [1,F,H,W,3]
return LeapVideo(frames.squeeze(0))
```
# helpers
# detection
# YOLO
Utils for the Yolo Object Detection task
This package contains multiple helpers and methods for the YOLO Objet detection task:
## YoloLoss
The YoloLoss is an implementation of the [YoloLoss](https://github.com/WongKinYiu/yolov7/blob/main/utils/loss.py) used by the Yolov7 repository.
We expose an interface to the loss that could be configured using the following properties:
```python
from code_loader.helpers.detection.yolo.loss import YoloLoss
LOSS_FN = YoloLoss(num_classes: int, default_boxes: List[NDArray[np.int32]],
overlap_thresh: float, background_label: int,
features: List[Tuple[int, int]] = [],
anchors: Optional[NDArray[np.int32]] = None,
from_logits: bool = True, weights: List[float] = [4.0, 1.0, 0.4],
max_match_per_gt: int = 10,
image_size: Union[Tuple[int, int], int] = (640, 640),
cls_w: float = 0.3, obj_w: float = 0.7, box_w: float = 0.05,
yolo_match: bool = False):
```
Args
num_classes
The number of classes in the dataset
default_boxes
A List of NDArray representing the model's grid . see Grid.generate_anchors()
overlap_thresh
The Matcher overlap threshold that sets what constitutes a match. YOLO default is 0.0625
background_label
If no background_label was used during training should be set to NUM_CLASSES+1
features
Only required if yolo_match is True. The size of the predictions heads your model uses [[H1,W1],[H2,W2]...]
anchors
Only required if yolo_match is True. The anchors used in your model
from_logits
True if the model was exported without a sigmoid. False if the model was exported as recommended by us
The number of priors matches per GT. Yolov7 default is 10
Image_size
the size of your images.
cls_w
Classification loss weight
obj_w
The object loss weight
box_w
The regression loss weight
yolo_match
When yolo_match is True we use the same Matcher as YoloV7. When yolo_match is False we use a slightly faster matcher, that approximates the YoloV7 matcher.
This loss has a `__call__` method that computes the yolo\_loss:
```python
iou_loss, obj_loss, class_loss =
LOSS_FN(y_true: tf.Tensor, y_pred: Tuple[List[tf.Tensor], List[tf.Tensor]])
```
Args
y_true
The ground truth encoded into a shape of [MAX_BB,5]. the 5 channels represent [X,Y,W,H,class]
y_pred
A tuple (loc,class) composed of: - loc. A list the size of the number of heads. Each element is of size [Batch,#BB,4]. The channels represent [X,Y,W,H] - class. A list the size of the number of heads. Each element is of size [Batch,#BB,#classes+1]
This returns the three losses of the YOLO repo (IOU loss, Object loss, Classification loss)
## Decoder
Since we recommend exporting the model without the `NMS` and `top-k` components we need a Decoder model that can serve as a head to filter only the most confident bounding box.
We expose an interface for our default decoder:
```python
from code_loader.helpers.detection.yolo.decoder import Decoder
DECODER = Decoder(self, num_classes: int, background_label: int, top_k: int,
conf_thresh: float, nms_thresh: float, max_bb_per_layer: int = 20,
max_bb_per_layer: int = 20, max_bb: int = 20)
```
Args
num_classes
The number of classes in the dataset
background_label
If no background_label was used during training should be set to NUM_CLASSES+1
top_k
The number of BB for the top_k param. Per-layer and per-class.
conf_thresh
A threshold for the confidence. BB with confidence lower with this will not be shown by the decoder
nms_thresh
The NMS threshold for IOU-overlap calculation. see Tensorflow's non_max_suppression IOU supression param for more details.
max_bb_per_layer
The maximum amount of BB selected per layer
max_bb
The maximum amount of BB selected overall
This decoder has a `__call__` function that returns a list of the selected bounding\_boxes
A list the size of the number of heads. Each element is of size [Batch,#BB,4]. The channels represent [X,Y,W,H]
conf_data
A list the size of the number of heads. Each element is of size [Batch,#BB,#classes+1]
prior_data
a List of NDArray representing the model's grid . see Grid.generate_anchors()
from_logits
True if the model was exported without a sigmoid. False if the model was exported as recommended by us
decoded
True if the model was exported with a decoder, as recommended by us. False otherwise (i.e. the predictions are still relative to anchors and are not in image coordinates)
## Grid
This class represents the YOLO priors grid.
The shape of the anchors as set in the Yolov7 YAML
strides
The strides that connects the head_size to image_size (IMAGE_SIZE/HEAD_SIZE)
offset
0 if the grid starts from (0,0) as expected by the YOLO repo
This class has a `generate_anchors()` method that creates the grid used by the loss and decoder.
```python
DEFAULT_BOXES = BOXES_GENERATOR.generate_anchors()
```
DEFAULT\_BOXES is of type List\[NDArray\[np.float32]]. each entry is an entry sized (#head-BB,4) representing the coordinates for the bounding box located in each head.
# Integration Example
This section would walkthrough specific code integrations examples from different projects, their interfaces and usage
# MNIST
This section would showcase the MNIST example
# UI Assets upload
# User Interface
This section contains reference documentation for the Tensorleap user interface (UI).
* [**Project**](/user-interface/project) **-** Describes the [Network](/user-interface/project/network) view, [Dashboard](/user-interface/dashboards), [Model versioning](/user-interface/project/versions) & the [Top menu bar](/user-interface/project/menu-bar)
* [**Resources Management**](/user-interface/resources-management) **-** Describes a way to access [integration scripts ](/tensorleap-integration/writing-integration-code)& [secrets](/user-interface/secrets-management)
* [**Team management**](/user-interface/team-management) **-** Describes the space to review which team members has Tesnorleap access
#### Guides and Examples
You can also check out our guides at [**Guides & Tutorials**](/guides) and find reference examples in Tensorleap's [**Examples Repository**](https://github.com/tensorleap/tensorleap/tree/master/examples).
# Project
A project defines the scope of the models and model versions for your use case.
## Create a Project
{% hint style="info" %}
It is recommended to create a project while pushing a [model](/tensorleap-integration/uploading-with-cli/cli-assets-upload#uploading-a-model) or [project](/tensorleap-integration/uploading-with-cli/cli-assets-upload#uploading-both-a-code-and-model) using the CLI
{% endhint %}
You can create a project after logging on to your account.
To create a project:
1. Click the side menu on the top left.
2. Click **New Project**.
3. On the **New Project** window, enter a name for your project.
4. Enter a description for the project.
5. Click **Create**.
## Open a Project
To open and start working on your project, you can either:
* Locate your project in **Recent Projects** and click it:
Opening a project from Recent Projects
{% hint style="info" %}
When you save your project for the first time, Tensorleap treats it as the master branch, with subsequent revisions being new branches. You can create different branches when saving a new version of a project. For more information, see [Versions](/user-interface/project/versions).
{% endhint %}
# Network
This section describes the network view in the platform and its usage: map integration elements and select code integrations.
## Network Layout Overview
When you open a Tensorleap project, the **Network** view is accessed by clicking the opne version icon on the model you would like to inspect:
The Network view. Marked areas are the Controller (left), Tab (up), Network Wizard (top left), and Code integration (right)
The **Network** view is where you inspect model integration into Tensorleap. In this screen you can:
* Select the [**Code Integration**](/user-interface/project/network/code-integration) to use with the selected model.
* Review the model uploaded and saved in Tensorleap when switching [**versions**](/user-interface/project/versions)**.**
### **The Controller**
The controller in the Network view (left hand size) allow you to:
 - Centers the network on your screen
 - Reorganise the network map.
 - Expand hidden layers.
# Network Mapping
This section details the way to add a mapping to your Network and validate it
{% hint style="success" %}
Before working a network mapping a model and code integration should have been s[uccessfully uploaded and processed](/tensorleap-integration/uploading-with-cli/cli-assets-upload) in the Tensorleap platform
{% endhint %}
The Tensorleap platform enables users to instruct it on how to connect Visualizers, Metrics and Losses to their model. This is done by:
* Opening a project on the [network](/user-interface/project/network) tab.
* Choosing a model from the [versions](/user-interface/project/versions) tab.
* Connecting a [code integration](/user-interface/project/network/code-integration) from it's controller.
* Adding multiple blocks to the network to [create a mapping](/user-interface/project/network/network-mapping/create-a-mapping-deprecated).
* [Validating the assets](/user-interface/project/network/network-mapping/validate-mapping) used in your mapping.
* [Saving the mapping](/user-interface/project/network/network-mapping/save-mapping-to-file-deprecated) for future use.
# Create a mapping (Deprecated)
{% hint style="success" %}
In order to create a mapping a model and code integration should previously been integrated into Tensorleap.
{% endhint %}
In order to create a mapping in the Tensorleap platform a user can add several UI blocks to its' model representation in the Network view.
This is usually done either in the first time a new architecture was uploaded to Tensorleap or when a new Metric, Loss, or Visualizer was added via the [Integration Script](/tensorleap-integration/writing-integration-code).
An example mapping creation process
## When should a mapping be created or updated
### The First Time a new architecture is uploaded
Once a new architecture has been successfully uploaded to Tensorleap, we would like to create a new mapping to instruct the platform on how to visualize elements, and what should be the inputs to the loss and metrics.
In order to create a mapping for the first time, you can use the [Network Wizard](/user-interface/project/network/network-mapping/create-a-mapping-deprecated/network-wizard) . It would give step-by-step instructions on how to create a valid mapping for your model.
### A new loss, metric, or visualizer was added to the Integration
In case you already have a mapping, but you've added a new [visualizer](/user-interface/project/network/network-mapping/create-a-mapping-deprecated/visualizer-node), [metric](/user-interface/project/network/network-mapping/create-a-mapping-deprecated/metric-node), or [loss](/user-interface/project/network/network-mapping/create-a-mapping-deprecated/loss-node) to your [Integration script](/tensorleap-integration/writing-integration-code) that you would like to use, you would need to change your mapping to instruct the platform on how to use this element.
You can than simply add the corresponding element to the UI, [save the changes ](/user-interface/project/network#the-controller)to your model, [validate](/user-interface/project/network/network-mapping/validate-mapping), and [save](/user-interface/project/network/network-mapping/save-mapping-to-file-deprecated) it for future use.
## How to change the Network mapping
### Adding Nodes
{% hint style="info" %}
Before changing an existing mapping, ensure the correct [code integration](/user-interface/project/network/code-integration) script and version is selected from the right hand controller. This would allow you to add specific elements to the mapping that was defined in that script.
{% endhint %}
The Tensorleap mapping can be changed by adding or modifying existing nodes in the UI.
To add a new element, simply right click anywhere in the Network view, choose the element you want, and connect it to the corresponding source. Connections are performed by a drag-and-drop operation - dragging from the output of one node into the input of another.
Right Clicking anywhere allows to add UI nodes
The elements you can add are a collection of default visualizers, loss, metrics in addition to custom one that you've defined in your [integration script](/tensorleap-integration/writing-integration-code):
* [Input Node](/user-interface/project/network/network-mapping/create-a-mapping-deprecated/input-node) - connects the [**Input Encoders**](/tensorleap-integration/writing-integration-code/input-encoder) created in the script with your model
* [Ground Truth](/user-interface/project/network/network-mapping/create-a-mapping-deprecated/ground-truth-node) - connects the [**Ground Truth encoder**](/tensorleap-integration/writing-integration-code/ground-truth-encoder) created in the script with your model
* [Custom Loss](/user-interface/project/network/network-mapping/create-a-mapping-deprecated/loss-node) - connects a [**Custom Loss**](/tensorleap-integration/writing-integration-code/custom-loss-function) created in the script with your model
* [Loss](/user-interface/project/network/network-mapping/create-a-mapping-deprecated/loss-node) - connect a default losses to your model
* [Visualizer](/user-interface/project/network/network-mapping/create-a-mapping-deprecated/visualizer-node) - connects a default visualizer or a [**Custom Visualizer**](/tensorleap-integration/writing-integration-code/visualizer-function) created in the script with your model.
* [Metric](/user-interface/project/network/network-mapping/create-a-mapping-deprecated/metric-node) - connects a default metric or a [**Custom Metric**](/tensorleap-integration/writing-integration-code/custom-metrics) created in the script with your model.
### Modifying Nodes
Each one of these nodes has some attributes that can be edited from the Node Details tab (right hand side). For example, if your model has multiple inputs you can select the input node by clicking on it, and a window would open that allows you to select the input you would like to use.
An input is selected by clicking on it. The panel that opens up allows to edit node specific properties
### Deleting nodes
To delete nodes from the UI, right click any node. This would open a pop-up window with the trash can icon. Clicking it would remove the node from the mapping.
Right clicking a node removes a node from the graph
{% hint style="warning" %}
Once nodes are added, modified, or deleted from the mapping it is important to use the button to save your changes to the mapping graph. Any unsaved changes in the configuration would be indicated by an orange dot over the save icon .
{% endhint %}
{% hint style="info" %}
After you are satisfied with the changes in your mapping you should [validate](/user-interface/project/network/network-mapping/validate-mapping) it is correct, and then [save it to file](/user-interface/project/network/network-mapping/save-mapping-to-file-deprecated) so you'll be able to [re-apply](/user-interface/project/network/network-mapping/applying-a-mapping-deprecated) it at will.
{% endhint %}
# Network Wizard
The network wizard (located in the top right part of the Network view) should assist you in the completion of your mapping graph. It is a step-by-step process that should lead you through Adding a model, configuring inputs, adding a loss, adding metrics, and adding a visualizer.
An example of using the Network Wizard to complete a graph mapping
Once a mapping is completed the Network Wizard would suggest to [validate it](/user-interface/project/network/network-mapping/validate-mapping), [update it](/user-interface/project/network/network-mapping/save-mapping-to-file-deprecated) or [apply it](/user-interface/project/network/network-mapping/applying-a-mapping-deprecated).
Then Network Wizard suggests to validate, update (i.e. save to file), or apply the mapping
{% hint style="info" %}
Any issue in the current graph (for example, missing elements or connecting encoders to an incorrectly shaped tensor input), would be reflected in this wizard.
{% endhint %}
# Input Node
The Input Node passes input from a dataset to your model's layers
The input node and its properties
## Setup
The **Input** Node defines the data source for your network. It should be pointed to the input that will serve as your network's data source.
The input node have several properties:
* **Selected Input**: a dropdown from which an input can be selected in case multiple [Input Encoders](/tensorleap-integration/writing-integration-code/input-encoder) were registered in the [integration script](/tensorleap-integration/writing-integration-code).
* **Name**: The name of the selected input encoder in the integration script
* **Shape**: The inferred shape of the input encoder in the integration script
{% hint style="info" %}
In case your model was linked with a code integration via [leap projects push](/tensorleap-integration/uploading-with-cli/cli-assets-upload#uploading-both-a-code-and-model) command, this input might be automatically selected when uploading a model. In case you have multiple inputs to your model, you would need to select which input should be associated with each node.
{% endhint %}
# Ground Truth Node
The Ground Truth Node passes ground truth from a dataset to your model's layers
The Ground truth node and its properties
## Setup
The **Ground Truth** Node defines the ground truth for a specific loss or metric.
The **Ground Truth** node have several properties:
* **Selected Ground Truth**: a dropdown from which a Ground Truth can be selected. The list would include all registered [ground truth encoders](/tensorleap-integration/writing-integration-code/ground-truth-encoder) from your [integration script](/tensorleap-integration/writing-integration-code).
* **Name**: The name of the selected ground truth encoder in the integration script
* **Shape**: The inferred shape of the ground truth encoder in the integration script
# Loss Node
The Loss Node computes the loss for your model
## Custom Loss
{% hint style="success" %}
Using a custom loss is the recommended way to work within Tensorleap. It allows you to test the validation of the loss in your [local environment](/tensorleap-integration/integration-test).
{% endhint %}
{% hint style="info" %}
Adding a custom loss is only possible after registering it in the [integration script](/tensorleap-integration/writing-integration-code) and parsing it successfully through the system. To make sure you can add your loss ensure that the correct [code integration](/user-interface/project/network/code-integration) that defines your loss is registered in the system
{% endhint %}
To add a custom loss, select CustomLoss when [adding nodes](/user-interface/project/network/network-mapping/create-a-mapping-deprecated#adding-nodes) to the mapping. This loss would have the same arguments defined in your [custom loss](/tensorleap-integration/writing-integration-code/custom-loss-function) defined in your [integration script](/tensorleap-integration/writing-integration-code).
For example, adding this loss in the integration script:
```python
@tensorleap_custom_loss("total_loss")
def loss(pred80,pred40,pred20,gt,demo_pred):
gt=np.squeeze(gt,axis=0)
d={}
d["bboxes"] = torch.from_numpy(gt[...,:4])
d["cls"] = torch.from_numpy(gt[...,4])
d["batch_idx"] = torch.zeros_like(d['cls'])
y_pred_torch = [torch.from_numpy(s) for s in [pred80,pred40,pred20]]
all_loss,_= criterion(y_pred_torch, d)
return all_loss.unsqueeze(0).numpy()
```
Would result in a possible node addition to the mapping:
Custom Loss and its properties
This node could then be connected to the different inputs it expects to get in order to operate as expected
## Setup
The **CustomLoss** node have several properties:
* **Selected Custom Loss**: a dropdown from which a custom loss can be selected. The list would include all registered [custom losses](/tensorleap-integration/writing-integration-code/custom-loss-function) from your [integration script](/tensorleap-integration/writing-integration-code).
* **Name**: The name of the selected ground truth encoder in the integration script
* **Arguments**: The expected arguments for your custom loss, as detailed in the integration script.
## Default losses
The Tensorleap integration compes equipped with several losses ready for usage. These losses can be added from the dropdown menu, and each would have its own configurable settings. Adding these losses does not require any addition of a custom loss within the [integration script](/tensorleap-integration/writing-integration-code).
# Visualizer Node
Visualize model graph tensors using Visualizers
Neural networks are made up of components that process generic, undefined data. In order to make sense of the data, Tensorleap enables you to visualize the data contained in any node, using a **Visualizer** node. You can visualize the input(s), output(s) (prediction), ground truth(s), and intermediate tensors.
These visualization would be present at multiple segments of the [Dashboard](/user-interface/dashboards) view.
When performing [**Sample Analysis**](/user-interface/dashboards/dashlets/sample-analysis#sample-analysis), error analysis algorithms analyze the sample's error throughout the model and project it to each input. This will generate various heat-maps highlighting different features. Therefore, at least one connection of the [**Dataset Node**](/user-interface/project/network/network-mapping/create-a-mapping-deprecated/input-node) (model-graph input) must be connected to a **Visualizer**.
You can write your own **Custom Visualizers** in the **Integration Script** (see [custom visualizers](/tensorleap-integration/python-api/code_loader/visualizer_classes)), or use one of the following out-of-the-box Decoders:
* **HorizontalBar** - visualize numeric data as horizontal bar with labels
* **Image** - visualize 2D image
* **Video -** visualize 3D data
* **Graph** - visualize numeric data as a graph
* **Raw data** - presents the raw data as is
* **Text** - tokens representation of text (for *token-to-text* **Visualizer**, use the [**Decoder Function**](/tensorleap-integration/writing-integration-code/visualizer-function) with your tokenizer)
* **ImageMask** - visualize an image and an overlay mask (commonly used in image segmentation)
* **TextMask** - visualize text and an overlay mask (commonly used in text segmentation)
{% hint style="success" %}
It is highly recommended to use your own custom visualizers in the [integration script](/tensorleap-integration/writing-integration-code). This would allow you to test results in your[ local development environment](/tensorleap-integration/integration-test) before you upload the model to Tensorleap. This helps to ensure the visualized results are as you would have expected, and to quickly adjust any normalizations, conversion, and display settings.
{% endhint %}
{% hint style="info" %}
Adding a custom visualization is only possible after registering it in the [integration script](/tensorleap-integration/writing-integration-code) and parsing it successfully through the system. To make sure you can add your visualizer ensure that the correct [code integration](/user-interface/project/network/code-integration) that defines your loss is registered in the system.
{% endhint %}
### Custom Visualizer Example
Adding the following custom visualizer in the script:
```python
@tensorleap_custom_visualizer('image_visualizer', LeapDataType.Image)
def image_visualizer(image: np.ndarray) -> LeapImage:
image = rescale_min_max(image.squeeze(0))
return LeapImage(image.transpose(1,2,0))
```
Would add the following option in the visualizer selection dropdown menu:
To add a visualizer, select visualizer when [adding nodes](/user-interface/project/network/network-mapping/create-a-mapping-deprecated#adding-nodes) to the mapping. This visualizer would have the same arguments as your [custom visualizer](/tensorleap-integration/writing-integration-code/visualizer-function) defined in your [integration script](/tensorleap-integration/writing-integration-code) in the case of a custom visualizer.
## Setup
Visualizer Node and its properties
The **Visualizer** node have several properties:
* **Selected Visualizer**: a dropdown from which a custom or default visualizer can be selected. The list would include all registered [custom visualizers](/tensorleap-integration/writing-integration-code/visualizer-function) from your [integration script](/tensorleap-integration/writing-integration-code).
* **Name**: The name of the selected visualizer.
* **Type:** They [type](/tensorleap-integration/python-api/code_loader/visualizer_classes) of the selected visualizer.
* **Labels**: The expected arguments for your visualizer.
# Metric Node
The Metric Node computes the metric for your model
The Tensorleap platform allows you to add metrics to be computed in each model evaluation
These Metrics are divided into two types:
* Default metrics
* MeanSquaredError
* MeanSquaredLogarithmicError
* MeanAbsoluteError
* MeanAbsolutePercentageError
* Accuracy
* BinaryAccuracy
* MeanIOU
* Custom metrics
{% hint style="success" %}
It is highly recommended to use your own custom metrics in the [integration script](/tensorleap-integration/writing-integration-code). This would allow you to test results in your[ local development environment](/tensorleap-integration/integration-test) before you upload the model to Tensorleap. This helps to ensure the metrics return the expected values before the integration
{% endhint %}
### Custom Metric Example
Adding the following metric in your code:
```python
@tensorleap_custom_metric("cost")
def cost(pred80,pred40,pred20,gt):
gt=np.squeeze(gt,axis=0)
d={}
d["bboxes"] = torch.from_numpy(gt[...,:4])
d["cls"] = torch.from_numpy(gt[...,4])
d["batch_idx"] = torch.zeros_like(d['cls'])
y_pred_torch = [torch.from_numpy(s) for s in [pred80,pred40,pred20]]
_,loss_parts= criterion(y_pred_torch, d)
return {"box":loss_parts[0].unsqueeze(0).numpy(),"cls":loss_parts[1].unsqueeze(0).numpy(),"dfl":loss_parts[2].unsqueeze(0).numpy()}
```
Would result in the following metric in selectable from the menu:
Metric Block
{% hint style="info" %}
In order to add a **Custom metric** it must be added to the dataset script and parsed first as described in the
{% endhint %}
## Setup
The **Metric** node have several properties:
* **Selected Metric**: a dropdown from which a custom or default metric can be selected. The list would include all registered [custom metrics](/tensorleap-integration/writing-integration-code/custom-metrics) from your [integration script](/tensorleap-integration/writing-integration-code).
* **Name**: The name of the selected visualizer.
* **Labels**: The expected arguments for your visualizer.
# Model Node
The Block that represents your model in the network view
The model block and the expand option
In order to support a compact visualization of large models, Tensorleap defaultively encode your model into a single block. This block is named Model.
The last layer of your model is extracted from the Model block and presented to the right of it, in order to ease the mapping creation process and enable connections to be made to it directly.
If you would like to visualize other, internal, representations of your model clicking the expand model in the left hand controller expands your model and presents all of the layers from which it is created.
The Network view after the model was expanded
{% hint style="success" %}
It is highly recommended to keep the model in "compact" form if inner layers are not visualized or if the mapping is completed. This would ensure a smooth experience when reviewing the Network view tab.
{% endhint %}
# Layers
Set up your network with Layers
A layer performs complex mathematical computations to extract features from input data. It then outputs the transformed data and passes them to the next layer in the network.
Layers encapsulate weights, or states, which are actively tracked and continuously updated during model training.
## Add a Layer
Layers are added to a network after the [**Dataset Block**](/user-interface/project/network/network-mapping/create-a-mapping-deprecated/input-node) has been set up.
To add a layer to your network:
1. On the **Network** view, right-click anywhere to open a menu, from which you can select the type of layer to be added to your project**.**
2. Click the layer block when it appears on the **Network** view, then set the [**Layer Properties**](#layer-properties) panel.

{% hint style="info" %}
Add a [**Loss and Optimizer**](/user-interface/project/network/network-mapping/create-a-mapping-deprecated/loss-node) to a network after the last layer. After saving, the network becomes available for training and evaluation (see [**Evaluate / Train Model**](/user-interface/project/menu-bar/evaluate-a-model)).
{% endhint %}
## Layer Properties
The **Layer Properties** panel appears to the right when you click a Layer on the Network view. From here, you can set the properties associated with a layer.
For example, for a **Conv2D** layer, you may want to change the number of filters, kernel size, and activation type.

## Connections
Once layers have been added to your project, you can start connecting them to each other.
Starting from the **Dataset Block**, grab the layer's right handle and drag it to the next layer's left handle. Perform the same procedure for the rest of the layers.
When connecting layers, each block shows the calculated output shape affected by the preceding layers.

{% hint style="info" %}
Set up the Dataset Block first before connecting it to the first layer on the network. For more information, see [Input Node](/user-interface/project/network/network-mapping/create-a-mapping-deprecated/input-node).
{% endhint %}
### Remove Connections
If you make a mistake when connecting layers, remove the connection by grabbing the layer's left handle and dragging it away from the layer.

## Layer Operations
Layers can be duplicated, deleted, and spawned. You can also copy a layer's properties and apply them to another layer.
{% hint style="info" %}
This same set of operations is also applicable to Loss and Optimizer blocks, which are also layers. See [**Loss and Optimizer**](/user-interface/project/network/network-mapping/create-a-mapping-deprecated/loss-node) for more information.
{% endhint %}
### Duplicate a Layer
When duplicating a layer, the layer, including its properties, are copied into the Network view. However, the connections between the layer and adjacent layers are not copied.
This is helpful when laying out two or more of the same type of layer onto the network. If the layer properties are different, you can just edit them later.
To duplicate a layer:
1. From the **Network** view, position your mouse cursor over the layer to be duplicated, then make a right click.
2. On the popup menu, click to duplicate the layer onto the network.

{% hint style="info" %}
If your layers are already connected, you may have to remove the connections, insert the duplicated layer in the desired position, then reconnect the layers together. See [**Connections**](#connections) for more information.
{% endhint %}
### Remove a Layer
If you make a mistake while adding a layer, or you do not need a layer anymore, you can remove it from the network.
To remove a layer:
1. From the [**Network**](/user-interface/project/network) view, position your mouse cursor over the layer to be removed, then make a right click.
2. On the popup menu, click to remove the layer from the network.

{% hint style="info" %}
All connections to and from the deleted layer are also removed.
{% endhint %}
### Spawn a Representation Block for Layer Weights Sharing
Layer weights-sharing, or parameter sharing, means to use a layer's weights in more than one place within the model. This is often used when similar features are extracted from different places within the model. Instead of creating an additional layer, these weights are shared, thus reducing the overall number of trainable parameters and training time.
# Validate mapping
How to ensure you created a valid mapping
{% hint style="success" %}
It is highly recommended to utilize the [integration test](/tensorleap-integration/integration-test) locally before validating your assets in the platform. This allows you to ensure a smooth code flow, and to fix any issues within your local debugging environment
{% endhint %}
### When should assets be validated?
Assets in the platform should be validated after
* A new mapping was [created or modified ](/user-interface/project/network/network-mapping/create-a-mapping-deprecated)in the platform
* Changes was made to the linked [code integration](/user-interface/project/network/code-integration) script causing data flow to change
* A new model was uploaded to the platform, with a different architecture than previous models
{% hint style="info" %}
If you're unsure whether the assets for this specific configuration was tested, check the color of the Validate Assets button in the [code integration](/user-interface/project/network/code-integration) view of the Network.
If it's blue - no validation was tested on this configuration yet
If it's green - the assets in this configuration are valid
If it's red - The assets currently used in the platform are not valid
{% endhint %}
### How to validate assets in the platform
An example of a mapping created but not validated
To validate assets in the platform, we go to the Network Tab, and ensure:
* (optional) A fully completed [Network Wizard](/user-interface/project/network/network-mapping/create-a-mapping-deprecated/network-wizard) indication, with all green markings.
* A green "Validate Assets" Button within the Code mapping tab in the right of the Network tab.
{% hint style="info" %}
The Network Wizard ensures you would have all the assets needed for a complete experience of the Tensorleap platform. Since some of the assets (metrics) are not mendatory for the analysis to begin, it does not have to be completed before validating the ,apping
{% endhint %}
## Validate Assets
The "validate assets" process in Tensorleap aims to ensure current mapping that exists in the network graph is valid.\
\
Upon a click on the "Validate Assets" button - Tensorleap starts a process that would use your integration script to load data, run it throught the model, and visualize the inputs. A successful execution of this process means that your model and data is fully integrated & configured in Tensorleap, and you can begin the [evaluation](/user-interface/project/menu-bar/evaluate-a-model) process.\
\
The validate assets does the following:
* It loads the code you set up in the [code integration](/user-interface/project/network/code-integration) tab
* It initializes your [PreProcessing Function](/tensorleap-integration/writing-integration-code/preprocess-function)
* It runs the first sample from your dataset and:
* Use the [Input Encoder](/tensorleap-integration/writing-integration-code/input-encoder) to load the input
* Use the [Ground Truth Encoder](/tensorleap-integration/writing-integration-code/ground-truth-encoder) (if present) to load the ground truth
* Use the [Metadata Encoders](/tensorleap-integration/writing-integration-code/metadata-function) (if present) to load the metadata
* It then utilize the Network Mapping to:
* Feed the input to your model and infer it
* Run connected metrics, loss, and visualizers
A successful assets validation indication in the platform.
Once the validate assets process is successfully finished it is recommended to [save it to file](/user-interface/project/network/network-mapping/save-mapping-to-file-deprecated) to ensure a re-use upon repeating uploads of the same model.
{% hint style="danger" %}
Assets validation mostly fail due to these reasons:
* A bug or unexpected use of the [integration script](/tensorleap-integration/writing-integration-code). Can be mostly prevented with [integration testing](/tensorleap-integration/integration-test).
* Connecting an asset to the wrong input. It is important to notice that the [mapping](/user-interface/project/network/network-mapping/create-a-mapping-deprecated) connection are as the integration script expect them to be.
{% endhint %}
{% hint style="warning" %}
A successful validate assets does not ensure the loss, metrics, or visualizers would behave as you might have expected, especially, for custom defined encoders. It only ensures the Tensorleap platform is able to propagate data through your model and into these functions and get a valid reponse. We highly recommend utilizing the [integration test](/tensorleap-integration/integration-test) ensure your custom defined properties return the expected result.
{% endhint %}
{% hint style="info" %}
Upon dataset parse (i.e. uploading a codebase to the model) inputs, ground truth, and metadata are also being run by Tensorleap. The process of "Validate Assets" is to validate the rest of the assets, defined by your mapping: i.e. model inference validity, metrics, losses, and visualizers.
{% endhint %}
# Save mapping to file (Deprecated)
How to save a network mapping for repeated use
After a mapping was [created or modified ](/user-interface/project/network/network-mapping/create-a-mapping-deprecated)and [validated](/user-interface/project/network/network-mapping/validate-mapping) in the Network tab, it is highly recommended to save it into file.
The code integration view from within the Network tab
In order to update a mapping, click the "UPDATE" button within the [code integration](/user-interface/project/network/code-integration) view. Clicking it would create a new version of your code integration script, that includes a new [leap\_mapping.yaml](broken://pages/3rU3R1SpB0X70g2DUoJ3).
The code integration view expanded to show the created leap_mapping.yaml file
This file would ensure this mapping could be applied to new models uploaded to the platform of the same architecture.\
\
In order to ensure future [CLI code uploads](/tensorleap-integration/uploading-with-cli/cli-assets-upload) would also include this leap\_mapping.yaml is it highly recommended to download this file to the local environment.
#### Downloading the leap\_mapping.yaml
* The easiest way to download the mapping file is by going to the [network wizard](/user-interface/project/network/network-mapping/create-a-mapping-deprecated/network-wizard) and reviewing it. Once assets are visualized, the option to "Download mapping file" should be available from the dropdown menu.
The option to download a mapping file from the Network Wizard
* Using the CLI `leap code pull` option would pull the current code into your local repository (inside a folder with the name of your code integration script). You can then locate the leap\_mapping.yaml file and copy it into the root of your project
* Copy Pasting the entire file from the extended code integration view is also possible if the other two options are not available.
Once this file is downloaded placing it within the root folder of your [integration script ](/tensorleap-integration/writing-integration-code)where the [leap.yaml](/tensorleap-integration/leap.yaml) is located would ensure any future upload of a model would have this mapping automatically applied to it.
{% hint style="warning" %}
Note that in case you change architecture or upgrade your server, you might need to create this mapping file again. In that case, uploading [models](/tensorleap-integration/uploading-with-cli/cli-assets-upload#uploading-a-model) would result in errors. If that happens, we recommend deleting or renaming the mapping file so it would not be [automatically applied](/user-interface/project/network/network-mapping/applying-a-mapping-deprecated) when uploading a new model.
{% endhint %}
# Applying a mapping (Deprecated)
How to apply a previously created mapping file
In case a mapping was previously created, it can be applied to the same architecture using the [code integration](/user-interface/project/network/code-integration) panel.
### When is the mapping automatically applied
* The mapping is automatically applied when using the [CLI to upload a new model](/tensorleap-integration/uploading-with-cli/cli-assets-upload) to a project that has leap\_mapping.yaml in its root directory
* The mapping is being directly supplied to the [leap projects push](/tensorleap-integration/uploading-with-cli/cli-assets-upload#uploading-both-a-code-and-model) command using the `--leap-mapping` flag
### How to manually apply a mapping
1. Ensure the current integration script has a [leap\_mapping.yaml](broken://pages/3rU3R1SpB0X70g2DUoJ3) within the selected script version
2. Verify that that the option to "Apply" the mapping appear in the code integration view and click it
The option to "Apply" a previously defined leap mapping
3. [Validate](/user-interface/project/network/network-mapping/validate-mapping) the mapping you applied
4. In case the validation is successful - save the changes made to the current configuration by clicking the "save changes" in the left hand side controller
A node is added to the graph after applying a previously defined mapping
{% hint style="warning" %}
If after applying a mapping to an architecture validate assets fail - it means that either the architecture is not the same (layers could be added if the export process was different), or the server had a major upgrade.
For both cases, we advise to not save the change to the configuration that were applied by the mapping, but to create a new mapping
{% endhint %}
# Code Integration
This section describe the code view within the Network Tab
The code view allows users to see the [integration script](/tensorleap-integration/writing-integration-code) of the code-model pair they have uploaded. That includes the code snapshot, the size of the data splits, used secret, etc.
To open the code view, go to the [Network view](/user-interface/project/network) and click Code on the right hand side.
To expand the code view in a way that would also allow access to the code itself, click the expand button in the top right section of the panel
Expanding the code integration to show the code
The code integration script contain several sections:
1. An in-platform [code-viewing](/user-interface/project/network/code-integration/code-viewing) section
2. An [asset review section](/user-interface/project/network/code-integration/asset-review), that can be used to examine the assets uploaded to the platform: the size of the sets in the set integration script, and the different metrics, metadata, visualizations, etc.
### Code Integration Video Tutorial
{% embed url="" %}
# Code version controller
This section describes the Tensorleap integration script version control and its association with an uploaded model
### Panel Overview
The Code version within the Network tab
Within Tensorleap the [integration scripts](/tensorleap-integration/writing-integration-code) being uploaded to the system are seperates entities than the models and projects. That way, the same code could be used within multiple projects and with multiple models.
The purpose of this section is to associate the specific model that is currently being examined with the relevant [integration script](/tensorleap-integration/writing-integration-code).\
\
The different attributes that could be controlled via this controller:
* The script that is selected for the selected model.
* The version of the script that is being selected for this model.
* The branch of the script that is being selected for this model.
### Changing script selection for a model
#### Changing the selected script
Each integration script uploaded to the platform have a script integration name [given to it upon upload](/tensorleap-integration/uploading-with-cli/cli-assets-upload#uploading-code-only). To switch between different scripts uploaded to the system, simply click the main dropdown menu and select the required scripts.
#### Script versioning at Tensorleap
Script versions
Each new upload that points to the [same integration script](/tensorleap-integration/leap.yaml) would create a new version of this script within the Tensorleap Platform. In such a way, it is possible to revert back to a previously uploaded script and run any model with it.
Script branches
To make the code versioning more flexible, Tensorleap supports **script branches**. In such a way you can create small variations in the script that would support:
* Working with multiple models that need a slight adjustment in data loading or visualization
* Multiple users Working on the same script
* Running experiments without influencing a "working version" of the script
#### Changing the selected script version & branch
By default, the script is pointing at the head of the "master" branch, which is the default branch that is being used. That means, that upon each successful parse of a new version of an integration script uploaded to the platform, each model that is pointing to that code integration would automatically be updated with the most up-to-date code and interfaces changes.
This could be changed, by pointing the model to a different branch or pointing on a specific version.
Changing the code integration pointer - Branches
To set a different version or branch, open the code integration view in your Network tab, and click the downward facing arrow This would upon up a pop-up Window with two tabs: "Branches" and "Versions".
* From the "Branches" Tab you can point to the latest version of each branch. This would ensure new code uploads to the platform would be integrated to this model without need to take further actions.
* From the "Versions" Tab you can point to a specific version. This fixes the script version, and make sure the current model would NOT be updated with different code updates
Changing the code integration pointer - versions
{% hint style="warning" %}
Once the script version or branch is modified the save button should be clicked to ensure the new configuration is kept.
{% endhint %}
{% hint style="warning" %}
Only script versions that were successfully parsed through the system would be able to properly run with a model. In case a version would not be successfully parsed, it would not be available for selection here
{% endhint %}
{% hint style="info" %}
Note that changing the script selection would change the available registered encoders available to use.
{% endhint %}
#### When to use Branch based pointer and version based pointers
* The recommended approach is to point to a branch for as long as your still actively working on your integration, trying new versions, and adding visualizers, metrics, and losses.
* Once you've fixed your code integration and are working more towards analysis, it might be better to point to a specific version - to make sure your analysis would not change due to an intended code change
---
[Next Page](/llms-full.txt/1)


 button within the [**Resources Management**](/user-interface/resources-management) view.
### Dataset Integration
For Tensorleap to read the data and fetch it to the model for training or evaluation, we must provide a [**Dataset Script**](/tensorleap-integration/writing-integration-code#dataset-script). This script defines the **preprocessing** function**, input/ground\_truth** encoders and **metadata** functions.
The script should be set at the `.tensorleap/dataset.py` file.
{% hint style="info" %}
Important to note that this script should be contained and **not** use external project dependencies!
{% endhint %}
This script will later be synced with the [**Dataset Instance**](/tensorleap-integration/writing-integration-code#dataset-instance) set by the `DATASET_NAME` property above.
More info can be found at the Dataset Script page. A sample script can be found at the [MNIST Guide](/guides/full-guides/mnist-guide).
Additional examples can be found at the [**Tensorleap Examples**](https://github.com/tensorleap/tensorleap/) repository.
### Model Integration
The model integration script is located at `.tensorleap/model.py`, an example script below:
{% tabs %}
{% tab title="Tensorflow" %}
```python
from pathlib import Path
from myproject.model import build_model # import from the parent project
def leap_save_model(target_file_path: Path):
# Load your model
model = build_model()
# Save it to the path supplied as an arugment (has a .h5 suffix)
model.save(target_file_path)
```
{% endtab %}
{% tab title="PyTorch" %}
Coming Soon
{% endtab %}
{% endtabs %}
The `leap_save_model` is automatically called by the CLI when pushing a model into the Tensorleap platform. Its purpose is to prepare and store the model in the provided `target_file_path`.
More info can be found at the Dataset Script page. A sample script can be found at the [MNIST Guide](/guides/full-guides/mnist-guide).
Additional examples can be found at the [**Tensorleap Examples**](https://github.com/tensorleap/tensorleap/) repository.
### Validation
You can validate the **dataset** and **model** scripts locally by using the following command:
```
leap check --all
```
This command will validate the scripts together with its synchronization with the Tensorleap platform.
### Synchronization
Once everything is validated, you can push the **dataset script** and **model** to the Tensorleap platform for further evaluation/training/analysis.
To push the **dataset script**, use the following command from the project path:
```bash
leap push --dataset
```
To push the model to the project, use the following command:
```bash
leap push --model
```
You can also set the `branch-name`, `description` and `model-name` as such:
```
leap push --model [--branch-name=
button within the [**Resources Management**](/user-interface/resources-management) view.
### Dataset Integration
For Tensorleap to read the data and fetch it to the model for training or evaluation, we must provide a [**Dataset Script**](/tensorleap-integration/writing-integration-code#dataset-script). This script defines the **preprocessing** function**, input/ground\_truth** encoders and **metadata** functions.
The script should be set at the `.tensorleap/dataset.py` file.
{% hint style="info" %}
Important to note that this script should be contained and **not** use external project dependencies!
{% endhint %}
This script will later be synced with the [**Dataset Instance**](/tensorleap-integration/writing-integration-code#dataset-instance) set by the `DATASET_NAME` property above.
More info can be found at the Dataset Script page. A sample script can be found at the [MNIST Guide](/guides/full-guides/mnist-guide).
Additional examples can be found at the [**Tensorleap Examples**](https://github.com/tensorleap/tensorleap/) repository.
### Model Integration
The model integration script is located at `.tensorleap/model.py`, an example script below:
{% tabs %}
{% tab title="Tensorflow" %}
```python
from pathlib import Path
from myproject.model import build_model # import from the parent project
def leap_save_model(target_file_path: Path):
# Load your model
model = build_model()
# Save it to the path supplied as an arugment (has a .h5 suffix)
model.save(target_file_path)
```
{% endtab %}
{% tab title="PyTorch" %}
Coming Soon
{% endtab %}
{% endtabs %}
The `leap_save_model` is automatically called by the CLI when pushing a model into the Tensorleap platform. Its purpose is to prepare and store the model in the provided `target_file_path`.
More info can be found at the Dataset Script page. A sample script can be found at the [MNIST Guide](/guides/full-guides/mnist-guide).
Additional examples can be found at the [**Tensorleap Examples**](https://github.com/tensorleap/tensorleap/) repository.
### Validation
You can validate the **dataset** and **model** scripts locally by using the following command:
```
leap check --all
```
This command will validate the scripts together with its synchronization with the Tensorleap platform.
### Synchronization
Once everything is validated, you can push the **dataset script** and **model** to the Tensorleap platform for further evaluation/training/analysis.
To push the **dataset script**, use the following command from the project path:
```bash
leap push --dataset
```
To push the model to the project, use the following command:
```bash
leap push --model
```
You can also set the `branch-name`, `description` and `model-name` as such:
```
leap push --model [--branch-name= on the right to **Open Commit**.
* Back on the **Network** view, set the [**Dataset** **Block**](/user-interface/project/network/network-mapping/create-a-mapping-deprecated/input-node#setup) to point to the `DATASET_NAME` [**Dataset Instance**](broken://pages/CBUAxbBBCSLCooJBRheA), and connect it to the first layer.
* Add the **ground truth**, **loss** and **optimizer** blocks, and connect them to the end of the network.\
More info at [**Dataset Block Setup**](/user-interface/project/network/network-mapping/create-a-mapping-deprecated/input-node#setup) and [**Loss and Optimizer**](/user-interface/project/network/network-mapping/create-a-mapping-deprecated/loss-node)**.**
* Save the version model by clicking the
on the right to **Open Commit**.
* Back on the **Network** view, set the [**Dataset** **Block**](/user-interface/project/network/network-mapping/create-a-mapping-deprecated/input-node#setup) to point to the `DATASET_NAME` [**Dataset Instance**](broken://pages/CBUAxbBBCSLCooJBRheA), and connect it to the first layer.
* Add the **ground truth**, **loss** and **optimizer** blocks, and connect them to the end of the network.\
More info at [**Dataset Block Setup**](/user-interface/project/network/network-mapping/create-a-mapping-deprecated/input-node#setup) and [**Loss and Optimizer**](/user-interface/project/network/network-mapping/create-a-mapping-deprecated/loss-node)**.**
* Save the version model by clicking the  button and set the `Revision Name` . This adds the new version to the [**Versions**](/user-interface/project/versions) view. More info at [**Save a Version**](/user-interface/project/versions#save-a-version).
* The model is ready for **training** or **evaluation**:
***Already trained model*** - click
button and set the `Revision Name` . This adds the new version to the [**Versions**](/user-interface/project/versions) view. More info at [**Save a Version**](/user-interface/project/versions#save-a-version).
* The model is ready for **training** or **evaluation**:
***Already trained model*** - click  from the top bar to inference the data and collect metrics.\
***Re-train / train from scratch in the Tensorleap platform*** - click
from the top bar to inference the data and collect metrics.\
***Re-train / train from scratch in the Tensorleap platform*** - click  from the top bar to train the model.\
More info at [Evaluate a Model](/user-interface/project/menu-bar/evaluate-a-model).
* After the process is done, the model is ready for analysis. More info at [Sample Analysis](/user-interface/dashboards/dashlets/sample-analysis).
# Tensorleap Integration
Integrating your own model and dataset to the platform and reviewing the development proces
This page outlines the different elements of the tensorleap integration and reviews the integration flow and development cycle within the platform.
### Prerequisites
* [Access to Tensorleap](/getting-started/tensorleap-setup/installation#accessing-the-tensorleap-platform)
* Leap CLI is [installed](/getting-started/tensorleap-setup/installation#tensorleap-cli-installation) and [authenticated](/getting-started/tensorleap-setup/cli-authentication)
* .onnx or .h5 model
* [A valid code integration](/tensorleap-integration/writing-integration-code) that instructs Tensorleap on how to load the dataset and parse and visualize different elements.
* Tensoleap [configuration yamls](/tensorleap-integration/configurations-files):
* A [leap.yaml](/tensorleap-integration/leap.yaml) file that contains the setup of your integration.
* (optionally) requirements.txt file if non-default requirements are needed
* An [integration test](/tensorleap-integration/integration-test) script that instructs Tensorleap on what code needs to be run during model analysis (loss, metrics, visualizers & metadata)
### Expected Folder Structure
The expected file structure for a Tensorleap code integration is the following:
```
my_leap_project/
├── ...
├── leap_binder.py
├── leap.yaml
├── integration_test.py
```
Here, leap\_binder.py contains the [integration script](/tensorleap-integration/writing-integration-code).
### The Tensorleap integration flow
1. Start from an existing repo from our [Leap Hub](/getting-started/quickstart/quickstart-using-leap-hub) or use the CLI to add template Tensorleap integration files into your existing repository.
2. Make sure your data is accessible by the [Tensorleap Server](/getting-started/tensorleap-setup/installation#tensorleap-server).
3. Create a basic [Integration script](/tensorleap-integration/writing-integration-code). This can include an [input\_encoder](/tensorleap-integration/writing-integration-code/input-encoder), [GT encoder](/tensorleap-integration/writing-integration-code/ground-truth-encoder), [loss](/tensorleap-integration/writing-integration-code/custom-loss-function), and a basic [visualizer](/tensorleap-integration/writing-integration-code/visualizer-function) for the input, prediction and GT.
4. Verify your integration validity locally using an [Integration test](/tensorleap-integration/integration-test).
5. Use the [CLI](/tensorleap-integration/uploading-with-cli/cli-assets-upload) to push the code and models to the platform
6. Use the Platform to [Evaluate](/user-interface/project/menu-bar/evaluate-a-model) and process the data using your model.
{% hint style="info" %}
After the integration step the model and dataset can be analyzed using the platform. Usually, during the analysis phase the insights and analysis being done points to a missing metadata, better visualization method, or a new metric. These elements should then be added to the integration script and then steps 4-7 are repeated.
{% endhint %}
# Writing Integration Code
Integration Script - How to integrate your dataset and dataloaders with Tensorleap
The way to integrate a dataset into Tensorleap is by providing an [**Integration** **Script**](#integration-script) that instructs the platform on how to load, parse and visualize your data when **evaluating** and **analyzing** a model.
## Integration Script
The Integration Script has the following structure:
* [**Preprocess Function**](/tensorleap-integration/writing-integration-code/preprocess-function) - prepares the data state for fetching into the neural network. Similar to a Pytorch Dataset.
* [**Input Encoders**](/tensorleap-integration/writing-integration-code/input-encoder) - read and prepare each input for your neural networks. Similar to a \_\_getitem\_\_ that fetches the input.
* [**Ground Truth Encoders**](/tensorleap-integration/writing-integration-code/ground-truth-encoder) - read and prepare each Ground Truth. Similar to a \_\_getitem\_\_ that fetches the ground truth.
* [**Metadata Functions**](/tensorleap-integration/writing-integration-code/metadata-function) - add extra data to each sample for future analysis.
* [**Visualizer Functions**](/tensorleap-integration/writing-integration-code/visualizer-function) *(optional)* - An interface that instructs the Tensorleap platform on how to visualize your inputs and outputs.
* [**Decorators**](/tensorleap-integration/python-api/code_loader/decorators) - bind the functions above for Tensorleap to register the dataset structure.
### Architecture
The [**Preprocess Function**](/tensorleap-integration/writing-integration-code/preprocess-function) runs once, and returns a list of data objects of type **PreprocessResponse** that correspond to the *training*, *validation*, *test, and unlabelled* dataset slices.
The returned [**PreprocessResponse**](/tensorleap-integration/python-api/code_loader/datasetclasses/preprocessresponse) object is then passed to the [**Input Encoders**](/tensorleap-integration/writing-integration-code/input-encoder), [**Ground Truth Encoders**](/tensorleap-integration/writing-integration-code/ground-truth-encoder) and [**Metadata Functions**](/tensorleap-integration/writing-integration-code/metadata-function), whose function is to read and prepare the data for a **single** sample with index `idx` passed as an argument.
{% hint style="info" %}
When processing the unlabelled set, the Ground Truth encoders and every metric or loss they're connected to is not called - since Ground Truth by definition is absent.
{% endhint %}
Finally, the [**Input Encoders**](/tensorleap-integration/writing-integration-code/input-encoder), [**Ground Truth Encoders**](/tensorleap-integration/writing-integration-code/ground-truth-encoder)**,** must be declared using the [Tensorleap decorators](/tensorleap-integration/python-api/code_loader/decorators).
The [**Metadata Functions**](/tensorleap-integration/writing-integration-code/metadata-function)**,** [**Visualizer Functions**](/tensorleap-integration/writing-integration-code/visualizer-function)**,** [**Metric Functions**](/tensorleap-integration/writing-integration-code/custom-metrics) are not mandatory, but are recommended to ensure a complete analysis using the Platform
The script can be integrated into the Platform using the [CLI](/tensorleap-integration/uploading-with-cli/cli-assets-upload).
### Examples
#### Basic Usage
```python
from typing import List, Union
# Tensorleap imports
from code_loader.contract.datasetclasses import PreprocessResponse
from code_loader.contract.visualizer_classes import LeapHorizontalBar
from code_loader.inner_leap_binder.leapbinder_decorators import *
from code_loader.contract.enums import DataStateType
# Preprocess Function:
@tensorleap_preprocess()
def preprocess_func() -> List[PreprocessResponse]:
...
train = PreprocessResponse(sample_ids=list(train_X.index), data=train_df, state=DataStateType.training)
val = PreprocessResponse(sample_ids=list(val_X.index), data=val_df, state=DataStateType.validation)
test = PreprocessResponse(sample_ids=list(test_X.index), data=test_df, state=DataStateType.test)
return [train, val, test]
# Input Encoder(s):
@tensorleap_input_encoder('image')
def input_encoder(idx: int, preprocess: PreprocessResponse) -> np.ndarray:
return preprocess.data.iloc[idx]['samples'].astype('float32')
# Ground Truth Encoder(s):
@tensorleap_gt_encoder('classes')
def gt_encoder(idx: int, preprocess: PreprocessResponse) -> np.ndarray:
return preprocess.data.iloc[idx]['ground_truth'].astype('float32')
# Metadata Function(s):
@tensorleap_metadata(name='label')
def metadata_label(idx: int, preprocess: PreprocessResponse) -> Union[int, float, str, bool]:
return preprocess.data.iloc[idx]['class_name']
LABELS = ['cat', 'dog', 'tiger', 'cow', 'goat', 'zebra', 'horse']
@tensorleap_custom_visualizer(name="pet_visualizer", visualizer_type=LeapDataType.HorizontalBar)
def is_pet_visualizer(animal_prediction: np.ndarray) -> LeapHorizontalBar:
np_labels = np.array(LABELS)
pet_confidence = animal_prediction[np_labels == 'cat'][0] + animal_prediction[np_labels == 'dog'][0]
body = np.array([pet_confidence, 1-pet_confidence])
return LeapHorizontalBar(body=body, labels=['pet', 'not-pet'])
```
### Retrieve the Secret
Tensorleap allows you to store sensitive information as a **Secret** in a secure location called [**Secret Manager**](/user-interface/secrets-management).
The **Integration Script** has access to the **Secret** [set for this Codebase](/tensorleap-integration/uploading-with-cli/cli-assets-upload#uploading-code-only). The secret is stored at the `AUTH_SECRET` environment variable, and can be accessed simply by using:
```python
import os
auth_secret_string = os.environ['AUTH_SECRET']
```
### Persistent Storage
Persistent storage is data storage that persists across different instances and reboots of job processes. In some cases there is a need to cache data. For example, after preprocessing or for very large files.
#### Cloud Platform
Tensorleap's cloud persistent storage can be accessed via writing and reading to the `/nfs/` path:
```python
persistent_dir = '/nfs/'
```
{% hint style="warning" %}
NOTE: Mounted storage in the cloud is set up only to serve as a cache, and it is regularly cleaned.
{% endhint %}
#### On Premise
In case you are running an on-premise solution, you can access your chosen mounted storage.
### Code Integration Video Tutorial
{% embed url="
from the top bar to train the model.\
More info at [Evaluate a Model](/user-interface/project/menu-bar/evaluate-a-model).
* After the process is done, the model is ready for analysis. More info at [Sample Analysis](/user-interface/dashboards/dashlets/sample-analysis).
# Tensorleap Integration
Integrating your own model and dataset to the platform and reviewing the development proces
This page outlines the different elements of the tensorleap integration and reviews the integration flow and development cycle within the platform.
### Prerequisites
* [Access to Tensorleap](/getting-started/tensorleap-setup/installation#accessing-the-tensorleap-platform)
* Leap CLI is [installed](/getting-started/tensorleap-setup/installation#tensorleap-cli-installation) and [authenticated](/getting-started/tensorleap-setup/cli-authentication)
* .onnx or .h5 model
* [A valid code integration](/tensorleap-integration/writing-integration-code) that instructs Tensorleap on how to load the dataset and parse and visualize different elements.
* Tensoleap [configuration yamls](/tensorleap-integration/configurations-files):
* A [leap.yaml](/tensorleap-integration/leap.yaml) file that contains the setup of your integration.
* (optionally) requirements.txt file if non-default requirements are needed
* An [integration test](/tensorleap-integration/integration-test) script that instructs Tensorleap on what code needs to be run during model analysis (loss, metrics, visualizers & metadata)
### Expected Folder Structure
The expected file structure for a Tensorleap code integration is the following:
```
my_leap_project/
├── ...
├── leap_binder.py
├── leap.yaml
├── integration_test.py
```
Here, leap\_binder.py contains the [integration script](/tensorleap-integration/writing-integration-code).
### The Tensorleap integration flow
1. Start from an existing repo from our [Leap Hub](/getting-started/quickstart/quickstart-using-leap-hub) or use the CLI to add template Tensorleap integration files into your existing repository.
2. Make sure your data is accessible by the [Tensorleap Server](/getting-started/tensorleap-setup/installation#tensorleap-server).
3. Create a basic [Integration script](/tensorleap-integration/writing-integration-code). This can include an [input\_encoder](/tensorleap-integration/writing-integration-code/input-encoder), [GT encoder](/tensorleap-integration/writing-integration-code/ground-truth-encoder), [loss](/tensorleap-integration/writing-integration-code/custom-loss-function), and a basic [visualizer](/tensorleap-integration/writing-integration-code/visualizer-function) for the input, prediction and GT.
4. Verify your integration validity locally using an [Integration test](/tensorleap-integration/integration-test).
5. Use the [CLI](/tensorleap-integration/uploading-with-cli/cli-assets-upload) to push the code and models to the platform
6. Use the Platform to [Evaluate](/user-interface/project/menu-bar/evaluate-a-model) and process the data using your model.
{% hint style="info" %}
After the integration step the model and dataset can be analyzed using the platform. Usually, during the analysis phase the insights and analysis being done points to a missing metadata, better visualization method, or a new metric. These elements should then be added to the integration script and then steps 4-7 are repeated.
{% endhint %}
# Writing Integration Code
Integration Script - How to integrate your dataset and dataloaders with Tensorleap
The way to integrate a dataset into Tensorleap is by providing an [**Integration** **Script**](#integration-script) that instructs the platform on how to load, parse and visualize your data when **evaluating** and **analyzing** a model.
## Integration Script
The Integration Script has the following structure:
* [**Preprocess Function**](/tensorleap-integration/writing-integration-code/preprocess-function) - prepares the data state for fetching into the neural network. Similar to a Pytorch Dataset.
* [**Input Encoders**](/tensorleap-integration/writing-integration-code/input-encoder) - read and prepare each input for your neural networks. Similar to a \_\_getitem\_\_ that fetches the input.
* [**Ground Truth Encoders**](/tensorleap-integration/writing-integration-code/ground-truth-encoder) - read and prepare each Ground Truth. Similar to a \_\_getitem\_\_ that fetches the ground truth.
* [**Metadata Functions**](/tensorleap-integration/writing-integration-code/metadata-function) - add extra data to each sample for future analysis.
* [**Visualizer Functions**](/tensorleap-integration/writing-integration-code/visualizer-function) *(optional)* - An interface that instructs the Tensorleap platform on how to visualize your inputs and outputs.
* [**Decorators**](/tensorleap-integration/python-api/code_loader/decorators) - bind the functions above for Tensorleap to register the dataset structure.
### Architecture
The [**Preprocess Function**](/tensorleap-integration/writing-integration-code/preprocess-function) runs once, and returns a list of data objects of type **PreprocessResponse** that correspond to the *training*, *validation*, *test, and unlabelled* dataset slices.
The returned [**PreprocessResponse**](/tensorleap-integration/python-api/code_loader/datasetclasses/preprocessresponse) object is then passed to the [**Input Encoders**](/tensorleap-integration/writing-integration-code/input-encoder), [**Ground Truth Encoders**](/tensorleap-integration/writing-integration-code/ground-truth-encoder) and [**Metadata Functions**](/tensorleap-integration/writing-integration-code/metadata-function), whose function is to read and prepare the data for a **single** sample with index `idx` passed as an argument.
{% hint style="info" %}
When processing the unlabelled set, the Ground Truth encoders and every metric or loss they're connected to is not called - since Ground Truth by definition is absent.
{% endhint %}
Finally, the [**Input Encoders**](/tensorleap-integration/writing-integration-code/input-encoder), [**Ground Truth Encoders**](/tensorleap-integration/writing-integration-code/ground-truth-encoder)**,** must be declared using the [Tensorleap decorators](/tensorleap-integration/python-api/code_loader/decorators).
The [**Metadata Functions**](/tensorleap-integration/writing-integration-code/metadata-function)**,** [**Visualizer Functions**](/tensorleap-integration/writing-integration-code/visualizer-function)**,** [**Metric Functions**](/tensorleap-integration/writing-integration-code/custom-metrics) are not mandatory, but are recommended to ensure a complete analysis using the Platform
The script can be integrated into the Platform using the [CLI](/tensorleap-integration/uploading-with-cli/cli-assets-upload).
### Examples
#### Basic Usage
```python
from typing import List, Union
# Tensorleap imports
from code_loader.contract.datasetclasses import PreprocessResponse
from code_loader.contract.visualizer_classes import LeapHorizontalBar
from code_loader.inner_leap_binder.leapbinder_decorators import *
from code_loader.contract.enums import DataStateType
# Preprocess Function:
@tensorleap_preprocess()
def preprocess_func() -> List[PreprocessResponse]:
...
train = PreprocessResponse(sample_ids=list(train_X.index), data=train_df, state=DataStateType.training)
val = PreprocessResponse(sample_ids=list(val_X.index), data=val_df, state=DataStateType.validation)
test = PreprocessResponse(sample_ids=list(test_X.index), data=test_df, state=DataStateType.test)
return [train, val, test]
# Input Encoder(s):
@tensorleap_input_encoder('image')
def input_encoder(idx: int, preprocess: PreprocessResponse) -> np.ndarray:
return preprocess.data.iloc[idx]['samples'].astype('float32')
# Ground Truth Encoder(s):
@tensorleap_gt_encoder('classes')
def gt_encoder(idx: int, preprocess: PreprocessResponse) -> np.ndarray:
return preprocess.data.iloc[idx]['ground_truth'].astype('float32')
# Metadata Function(s):
@tensorleap_metadata(name='label')
def metadata_label(idx: int, preprocess: PreprocessResponse) -> Union[int, float, str, bool]:
return preprocess.data.iloc[idx]['class_name']
LABELS = ['cat', 'dog', 'tiger', 'cow', 'goat', 'zebra', 'horse']
@tensorleap_custom_visualizer(name="pet_visualizer", visualizer_type=LeapDataType.HorizontalBar)
def is_pet_visualizer(animal_prediction: np.ndarray) -> LeapHorizontalBar:
np_labels = np.array(LABELS)
pet_confidence = animal_prediction[np_labels == 'cat'][0] + animal_prediction[np_labels == 'dog'][0]
body = np.array([pet_confidence, 1-pet_confidence])
return LeapHorizontalBar(body=body, labels=['pet', 'not-pet'])
```
### Retrieve the Secret
Tensorleap allows you to store sensitive information as a **Secret** in a secure location called [**Secret Manager**](/user-interface/secrets-management).
The **Integration Script** has access to the **Secret** [set for this Codebase](/tensorleap-integration/uploading-with-cli/cli-assets-upload#uploading-code-only). The secret is stored at the `AUTH_SECRET` environment variable, and can be accessed simply by using:
```python
import os
auth_secret_string = os.environ['AUTH_SECRET']
```
### Persistent Storage
Persistent storage is data storage that persists across different instances and reboots of job processes. In some cases there is a need to cache data. For example, after preprocessing or for very large files.
#### Cloud Platform
Tensorleap's cloud persistent storage can be accessed via writing and reading to the `/nfs/` path:
```python
persistent_dir = '/nfs/'
```
{% hint style="warning" %}
NOTE: Mounted storage in the cloud is set up only to serve as a cache, and it is regularly cleaned.
{% endhint %}
#### On Premise
In case you are running an on-premise solution, you can access your chosen mounted storage.
### Code Integration Video Tutorial
{% embed url="


 on the model you would like to inspect:


 button to save your changes to the mapping graph. Any unsaved changes in the configuration would be indicated by an orange dot over the save icon
  .
{% endhint %}
{% hint style="info" %}
After you are satisfied with the changes in your mapping you should [validate](/user-interface/project/network/network-mapping/validate-mapping) it is correct, and then [save it to file](/user-interface/project/network/network-mapping/save-mapping-to-file-deprecated) so you'll be able to [re-apply](/user-interface/project/network/network-mapping/applying-a-mapping-deprecated) it at will.
{% endhint %}
# Network Wizard
The network wizard (located in the top right part of the Network view) should assist you in the completion of your mapping graph. It is a step-by-step process that should lead you through Adding a model, configuring inputs, adding a loss, adding metrics, and adding a visualizer.
.
{% endhint %}
{% hint style="info" %}
After you are satisfied with the changes in your mapping you should [validate](/user-interface/project/network/network-mapping/validate-mapping) it is correct, and then [save it to file](/user-interface/project/network/network-mapping/save-mapping-to-file-deprecated) so you'll be able to [re-apply](/user-interface/project/network/network-mapping/applying-a-mapping-deprecated) it at will.
{% endhint %}
# Network Wizard
The network wizard (located in the top right part of the Network view) should assist you in the completion of your mapping graph. It is a step-by-step process that should lead you through Adding a model, configuring inputs, adding a loss, adding metrics, and adding a visualizer.


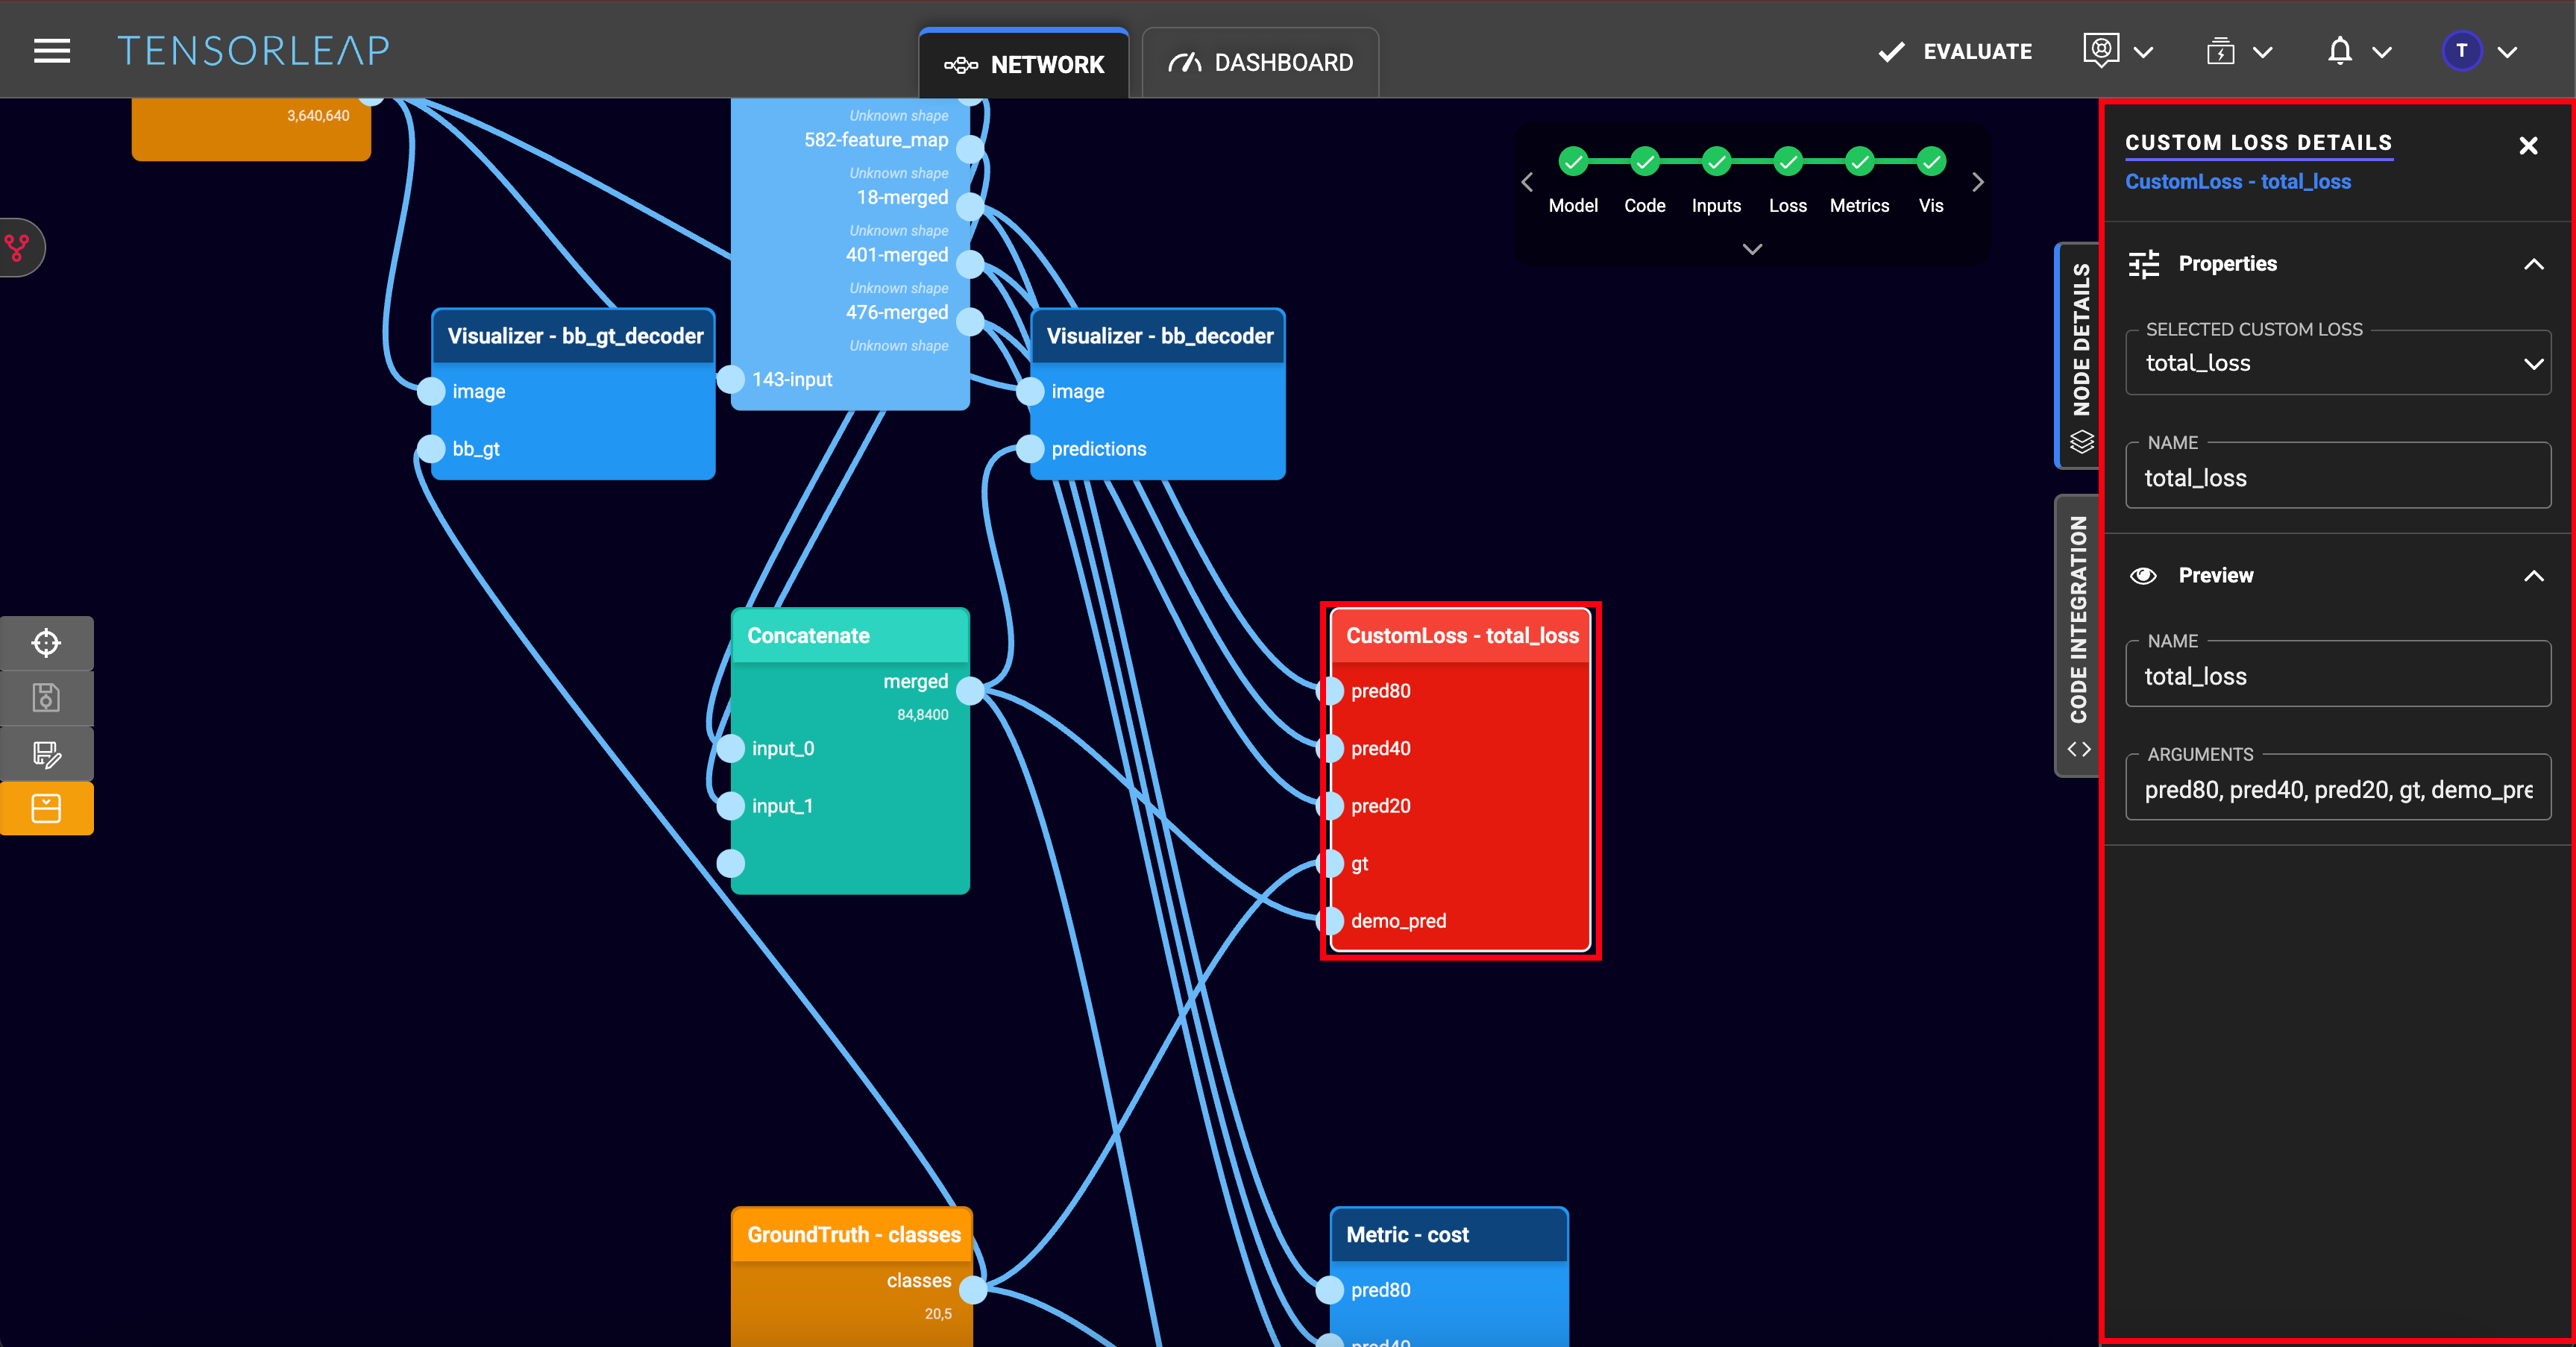
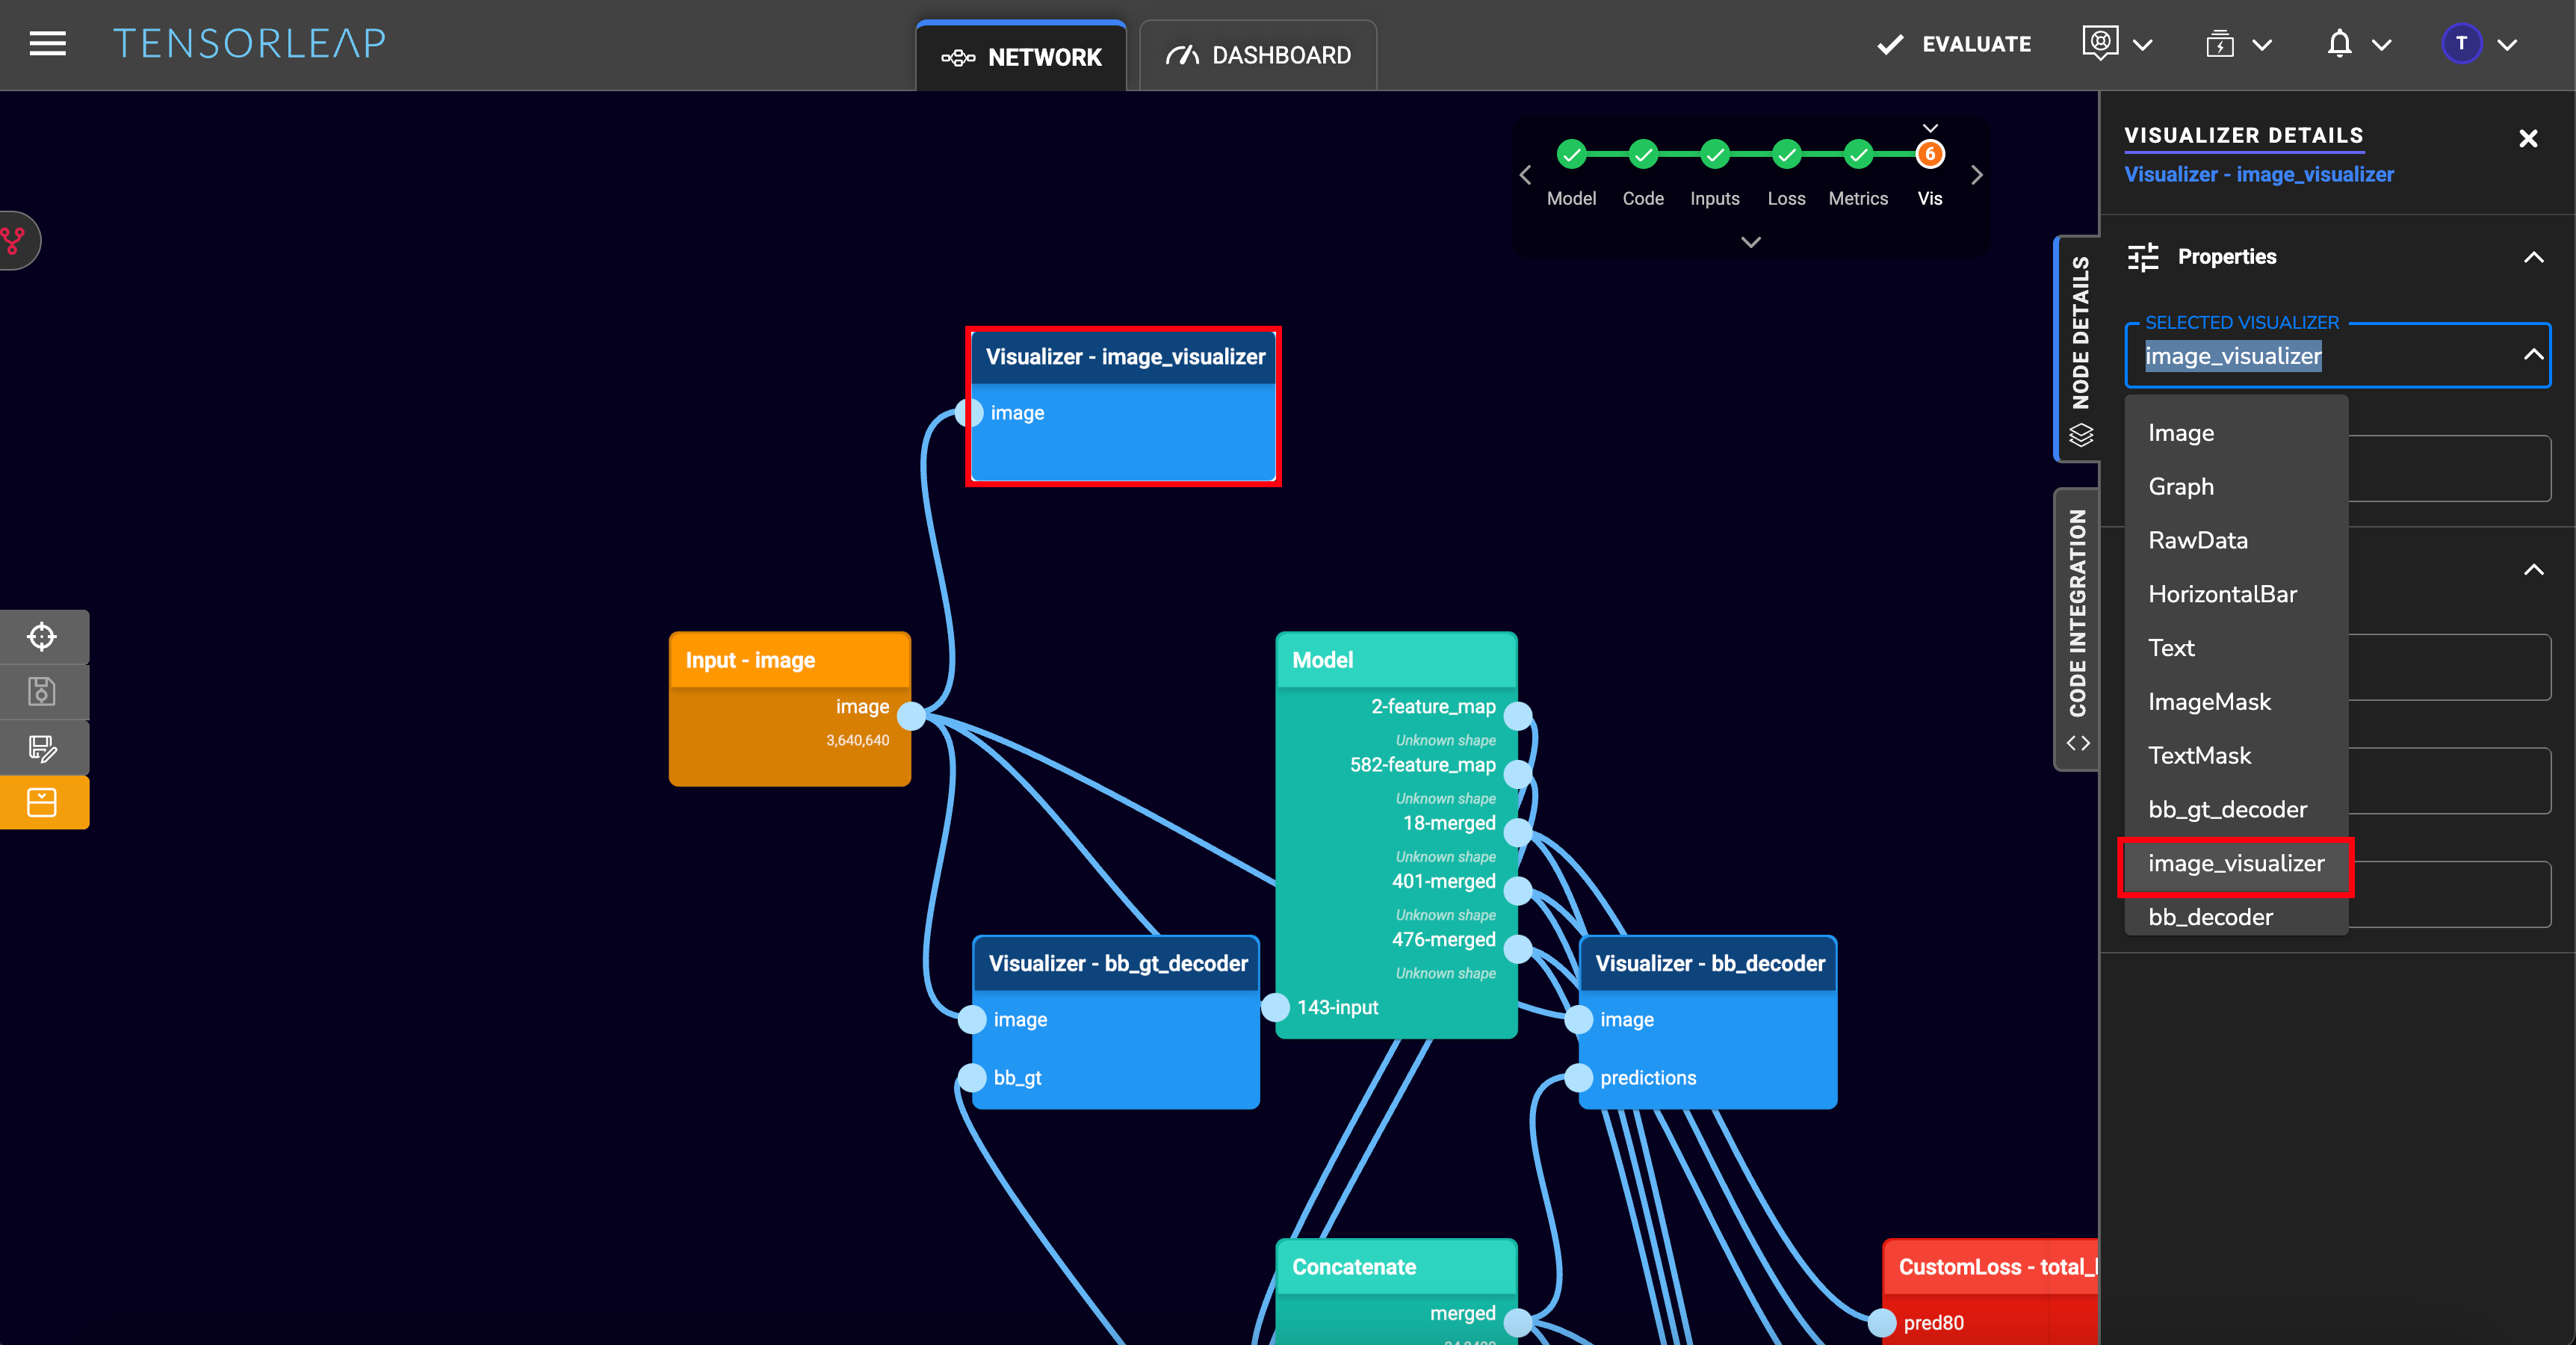
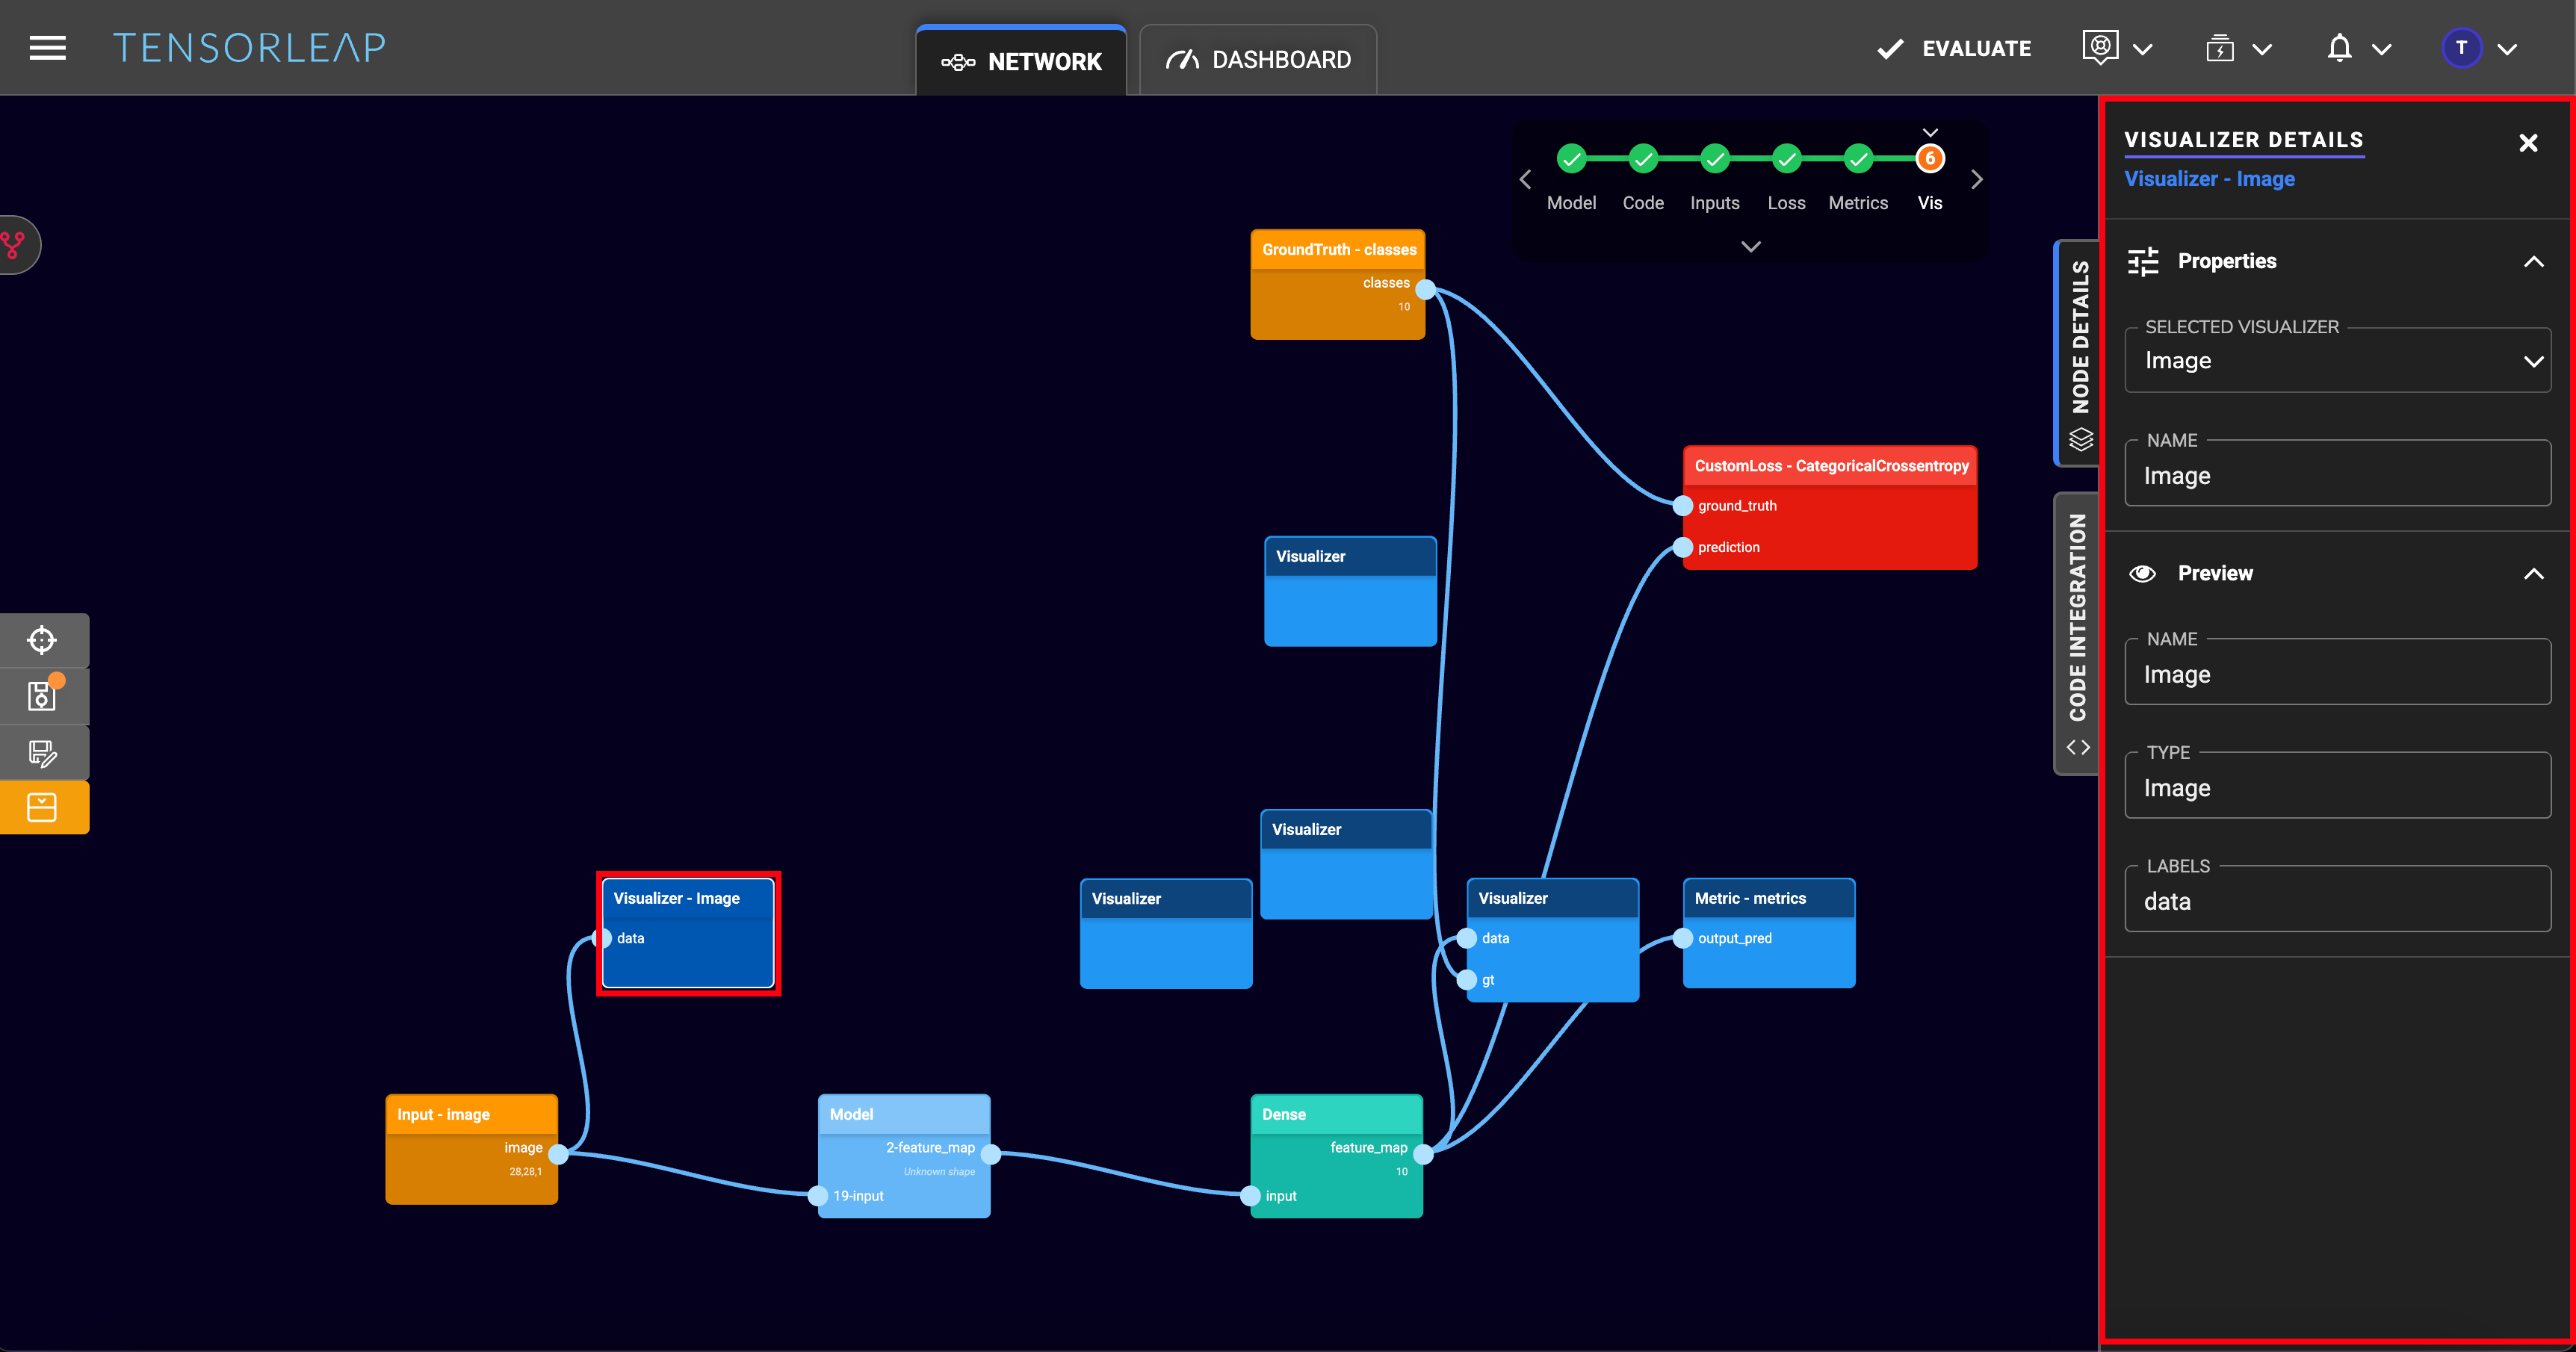
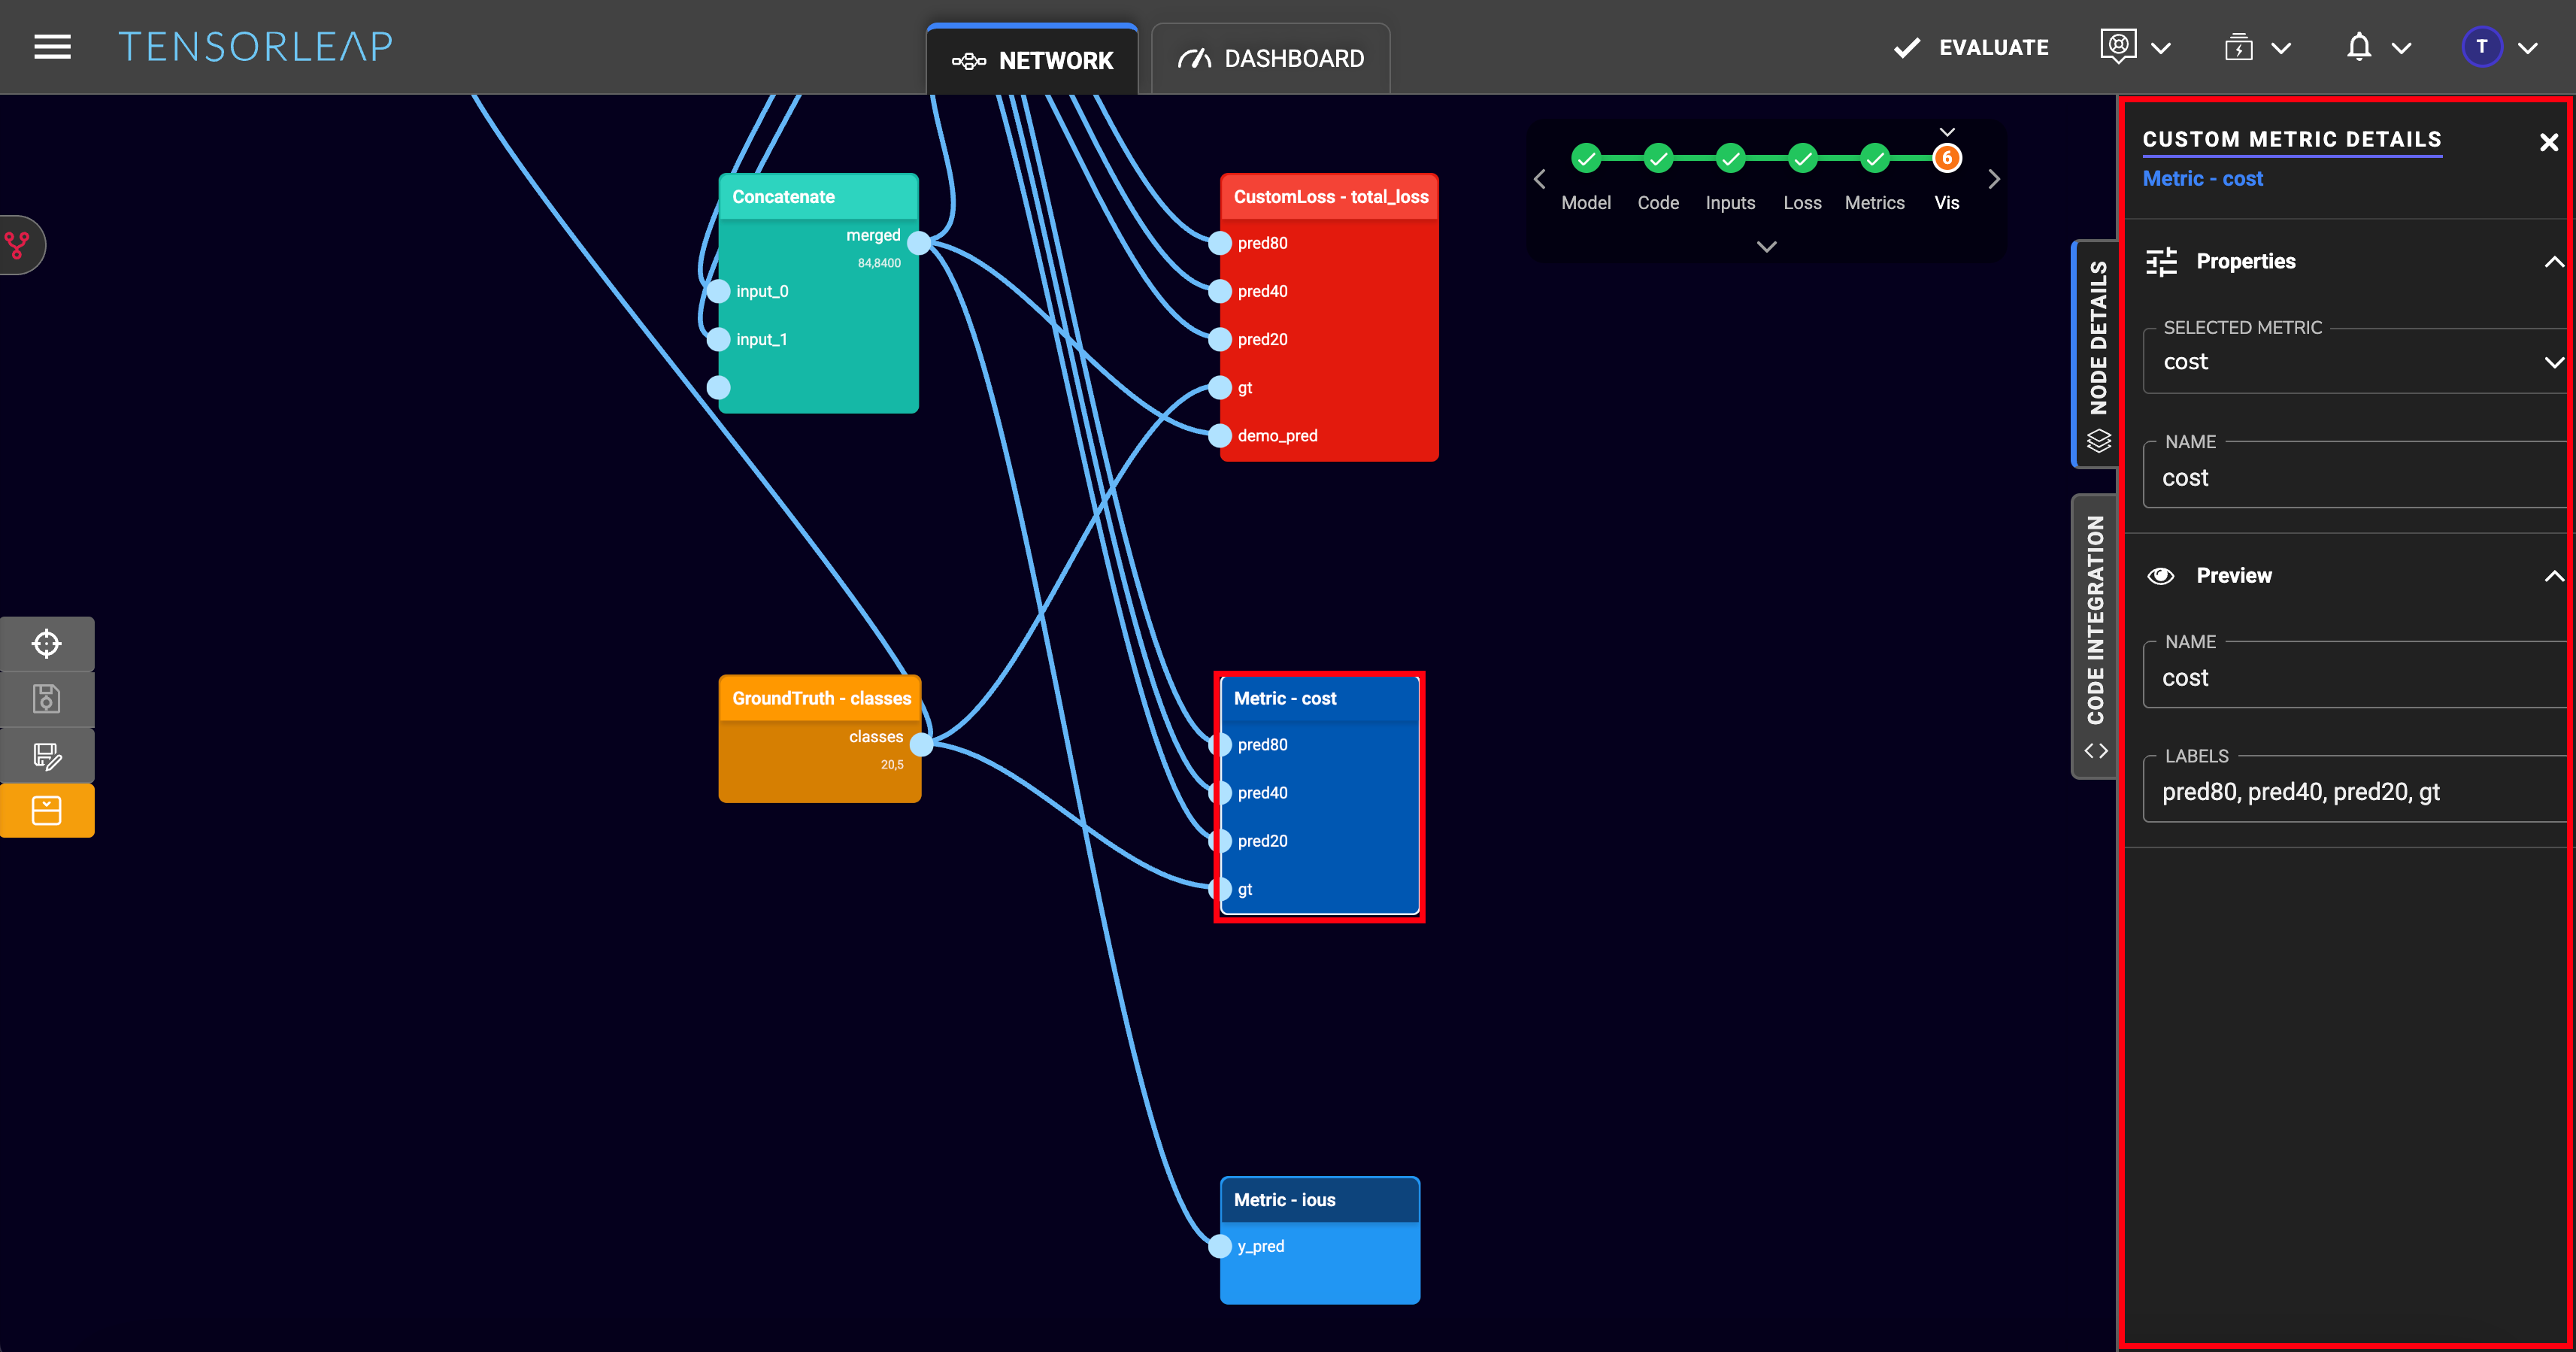
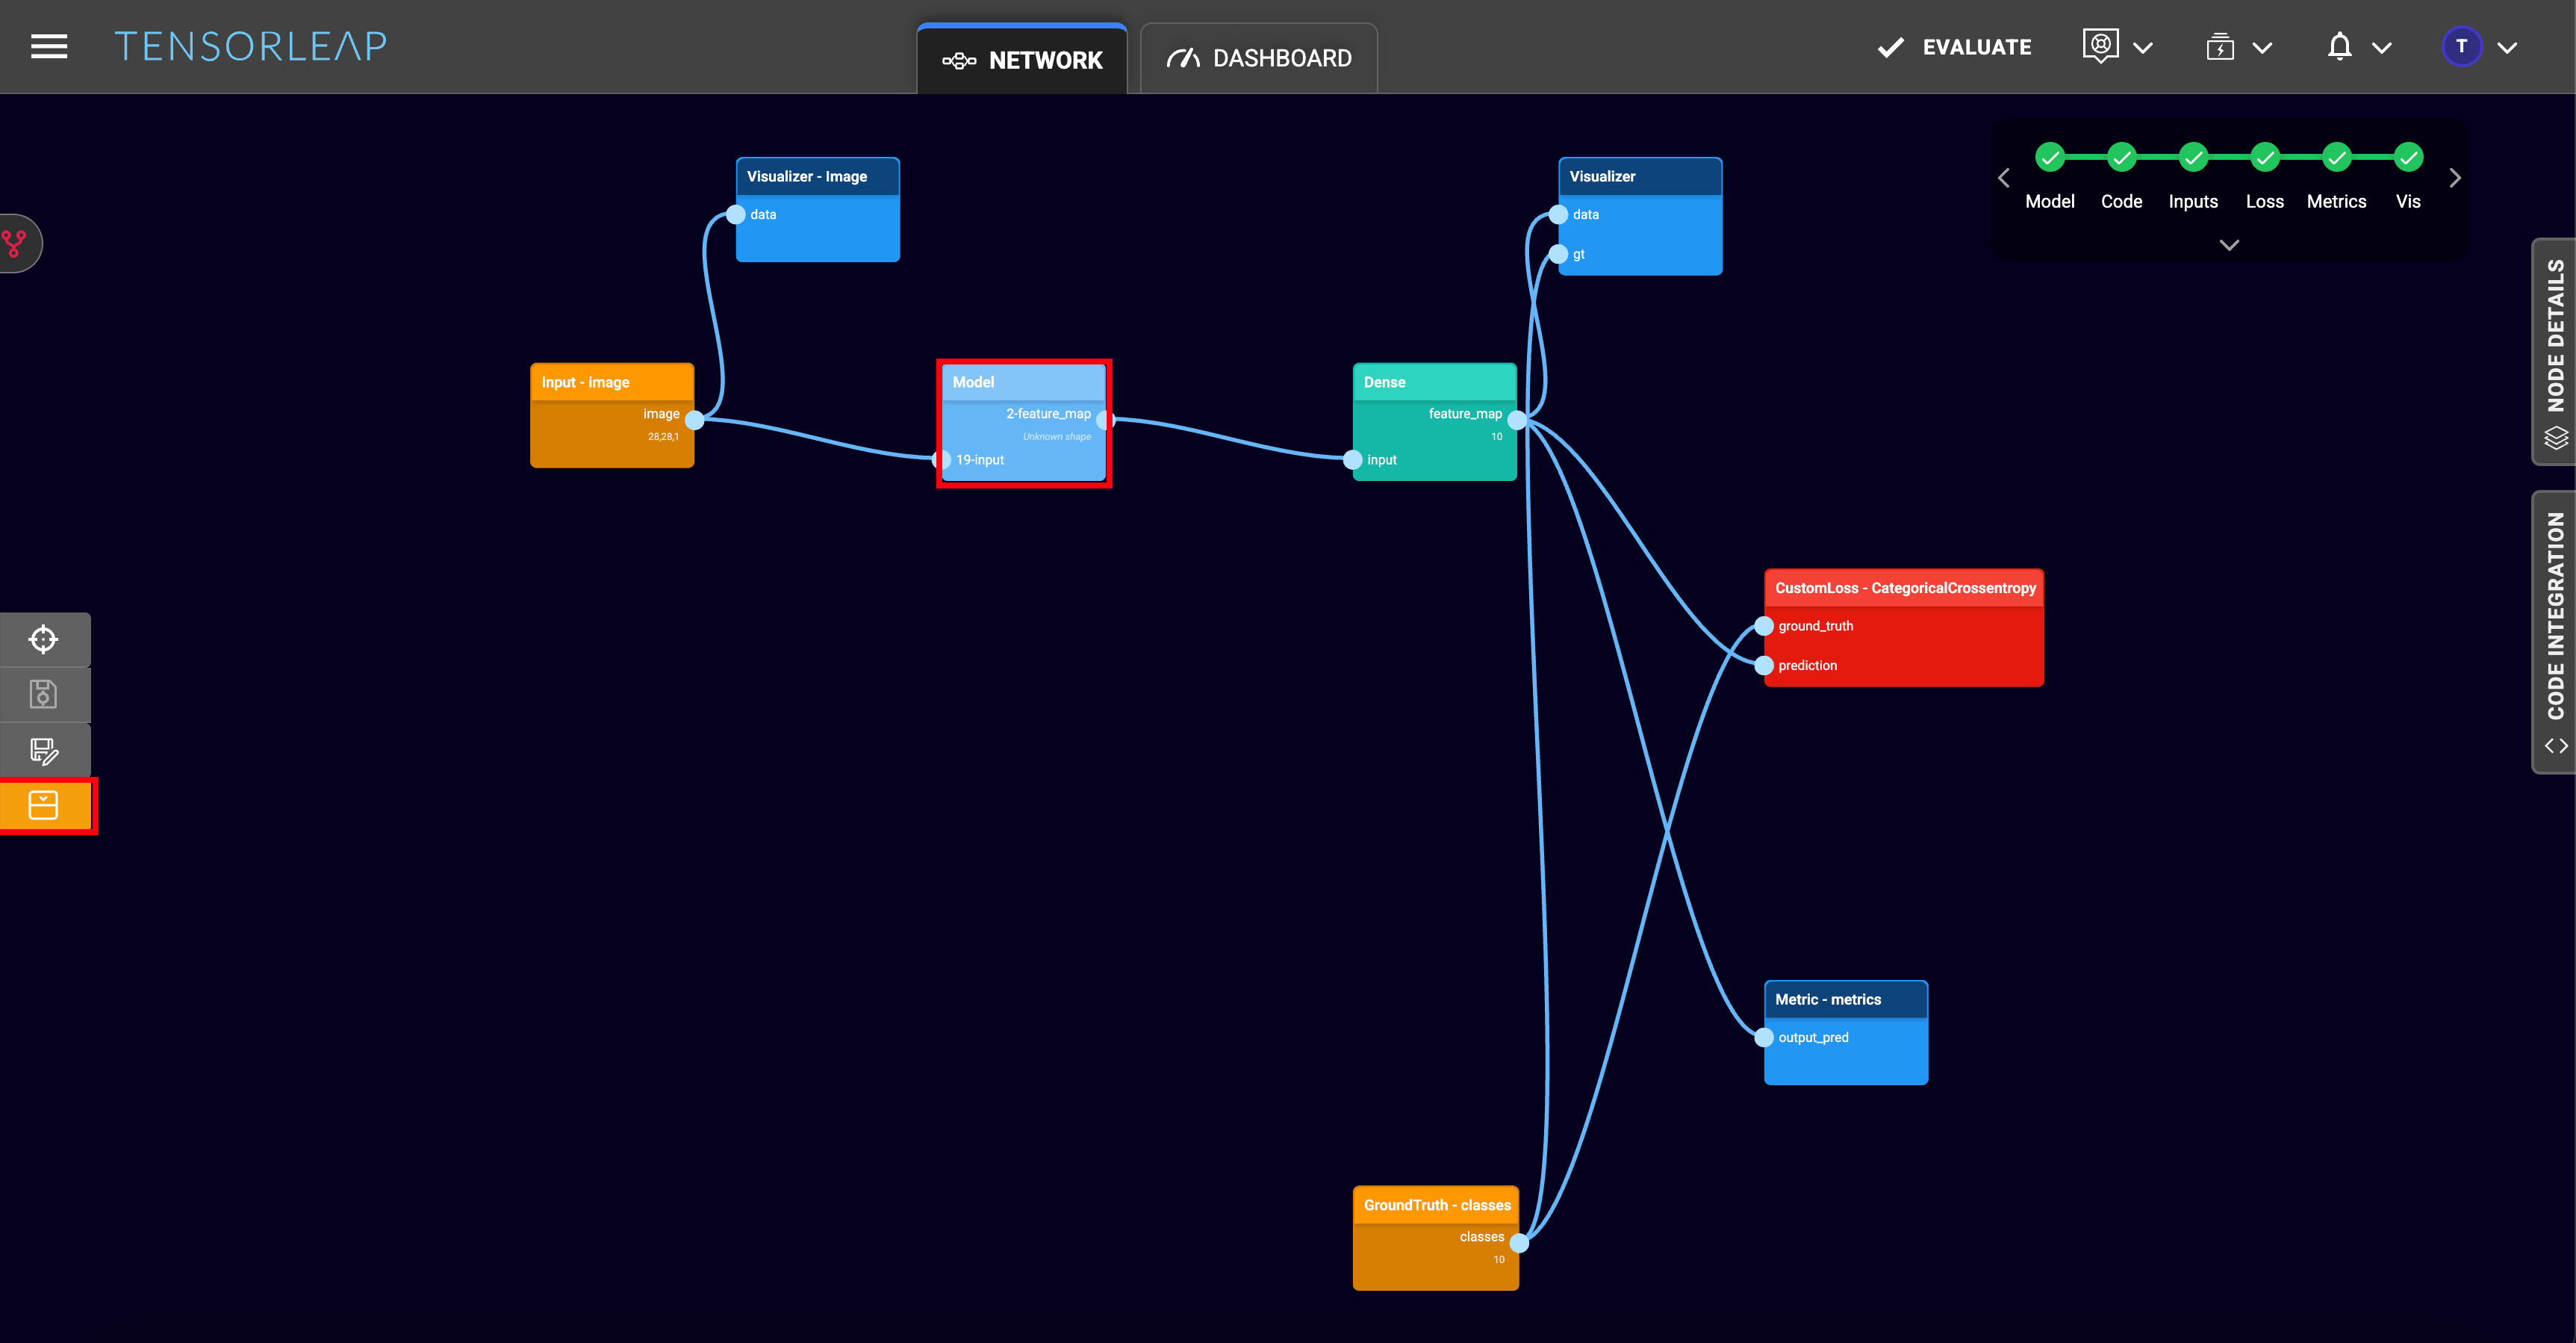

 to duplicate the layer onto the network.

{% hint style="info" %}
If your layers are already connected, you may have to remove the connections, insert the duplicated layer in the desired position, then reconnect the layers together. See [**Connections**](#connections) for more information.
{% endhint %}
### Remove a Layer
If you make a mistake while adding a layer, or you do not need a layer anymore, you can remove it from the network.
To remove a layer:
1. From the [**Network**](/user-interface/project/network) view, position your mouse cursor over the layer to be removed, then make a right click.
2. On the popup menu, click
to duplicate the layer onto the network.

{% hint style="info" %}
If your layers are already connected, you may have to remove the connections, insert the duplicated layer in the desired position, then reconnect the layers together. See [**Connections**](#connections) for more information.
{% endhint %}
### Remove a Layer
If you make a mistake while adding a layer, or you do not need a layer anymore, you can remove it from the network.
To remove a layer:
1. From the [**Network**](/user-interface/project/network) view, position your mouse cursor over the layer to be removed, then make a right click.
2. On the popup menu, click  to remove the layer from the network.

{% hint style="info" %}
All connections to and from the deleted layer are also removed.
{% endhint %}
### Spawn a Representation Block for Layer Weights Sharing
Layer weights-sharing, or parameter sharing, means to use a layer's weights in more than one place within the model. This is often used when similar features are extracted from different places within the model. Instead of creating an additional layer, these weights are shared, thus reducing the overall number of trainable parameters and training time.
# Validate mapping
How to ensure you created a valid mapping
{% hint style="success" %}
It is highly recommended to utilize the [integration test](/tensorleap-integration/integration-test) locally before validating your assets in the platform. This allows you to ensure a smooth code flow, and to fix any issues within your local debugging environment
{% endhint %}
### When should assets be validated?
Assets in the platform should be validated after
* A new mapping was [created or modified ](/user-interface/project/network/network-mapping/create-a-mapping-deprecated)in the platform
* Changes was made to the linked [code integration](/user-interface/project/network/code-integration) script causing data flow to change
* A new model was uploaded to the platform, with a different architecture than previous models
{% hint style="info" %}
If you're unsure whether the assets for this specific configuration was tested, check the color of the Validate Assets button in the [code integration](/user-interface/project/network/code-integration) view of the Network.
If it's blue - no validation was tested on this configuration yet
If it's green - the assets in this configuration are valid
If it's red - The assets currently used in the platform are not valid
{% endhint %}
### How to validate assets in the platform
to remove the layer from the network.

{% hint style="info" %}
All connections to and from the deleted layer are also removed.
{% endhint %}
### Spawn a Representation Block for Layer Weights Sharing
Layer weights-sharing, or parameter sharing, means to use a layer's weights in more than one place within the model. This is often used when similar features are extracted from different places within the model. Instead of creating an additional layer, these weights are shared, thus reducing the overall number of trainable parameters and training time.
# Validate mapping
How to ensure you created a valid mapping
{% hint style="success" %}
It is highly recommended to utilize the [integration test](/tensorleap-integration/integration-test) locally before validating your assets in the platform. This allows you to ensure a smooth code flow, and to fix any issues within your local debugging environment
{% endhint %}
### When should assets be validated?
Assets in the platform should be validated after
* A new mapping was [created or modified ](/user-interface/project/network/network-mapping/create-a-mapping-deprecated)in the platform
* Changes was made to the linked [code integration](/user-interface/project/network/code-integration) script causing data flow to change
* A new model was uploaded to the platform, with a different architecture than previous models
{% hint style="info" %}
If you're unsure whether the assets for this specific configuration was tested, check the color of the Validate Assets button in the [code integration](/user-interface/project/network/code-integration) view of the Network.
If it's blue - no validation was tested on this configuration yet
If it's green - the assets in this configuration are valid
If it's red - The assets currently used in the platform are not valid
{% endhint %}
### How to validate assets in the platform